Repair Procedures: Reassembly
- After spreading grease on the rack bar gear part (A), install rack bar (B) in the direction of the arrow.
CAUTION:
- When inserting the rack bar, be careful not to damage to inner rack housing.
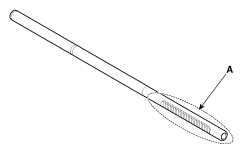 Courtesy of KIA MOTORS AMERICA, INC.
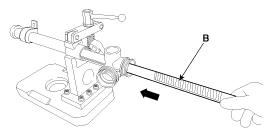 Courtesy of KIA MOTORS AMERICA, INC.
- After spreading grease on the pinion gear part, install the pinion assembly (A).
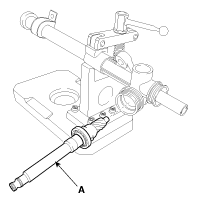 Courtesy of KIA MOTORS AMERICA, INC.
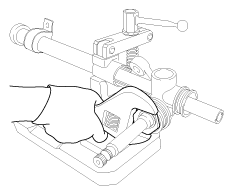
- After spreading three bond (Loctite) on the top plug (A) thread, install the top plug by using the spanner.
CAUTION:
- When installing the top plug, top plug is made of aluminum, so be careful to avoid distortion.
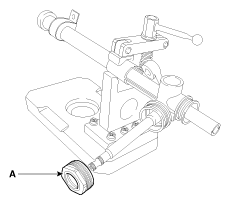 Courtesy of KIA MOTORS AMERICA, INC.
 Courtesy of KIA MOTORS AMERICA, INC.
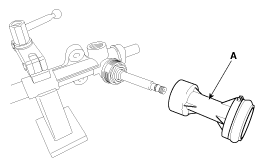
- Install the dust packing & cap (A).
 Courtesy of KIA MOTORS AMERICA, INC.
- Install the support yoke (A).
CAUTION:
- Before installing the support yoke assembly, make sure to check
the O-ring for damage.
 Courtesy of KIA MOTORS AMERICA, INC.
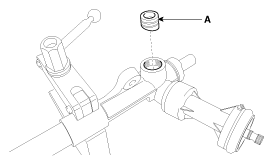
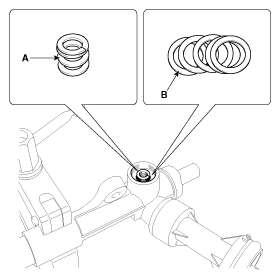
- Install the Yoke plug (A) and leaf spring (B).
CAUTION:
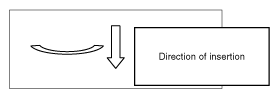
- The number of leaf spring can differ from depending on vehicle, pay attention to direction.
- Direction of leaf spring
 Courtesy of KIA MOTORS AMERICA, INC.
 Courtesy of KIA MOTORS AMERICA, INC.
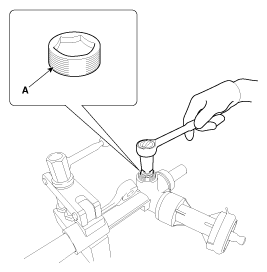
- After spreading three bond (Loctite) on the Yoke plug (A) thread, install the Yoke plug.
 Courtesy of KIA MOTORS AMERICA, INC.
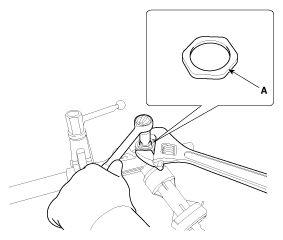
- After fixing the yoke plug, install the
lock nut (A).
 Courtesy of KIA MOTORS AMERICA, INC.
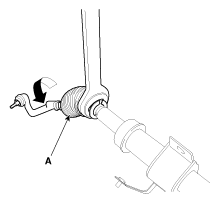
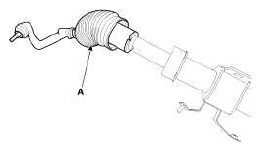
- Install the tie-rod & tie-rod end assembly (A). (The left and right are the same
)
 Courtesy of KIA MOTORS AMERICA, INC.
 Courtesy of KIA MOTORS AMERICA, INC.
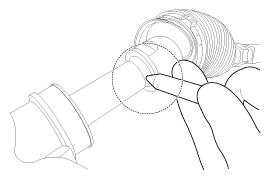
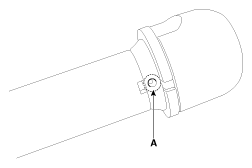
- Caulk (A) the rack bar and tie-rod assembly joints. (The left and right are the same
)
CAUTION:
- When you doing caulking, use the air tool or chisel.
 Courtesy of KIA MOTORS AMERICA, INC.
 Courtesy of KIA MOTORS AMERICA, INC.
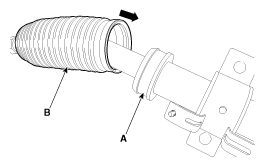
- After spreading sealant on the rack hosing and the bellow joints (A), install the bellows (B) in the direction of the arrow.
 Courtesy of KIA MOTORS AMERICA, INC.