Lower Crash Pad Panel Replacement
- Remove the glove box.
- Remove the side air vent.
- Remove the DVD cover (A).
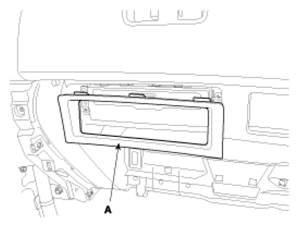 Courtesy of KIA MOTORS AMERICA, INC.
- Loosen the mounting screws, remove the DVD (A).
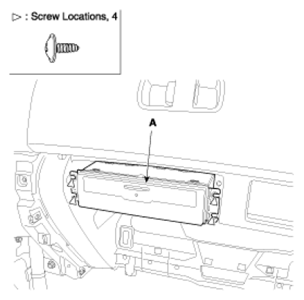 Courtesy of KIA MOTORS AMERICA, INC.
- Disconnect the connector (A).
 Courtesy of KIA MOTORS AMERICA, INC.
- After loosening the upper glove box mounting screws, then remove the upper glove box (A).
 Courtesy of KIA MOTORS AMERICA, INC.
- Loosen the panel mounting bolts and screws.
- After disconnecting the connector, remove the panel (A).
 Courtesy of KIA MOTORS AMERICA, INC.
- Installation is the reverse of removal.