Front Driveshaft Assembly: Removal
- Loosen the wheel nuts slightly.
- Raise the front of the vehicle and support it with safety stands in a proper location.
- Remove the front wheel and tire.
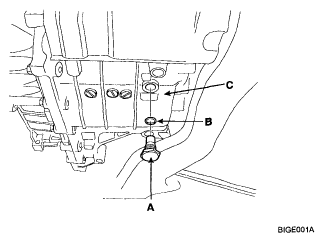
- Remove the drain plug (A). Drain the transaxle oil.
- Lay a bottle keeping the gear oil under transaxle.
- Remove drain plug (A) and washer (B) in the lower part of transaxle (C).
 Courtesy of KIA MOTORS AMERICA, INC.
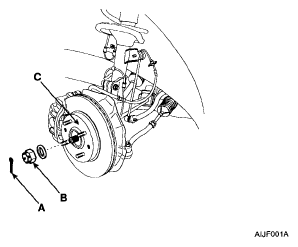
- Remove the split pin (A), the lock nut (B) and the washer (C) from the front hub (D) under applying the brake.
 Courtesy of KIA MOTORS AMERICA, INC.
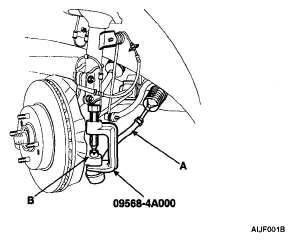
- Disconnect the tie rod end ball joint (A) from the knuckle (B) using the Special Tool (09568-4A000) after removing the split pin and lock nut.
 Courtesy of KIA MOTORS AMERICA, INC.
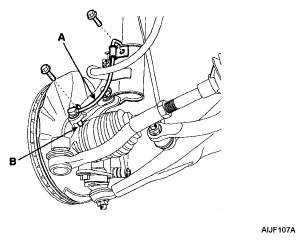
- Remove the wheel speed sensor (A) from the knuckle (B).
 Courtesy of KIA MOTORS AMERICA, INC.
- Remove the lower arm mounting bolts (A) from the knuckle.
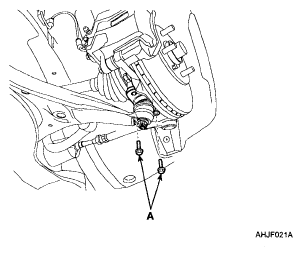 Courtesy of KIA MOTORS AMERICA, INC.
- Using a plastic hammer (A), disconnect the driveshaft (B) from the axle hub (C).
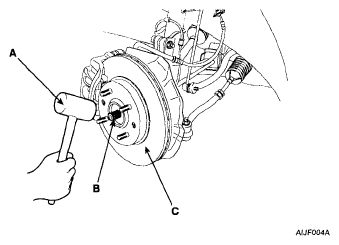 Courtesy of KIA MOTORS AMERICA, INC.
- Push the axle hub (C) outward and separate the driveshaft (B) from the axle hub (C).
- Insert a pry bar (A) between the transaxle case (B) and joint case (C), and separate the driveshaft from the transaxle case (B).
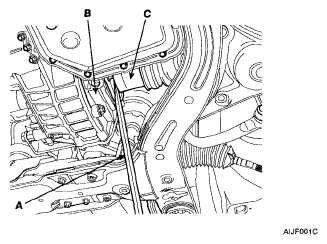 Courtesy of KIA MOTORS AMERICA, INC.
CAUTION:
- Use a pry bar (A) being careful not to damage the transaxle and joint.
- Do not insert the pry bar (A) too deep, as this may cause damage to the oil seal [max. depth: 7mm (0.28 in.)].
- Do not pull the driveshaft by excessive force it may cause components inside the BJ or TJ joint (C) kit to dislodge resulting in a torn boot (E) or a damaged bearing.
- Pull out the driveshaft (F) from the transaxle case (B).
CAUTION:
- Plug the hole of the transaxle case with the oil seal cap to prevent contamination.
- Support the driveshaft properly.
- Replace the retainer ring whenever the driveshaft is removed from the transaxle case.