Repair Procedures: Removal
- Preparation
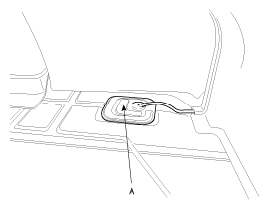
- Open the service cover (A) in trunk.
 Courtesy of KIA MOTORS AMERICA, INC.
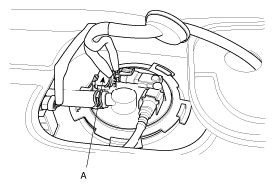
- Disconnect the fuel pump connector (A).
 Courtesy of KIA MOTORS AMERICA, INC.
- Start the engine and wait until fuel in fuel line is exhausted.
- After engine stalls, turn the ignition switch to OFF position.
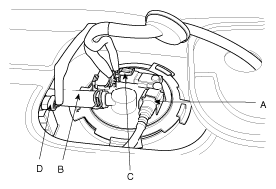
- Disconnect the fuel feed quick-connector (A), the vapor hose (B), the fuel tank pressure sensor connector (C) and the canister close valve connector (D).
 Courtesy of KIA MOTORS AMERICA, INC.
- Lift the vehicle.
- Remove the main muffler (Refer to INTAKE AND EXHAUST SYSTEM - 2.4L
).
- Support the fuel tank with a jack and unscrew fuel tank band mounting nuts.
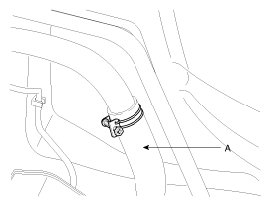
- Disconnect the fuel filler hose(A).
 Courtesy of KIA MOTORS AMERICA, INC.
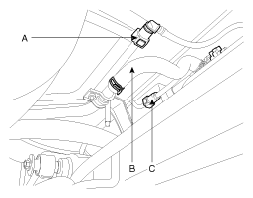
- Disconnect the recirculation pipe quick-connector (A), the vapor hose (B) connecting the canister with the fuel tank air filter and the purge tube quick-connector (C) connecting the canister and the intake manifold.
 Courtesy of KIA MOTORS AMERICA, INC.
- Remove the fuel tank from the vehicle with coming down the jack slowly.