Repair Procedures: Reassembly
- Install the clutch coil (A).
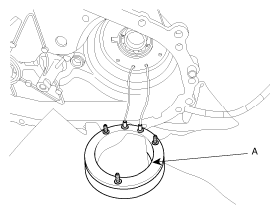 Courtesy of KIA MOTORS AMERICA, INC.
- Install the clutch coil nuts (A-3ea).
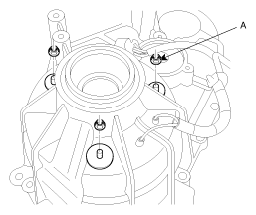 Courtesy of KIA MOTORS AMERICA, INC.
- Insert each wire to the connector housing.
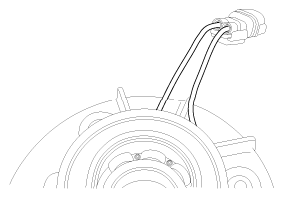 Courtesy of KIA MOTORS AMERICA, INC.
- Widen two ends of the snap ring (A) and install the carrier assembly (B).
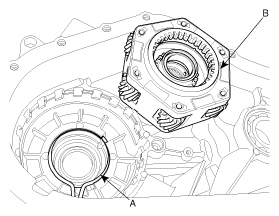 Courtesy of KIA MOTORS AMERICA, INC.
- Install the ring gear (A).
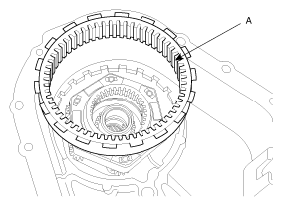 Courtesy of KIA MOTORS AMERICA, INC.
- Install the snap ring (A) between the carrier (B) and ring gear (C).
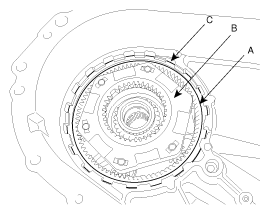 Courtesy of KIA MOTORS AMERICA, INC.
- Install the front output shaft assembly outward from the case.
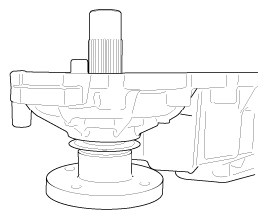 Courtesy of KIA MOTORS AMERICA, INC.
- Install the snap ring (A).
 Courtesy of KIA MOTORS AMERICA, INC.
- Install the reduction hub (A).
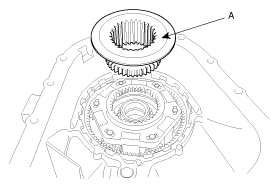 Courtesy of KIA MOTORS AMERICA, INC.
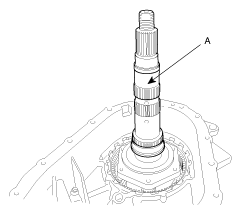
- Install the main shaft (A).
 Courtesy of KIA MOTORS AMERICA, INC.
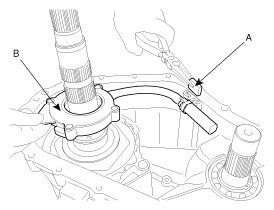
- Install the oil filter (B) and the
magnet (A).
 Courtesy of KIA MOTORS AMERICA, INC.
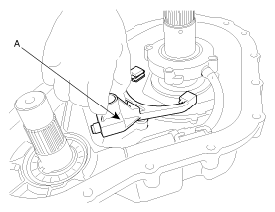
- Install the reduction fork (A).
 Courtesy of KIA MOTORS AMERICA, INC.
- Install the shift shaft and cam.
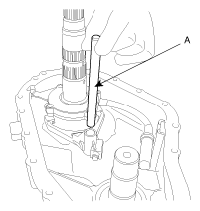
- Install the fork rail (A).
 Courtesy of KIA MOTORS AMERICA, INC.
- Install the lockup clutch (A) with the lockup fork (B).
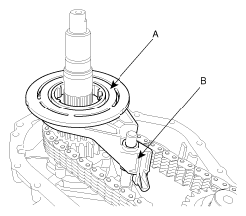 Courtesy of KIA MOTORS AMERICA, INC.
- Install the clutch housing (A).
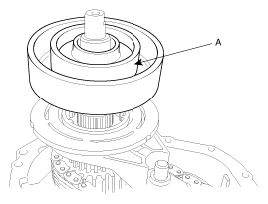 Courtesy of KIA MOTORS AMERICA, INC.
- Install the return spring (A).
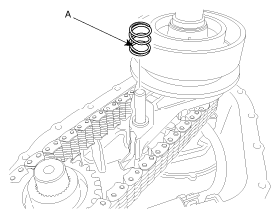 Courtesy of KIA MOTORS AMERICA, INC.
- Grease the contact surface of the cover and install the transfer cover (A).
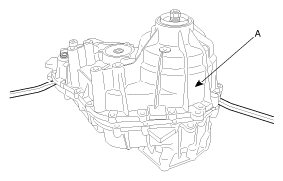 Courtesy of KIA MOTORS AMERICA, INC.
- Install the transfer cover bolts (A-17ea).
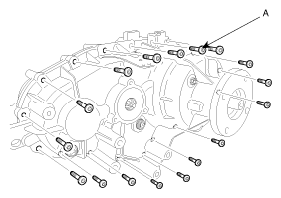 Courtesy of KIA MOTORS AMERICA, INC.
- Install the rear flange (A) by using press.
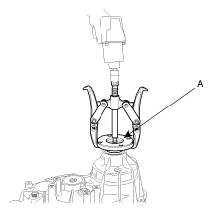 Courtesy of KIA MOTORS AMERICA, INC.
- Install the nylock nut (A).
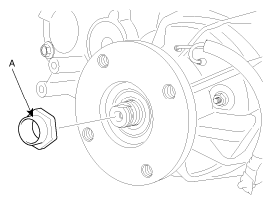 Courtesy of KIA MOTORS AMERICA, INC.
- Install the dynamic damper (A) by installing bolts (B-4ea).
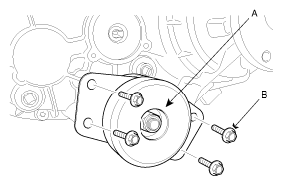 Courtesy of KIA MOTORS AMERICA, INC.
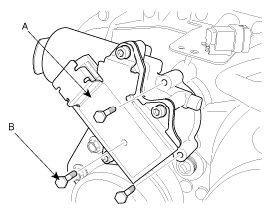
- Install the TCCU and motor assembly (A) by installing bolts (B-3ea).
 Courtesy of KIA MOTORS AMERICA, INC.
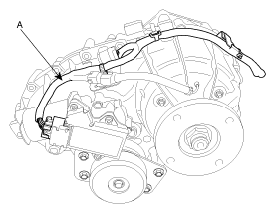
- Connecting the connectors, install the wiring assembly (A).
 Courtesy of KIA MOTORS AMERICA, INC.