Audio Assembly Replacement
- Remove the center fascia garnish (A).
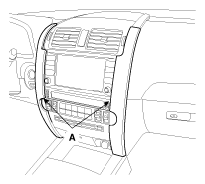 Courtesy of KIA MOTORS AMERICA, INC.
- Remove the center air vent (A).
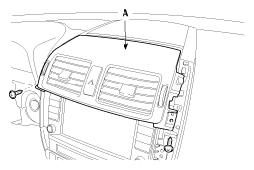 Courtesy of KIA MOTORS AMERICA, INC.
- Disconnect the connector (A).
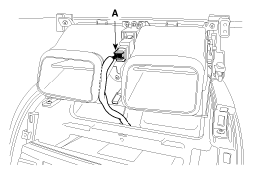 Courtesy of KIA MOTORS AMERICA, INC.
- After loosening the audio assembly mounting screws, then remove the audio assembly (A).
 Courtesy of KIA MOTORS AMERICA, INC.
- Disconnect the connectors (A).
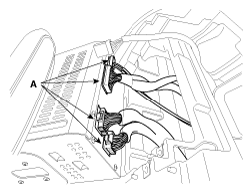 Courtesy of KIA MOTORS AMERICA, INC.
- Installation is the reverse of removal.
NOTE:
- Make sure the connector are connected in properly.