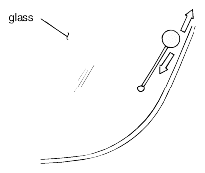
- Remove the excess sealant from the glass with a window scraper.
 Courtesy of KIA MOTORS AMERICA, INC.
- Remove the excess sealant and foam dam from the body with a knife.
 Courtesy of KIA MOTORS AMERICA, INC.
- Clean the inside of the glass with commercial glass cleaner and a lint-free cloth.
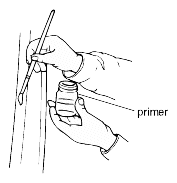
- Prime an area approximately 20 mm (3/4 inch) wide around the complete perimeter of the glass.
 Courtesy of KIA MOTORS AMERICA, INC.
- Prime the contact area on the body.
 Courtesy of KIA MOTORS AMERICA, INC.
- Reprime the same area on the inside surface of the glass.
CAUTION:
Do not permit any primed surface to become contaminated with dirt, water, oil, etc. Do not touch primed surfaces with your hands. Contamination will affect adhesion.
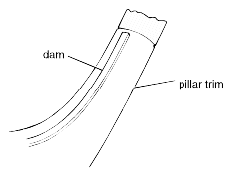
- Install the self-adhesive foam dam to the body where the original dam had been.
 Courtesy of KIA MOTORS AMERICA, INC.
NOTE:
The following cure times may be critical. Attempting to replace a windshield in ambient temperature over 35°C (95°F) should be avoided before completing the application.
TEMPERATURE CHART
| Temperature |
Surface hardening time |
Time required until vehicle can be returned to service |
| 5°C (41°F) |
approx 1.5 hrs |
12 hrs |
| 13°C (55°F) |
approx 1.2 hrs |
8 hrs |
| 20°C (68°F) |
approx 1 hrs |
4 hrs |
| 28°C (81°F) |
approx 0.5 hrs |
3 hrs |
| 35°C (95°F) |
approx 10 hrs |
2 hrs |
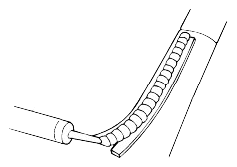
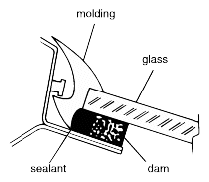
- Apply the sealant bead to the body just outside the dam. The bead should be slightly higher than the dam.
 Courtesy of KIA MOTORS AMERICA, INC.
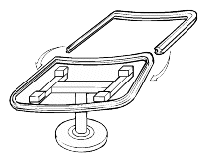
- Install molding on the glass.
 Courtesy of KIA MOTORS AMERICA, INC.
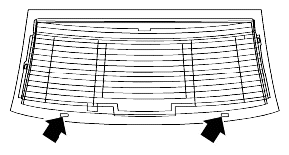
- Install the glass into the body making sure the glass rests upon the two spacers at the bottom of the windshield.
 Courtesy of KIA MOTORS AMERICA, INC.
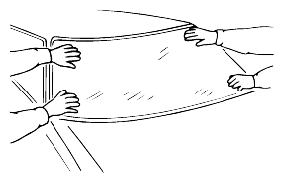
- Press glass firmly into place.
 Courtesy of KIA MOTORS AMERICA, INC.
 Courtesy of KIA MOTORS AMERICA, INC.
CAUTION:
Lower both front door windows and leave them in that condition until the vehicle can be put back into service. If the vehicle were completely closed, quickly closing a door could break the seal.
- Remove excess sealant, if any.
- Press molding firmly into place.
- Perform water leak test immediately.
- Clean the outside of the window glass.
- Install package tray.
- Install both of the rear pillar trims.