Removal & Installation: Engine: Installation
- Install engine and transaxle into engine compartment as an assembly. Install No. 1 engine mount bolts. Install No. 3 engine mount bolt. Install No. 2 engine mount nuts. Install engine mount crossmember. See Fig 3. Tighten all bolts and nuts to specification. See TORQUE SPECIFICATIONS .
- Remove engine hoist. Install NEW clips on axle shaft. Push drive shaft and joint shaft into transaxle with opening of clips pointing upward. See Fig 2. Install joint shaft support bracket bolts. Install damper to steering knuckles. Install both right and left lower arm to steering knuckles. Install both right and left tie rod ends to steering knuckles. Install right and left stabilizer control links. Install front exhaust pipe and catalytic converter. Tighten all bolts and nuts to specification. See TORQUE SPECIFICATIONS .
- On A/T models, connect ATF cooler hoses. Connect solenoid valve connector. Connect automatic transaxle range switch connector. Install washer and nut at automatic transaxle linkage. Connect ATF cooler hose. Connect solenoid valve connector. Install extension bar.
- On M/T models, connect back-up light switch connector and vehicle speed sensor connector. Install clutch release cylinder and pipe. Install extension bar and manual transaxle linkage. Tighten all bolts and nuts to specification. See TORQUE SPECIFICATIONS .
- On all models, connect input turbine speed sensor connector. Connect ground strap to top of transaxle. Install A/C compressor mounting bracket. Install power steering pump bracket bolts. Install exhaust manifold heat shield. Install right and left splash shields.
- To complete installation procedure, reverse removal procedure. Tighten all bolts and nuts to specification. See TORQUE SPECIFICATIONS . Fill engine coolant with specified type and amount. Connect both battery cables. Check and/or fill all fluids. Test run engine perform an overall check.
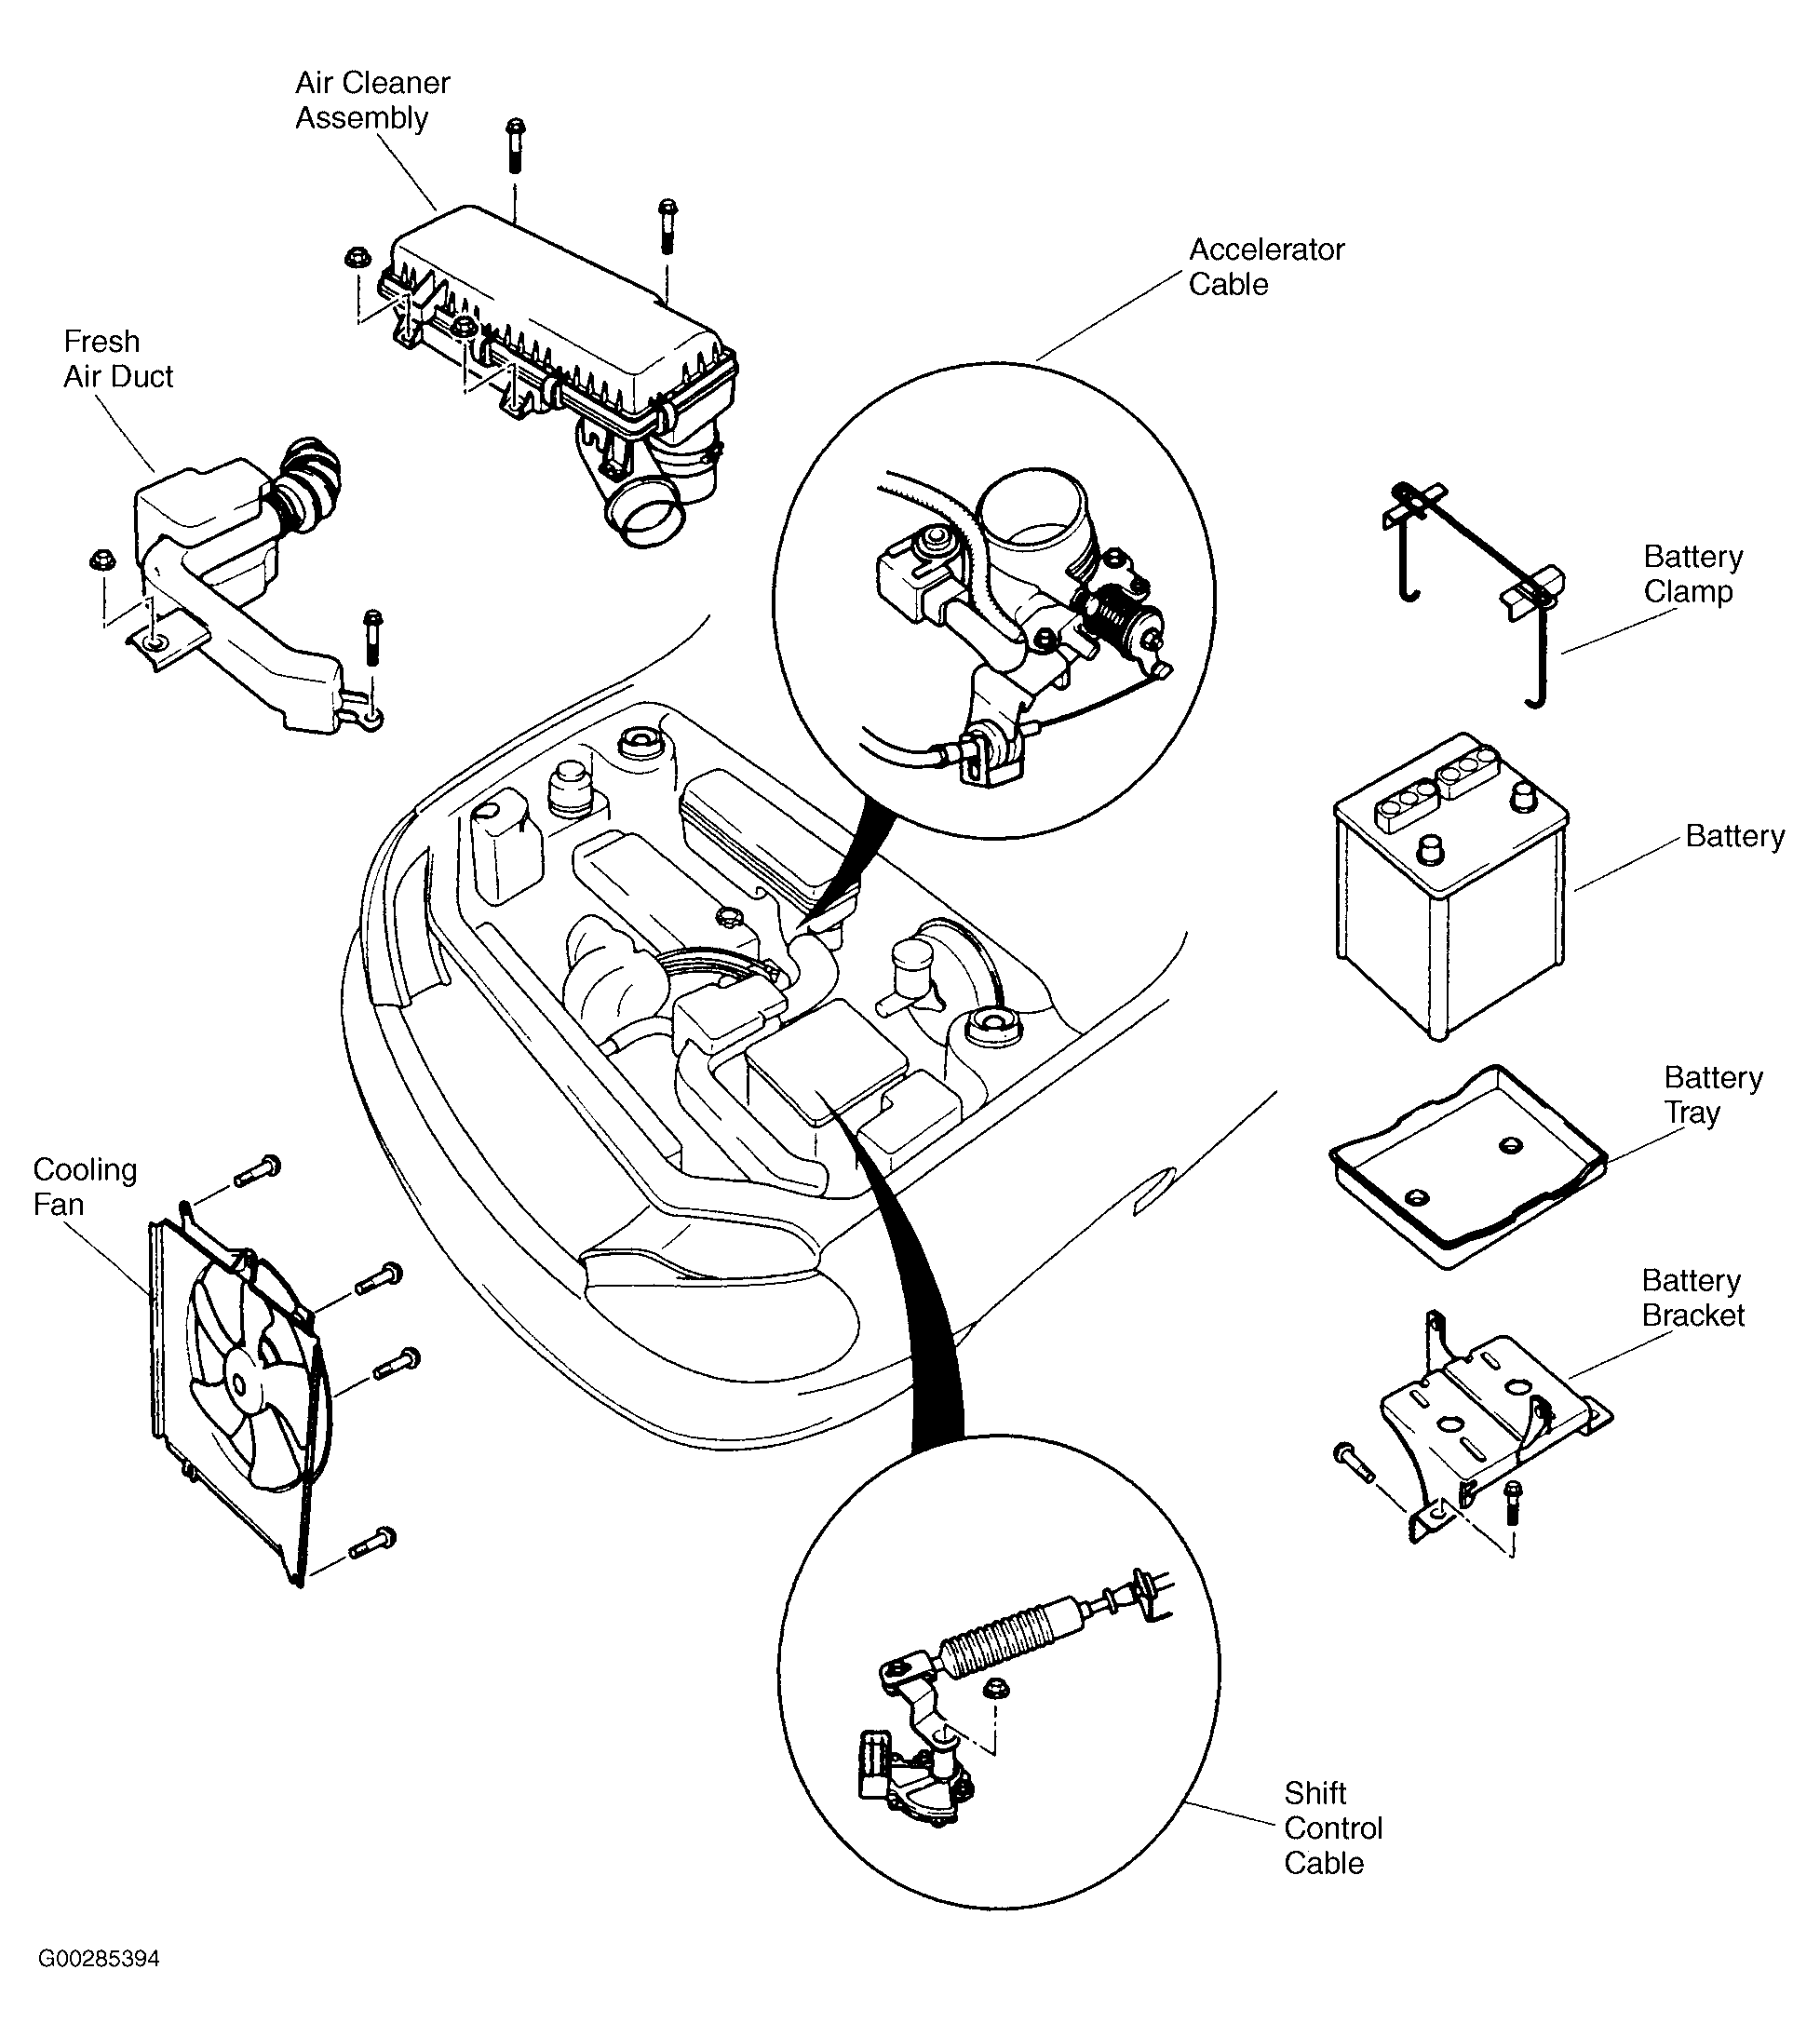 Courtesy of KIA MOTORS AMERICA, INC.
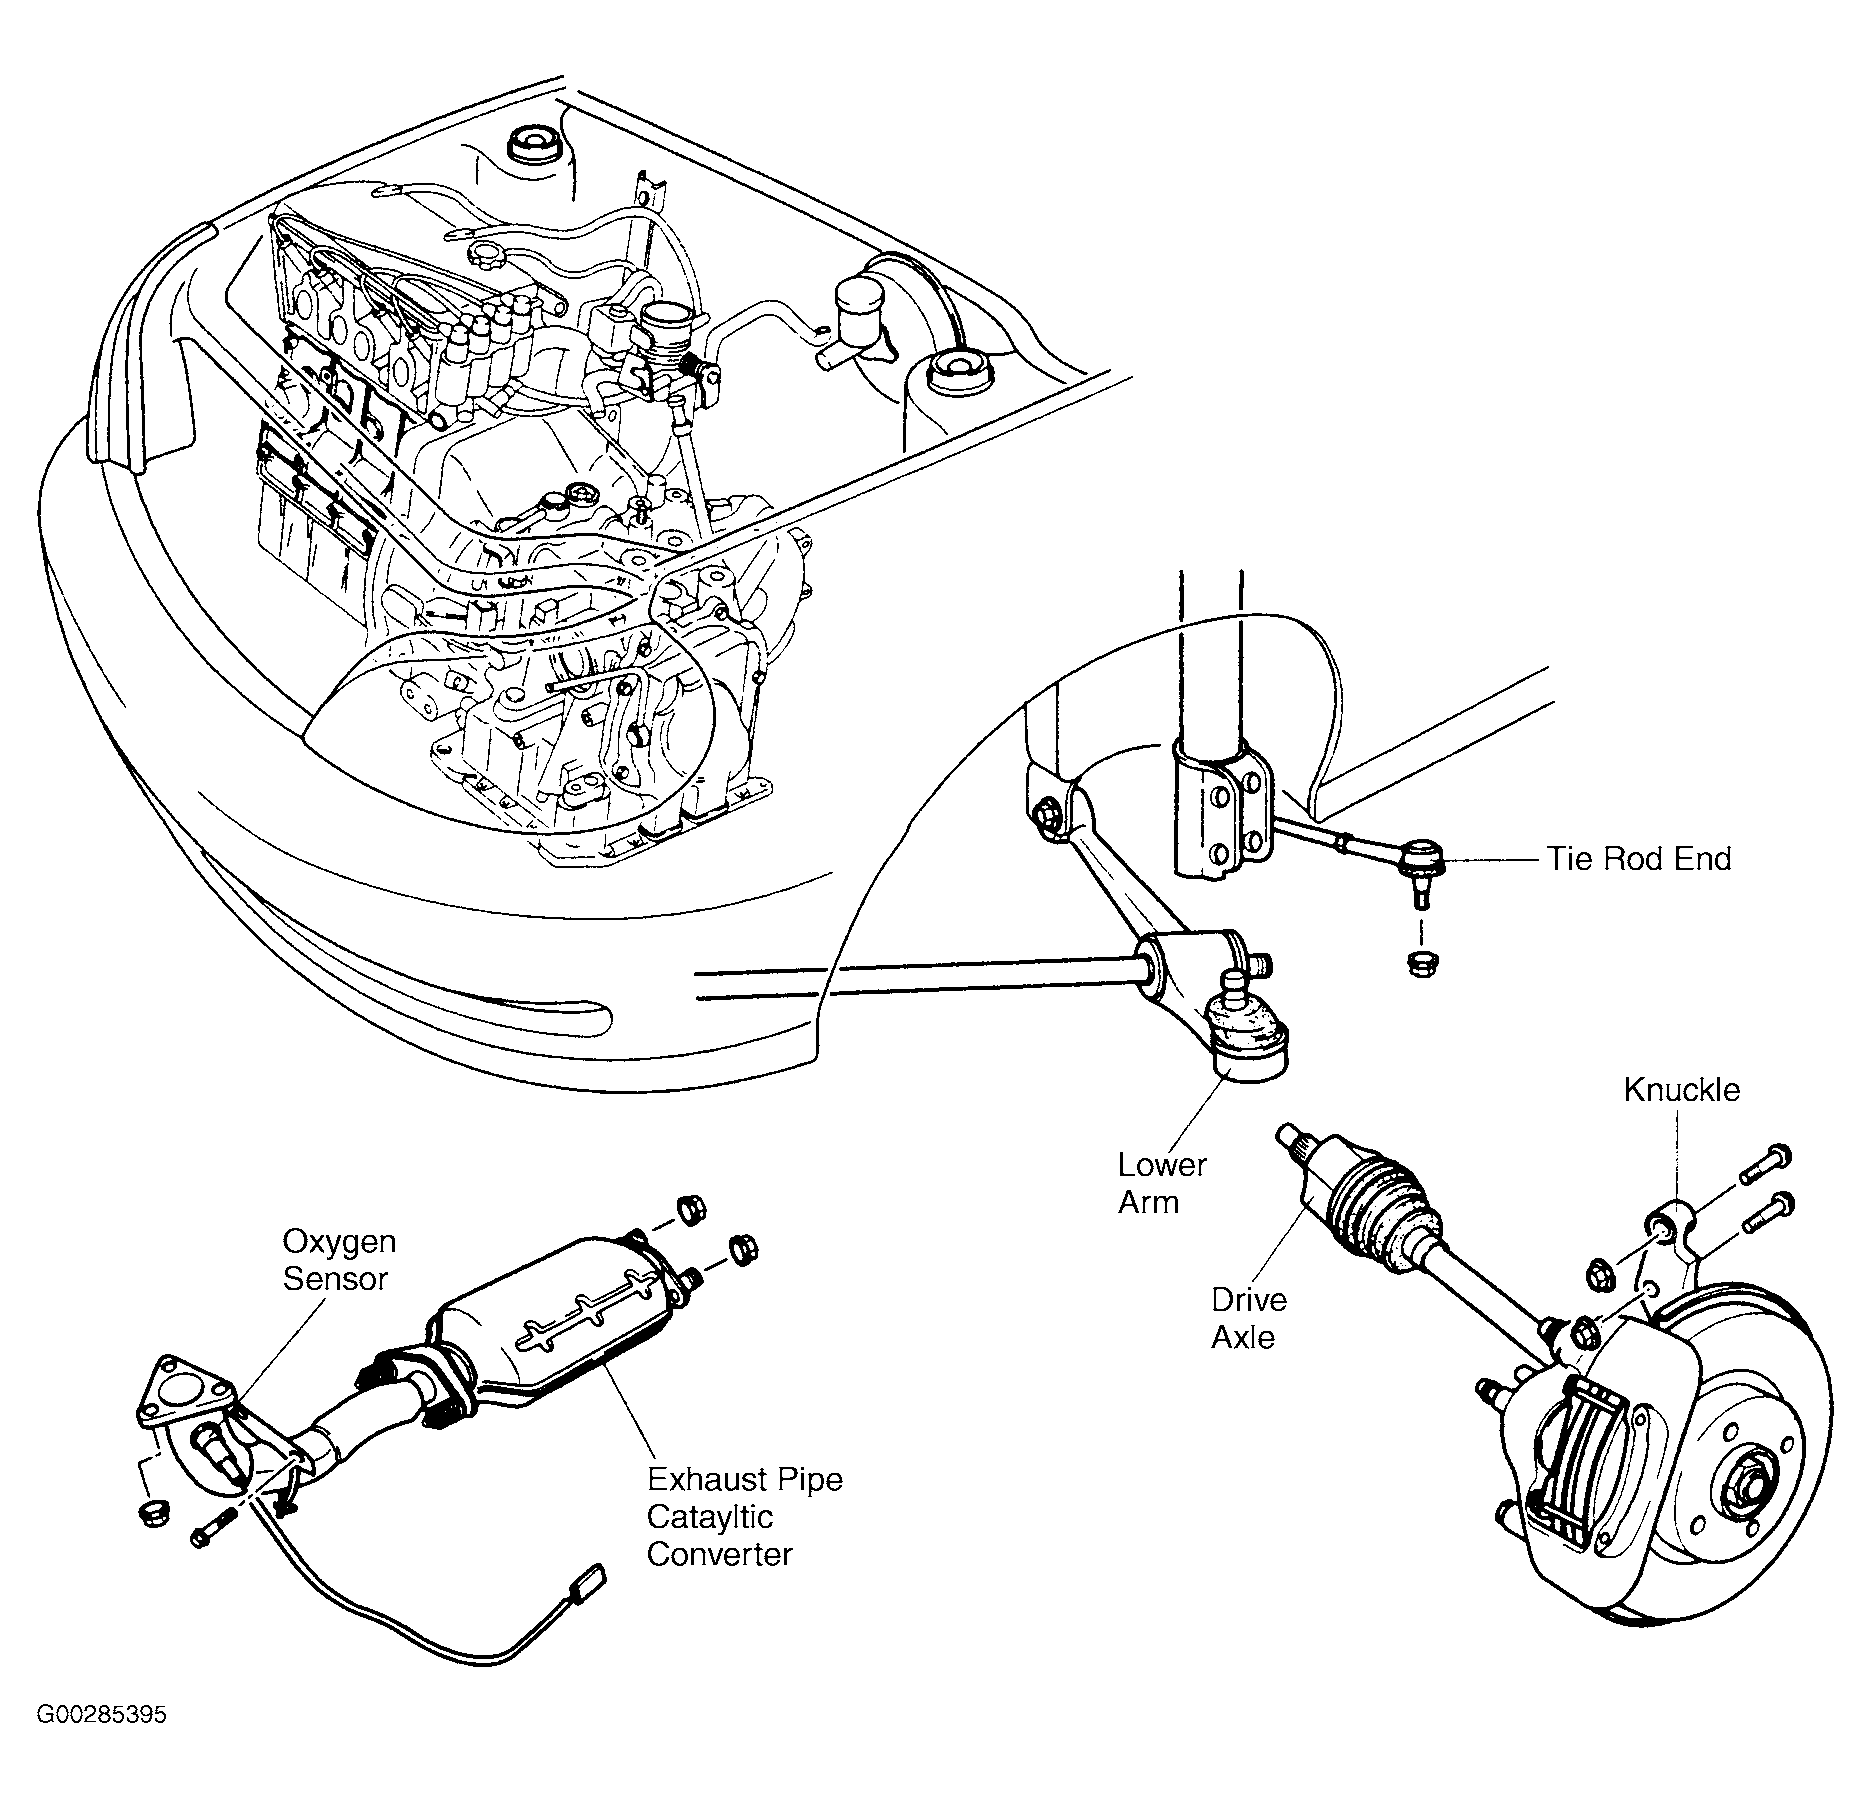 Courtesy of KIA MOTORS AMERICA, INC.
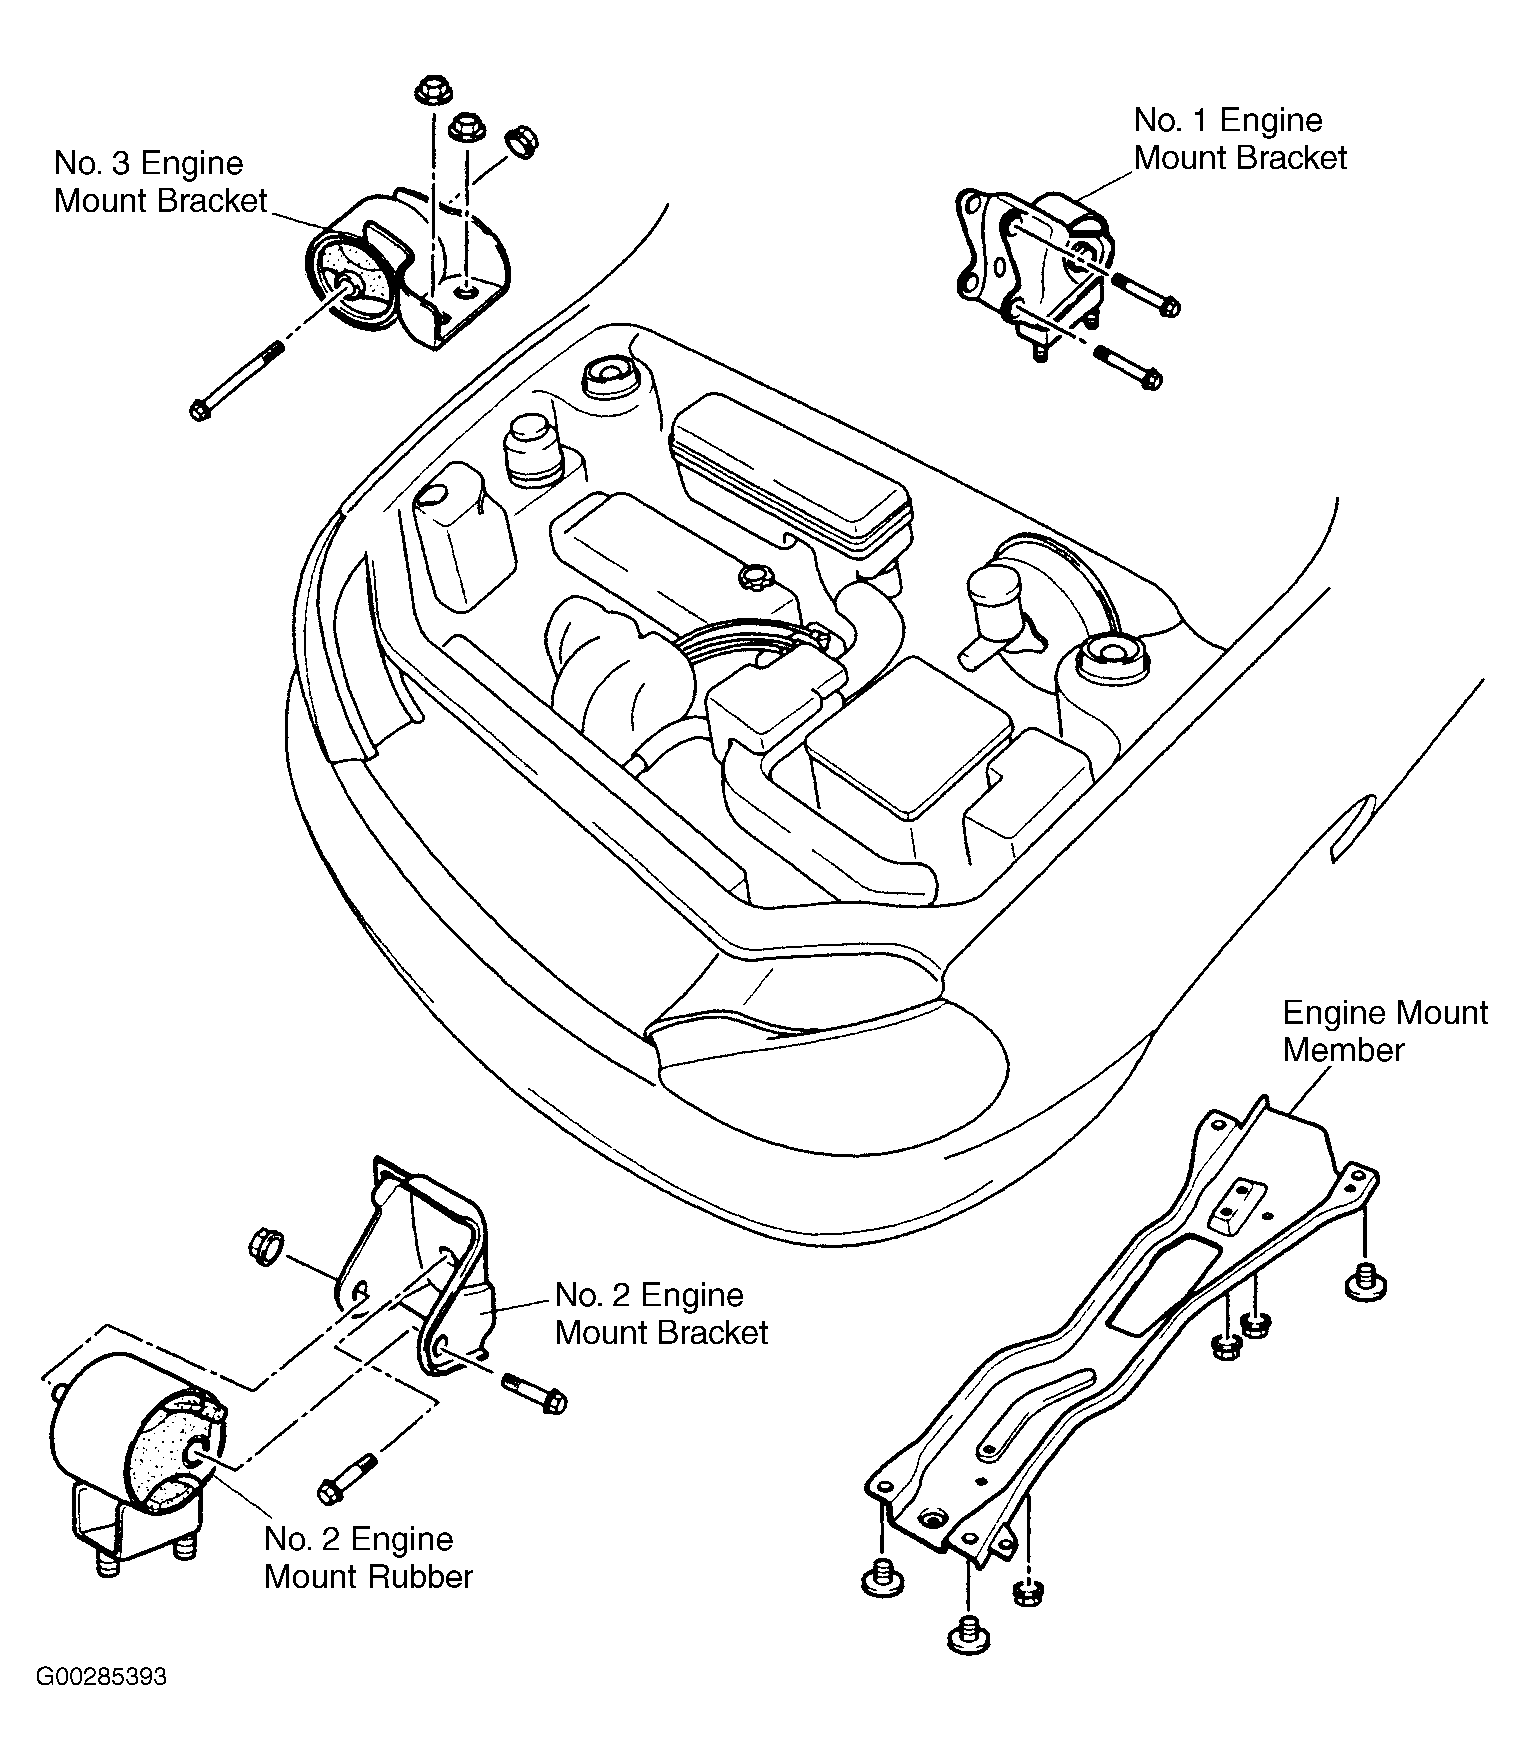 Courtesy of KIA MOTORS AMERICA, INC.