CVT Automatic Transmission (Service Information): Removal: Removal
 Courtesy of CHRYSLER GROUP, LLC
- Disconnect battery cables (2).
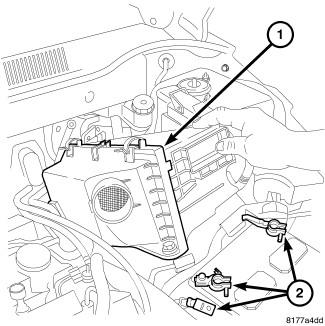
- Remove air cleaner assembly (1). For 2.0L, refer to BODY, AIR CLEANER, REMOVAL
. For 2.4L, refer to BODY, AIR CLEANER, REMOVAL
.
- Remove battery. Refer to BATTERY, REMOVAL
.
 Courtesy of CHRYSLER GROUP, LLC
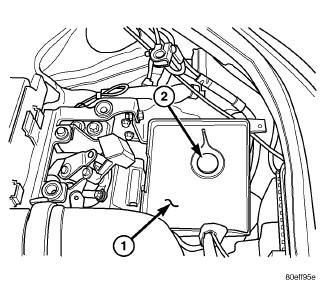
- Remove battery tray (1). Refer to TRAY, BATTERY, REMOVAL
.
- Drain coolant. Refer to STANDARD PROCEDURE
.
 Courtesy of CHRYSLER GROUP, LLC
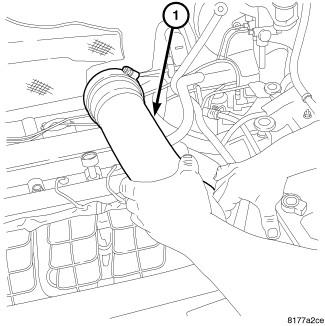
- Remove inlet air tube (1).
- Remove vacuum supply lines.
 Courtesy of CHRYSLER GROUP, LLC
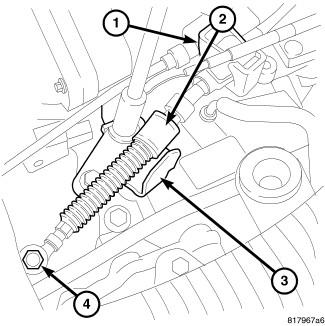
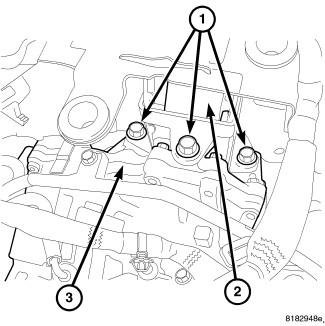
- Remove the shifter cable (2) and bracket (3).
 Courtesy of CHRYSLER GROUP, LLC
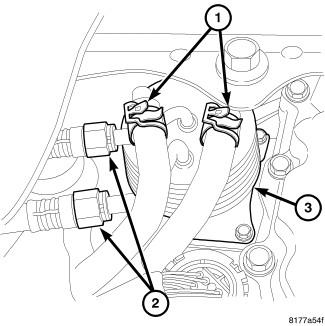
- WITH FLUID COOLER
, disconnect the coolant hoses (1) and the transmission fluid lines (2). Refer to TUBES AND HOSES, TRANSMISSION OIL COOLER, STANDARD PROCEDURE
.
 Courtesy of CHRYSLER GROUP, LLC
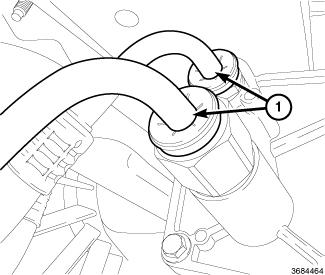
- WITH BYPASS VALVE
, disconnect the transmission fluid lines (1). Refer to TUBES AND HOSES, TRANSMISSION OIL COOLER, STANDARD PROCEDURE
.
- Remove heater hose.
 Courtesy of CHRYSLER GROUP, LLC
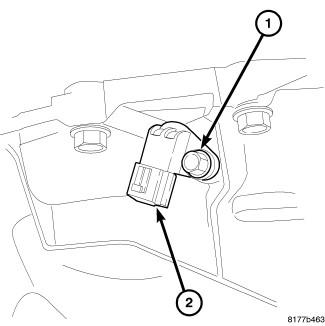
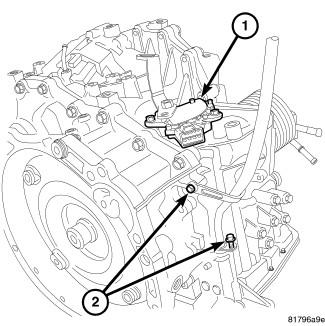
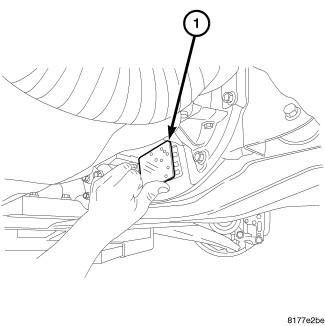
- Remove the speed sensor connector (1).
 Courtesy of CHRYSLER GROUP, LLC
- Remove the wiring harness from the top of the transmission (2).
- Remove the transmission vent tube (1).
 Courtesy of CHRYSLER GROUP, LLC
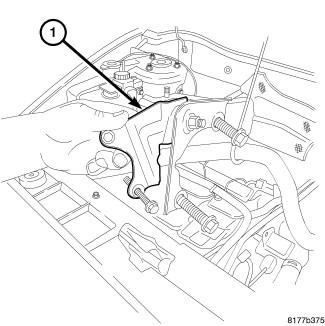
- Remove the throttle body support bracket (1).
 Courtesy of CHRYSLER GROUP, LLC
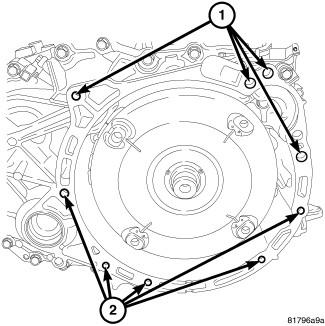
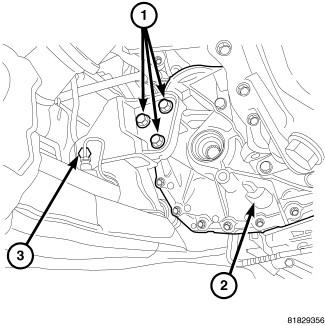
- Remove the upper bell housing bolts (1).
 Courtesy of CHRYSLER GROUP, LLC
- Remove the upper transmission mount bolts (1).
- Remove the upper transmission mount through bolt.
- Remove the upper transmission mount (2).
- Raise vehicle on a hoist.
- Drain transmission fluid.
- Remove the front skid plate, if equipped.
- Remove the left and right front lower splash shields.
 Courtesy of CHRYSLER GROUP, LLC
- Support the transmission with a jack (1).
- Remove the starter. Refer to STARTER, REMOVAL
.
 Courtesy of CHRYSLER GROUP, LLC
- Remove the two transmission fill tube bolts (2) and remove the fill tube.
- Drain the transmission fluid.
- Remove both front wheels.
- Remove the right and left half shafts. Refer to REMOVAL
.
 Courtesy of CHRYSLER GROUP, LLC
- Remove inspection cover (1).
- Mark the torque converter to the flex plate for alignment upon installation.
 Courtesy of CHRYSLER GROUP, LLC
- Remove torque converter bolts (1).
 Courtesy of CHRYSLER GROUP, LLC
- Support the engine with a screw jack (2).
 Courtesy of CHRYSLER GROUP, LLC
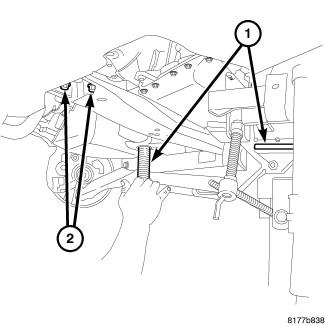
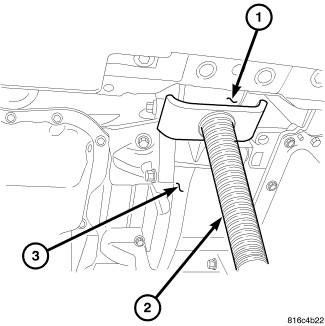
- Remove the through bolt (1) at the front transmission mount.
- Remove bolts (2) at the transmission cross member.
- Remove the transmission cross member.
 Courtesy of CHRYSLER GROUP, LLC
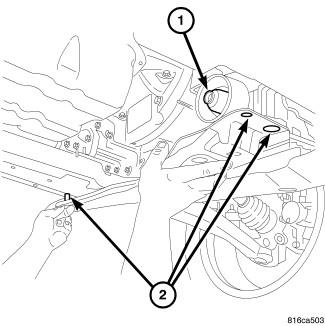
- Remove the transmission rear mount thorough bolt (2).
 Courtesy of CHRYSLER GROUP, LLC
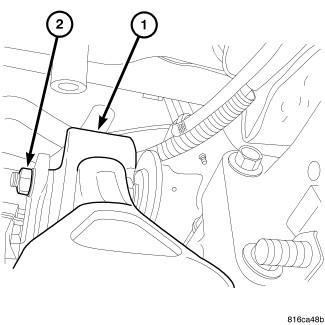
- Remove the rear mount to transaxle bolts (1).
- Remove the Power Transfer Unit (PTU), if equipped. Refer to REMOVAL
.
Courtesy of CHRYSLER GROUP, LLC
- Remove the lower transmission bell housing bolts (2).
- Lower transmission.