Radiator, Engine Cooling: Removal: 2.4L
- Disconnect and isolate the negative battery cable. If equipped with an Intelligent Battery Sensor (IBS), disconnect the IBS connector first before disconnecting the negative battery cable.
- Remove the engine cover.
- Recover the refrigerant from the refrigerant system. Refer to PLUMBING, STANDARD PROCEDURE
.
- Raise and support the vehicle. Refer to HOISTING, STANDARD PROCEDURE
.
- Remove the transmission skid plate, if equipped. Refer to PLATE, SKID, FRONT, REMOVAL
.
- Remove the belly pan, if equipped. Refer to BELLY PAN, REMOVAL
.
- Drain the cooling system. Refer to STANDARD PROCEDURE .
- Disconnect the quick-coupling and remove the lower coolant hose from the radiator.
 Courtesy of CHRYSLER GROUP, LLC
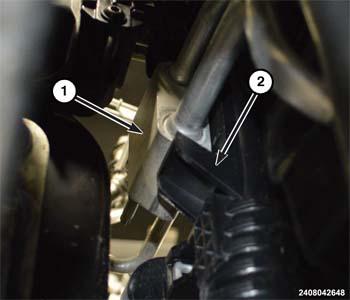
- Separate the lower air deflector (2).
 Courtesy of CHRYSLER GROUP, LLC
- Remove the push pins and remove the radiator closeout panel (1).
 Courtesy of CHRYSLER GROUP, LLC
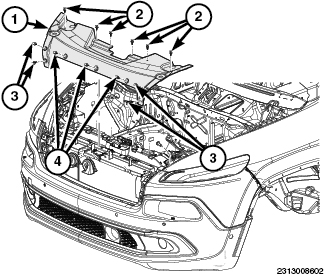
- Separate the side air deflectors (2) from the upper radiator closure panel (1).
 Courtesy of CHRYSLER GROUP, LLC
- Disconnect the cooling fan module harness connector (4).
- Disconnect the ambient air temperature sensor harness connector (5).
- Disconnect the horn electrical connectors (6).
- Remove the hood release cable (3) from the air deflector.
- Remove the wiring harness (7) from the air deflector.
- Remove the upper air deflector (1).
 Courtesy of CHRYSLER GROUP, LLC
- Loosen the clamp and remove the upper coolant hose from the radiator.
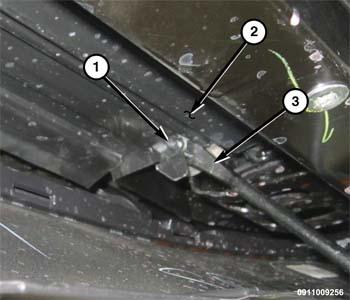
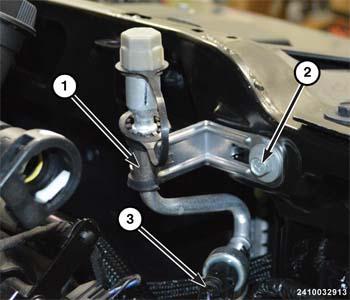
- Remove the transmission cooler line support bracket bolt (1).
 Courtesy of CHRYSLER GROUP, LLC
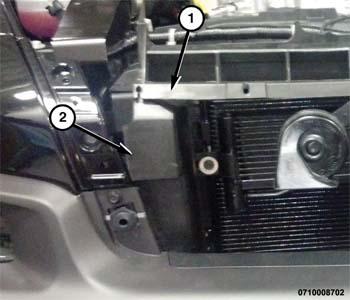
- Disconnect the A/C pressure sensor harness connector (3).
- Remove the bolt (2) that secures the service port (1) and position aside.
 Courtesy of CHRYSLER GROUP, LLC
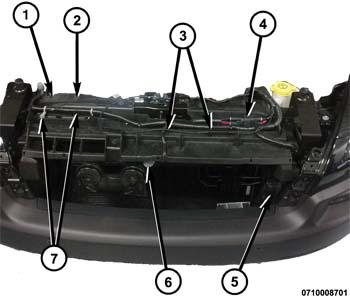
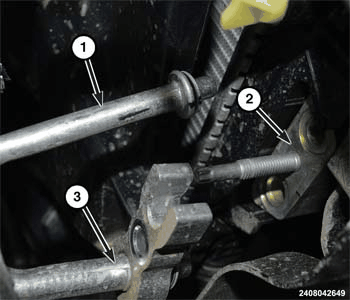
- Remove nut and the A/C discharge (3) and liquid line (1) manifold from the condenser jumper line (2).
- Detach the liquid line from manifold. Remove and discard the O-ring seal and gasket.
- Install plugs in, or tape over the opened refrigerant line fittings and the condenser and suction line ports.
 Courtesy of CHRYSLER GROUP, LLC
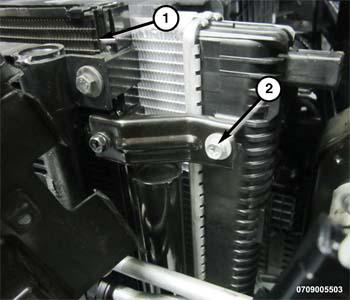
- Remove the upper and lower A/C condenser (1) to radiator bolts (2).
 Courtesy of CHRYSLER GROUP, LLC
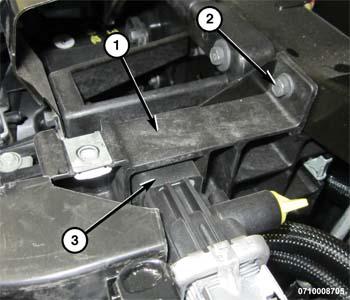
- Remove the bolts (2) and the upper radiator mounts (1).
 Courtesy of CHRYSLER GROUP, LLC
- Disengage the jumper line junction block (1) from the radiator (2) and remove the radiator from the vehicle.
- Remove the cooling fan assembly from the radiator.