Rail, Fuel: Removal: Removal
 Courtesy of CHRYSLER GROUP, LLC
- Disconnect negative battery cable.
- Remove engine cover.
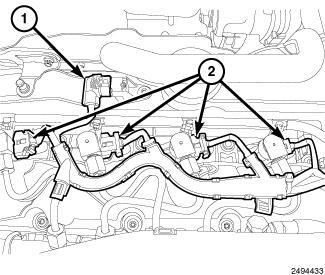
- Disconnect the Camshaft Position Sensor (CMP) (1) harness connector.
- Disconnect the fuel injector harness connectors (2).
- Lift up on fuel injector wire harness and position aside.
 Courtesy of CHRYSLER GROUP, LLC
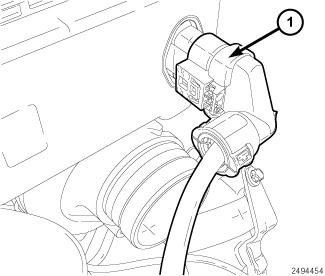
- Disconnect the turbocharger actuator (1) harness connector.
 Courtesy of CHRYSLER GROUP, LLC
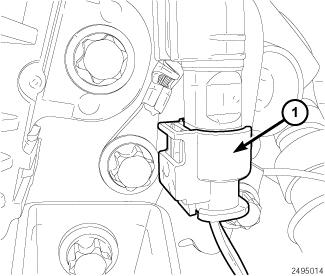
- Disconnect the turbocharger exhaust temperature sensor (1) harness connector.
 Courtesy of CHRYSLER GROUP, LLC
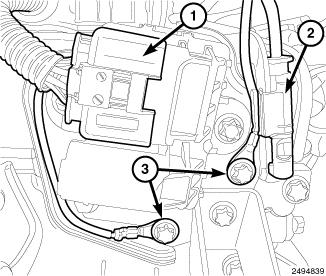
- Disconnect the turbocharger exhaust temperature sensor harness connector (2) from bracket.
- Remove the two bolts (3) and position aside the ground wires.
- Disconnect the glow plug module harness connector (1).
 Courtesy of CHRYSLER GROUP, LLC
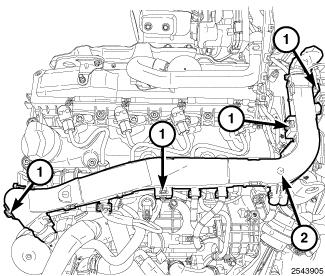
- Release the four lock tabs (1) lift up and position aside engine wire harness (2).
 Courtesy of CHRYSLER GROUP, LLC
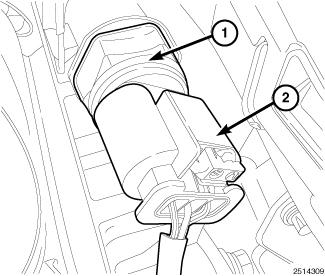
- Disconnect the fuel rail pressure regulator harness connector (2).
 Courtesy of CHRYSLER GROUP, LLC
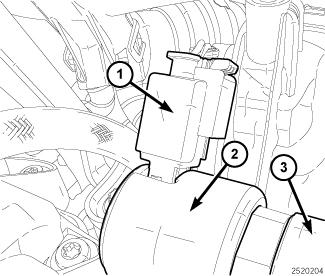
- Disconnect the fuel rail pressure sensor harness connector (1).
 Courtesy of CHRYSLER GROUP, LLC
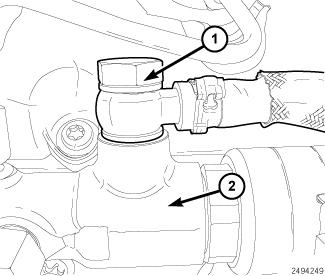
- Remove the banjo bolt (1) and the fuel rail return line from rail (2).
 Courtesy of CHRYSLER GROUP, LLC
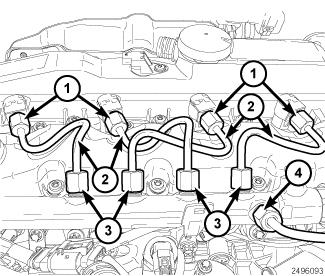
- Remove the high pressure fuel tubes (2) at fuel injectors (1) and fuel rail (3) and discard fuel tubes.
- Install protective caps onto the fuel injectors.
- Remove the high pressure feed line (4) from fuel rail.
 Courtesy of CHRYSLER GROUP, LLC
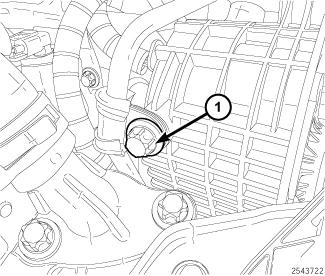
- Remove bolt (1) securing the high pressure feed line.
 Courtesy of CHRYSLER GROUP, LLC
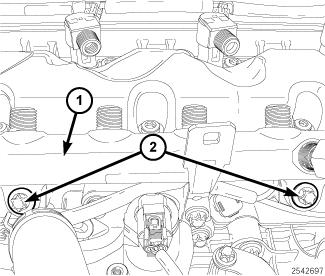
- Remove the bolts (2) and the fuel rail (1).