VALVE, Exhaust Gas Recirculation (EGR): Installation: Installation
 Courtesy of CHRYSLER LLC
- Clean all the gasket surface areas.
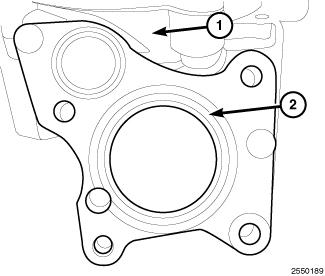
- Install a new gasket (2) onto the EGR cooler (1).
 Courtesy of CHRYSLER LLC
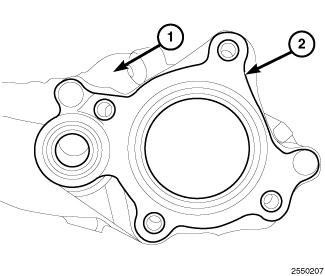
- Install a new gasket (2) onto the EGR inlet pipe (1).
 Courtesy of CHRYSLER LLC
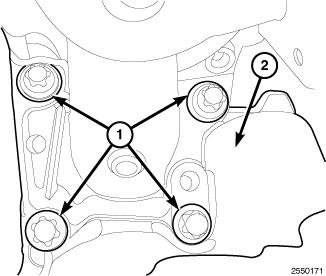
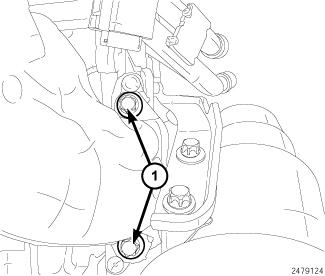
- Install EGR valve (2). Tighten bolts (1) to 9 N.m (80 in. lbs.).
 Courtesy of CHRYSLER LLC
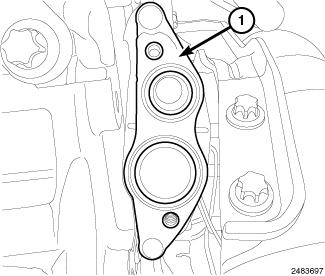
- Clean the gasket surfaces and install a new EGR manifold gasket (1).
 Courtesy of CHRYSLER LLC
- Install the EGR manifold. Tighten bolts (1) to 9 N.m (80 in. lbs.).
 Courtesy of CHRYSLER LLC
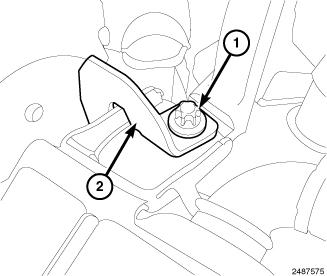
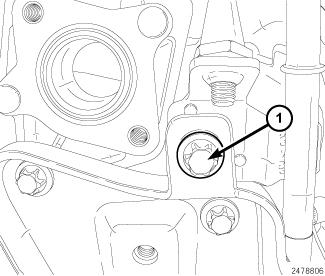
- Install the support bracket bolt (1). Tighten bolt (1) to 9 N.m (80 in. lbs.).
 Courtesy of CHRYSLER LLC
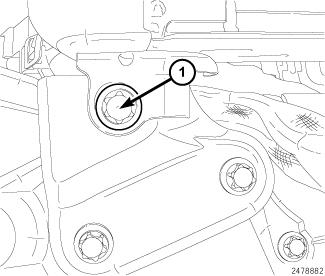
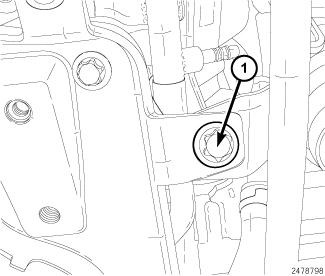
- Install the lower EGR cooler support bolt (1). Tighten bolt (1) to 9 N.m (80 in. lbs.).
 Courtesy of CHRYSLER LLC
- Install the upper EGR cooler support bolt (1). Tighten bolt (1) to 9 N.m (80 in. lbs.).
 Courtesy of CHRYSLER LLC
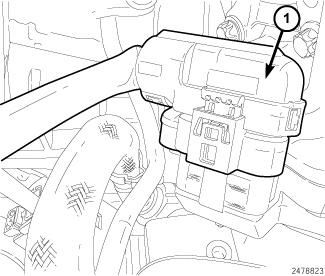
- Disconnect the EGR valve harness connector (1).
 Courtesy of CHRYSLER LLC
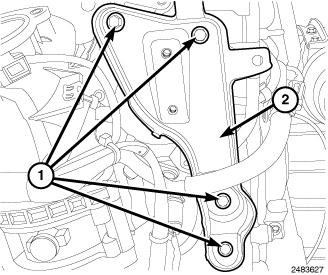
- Install the EGR support bracket (2). Tighten bolts (1) to 9 N.m (80 in. lbs.).
 Courtesy of CHRYSLER LLC
- Connect the wire harness retainers (1).
 Courtesy of CHRYSLER LLC
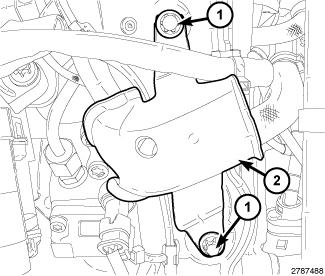
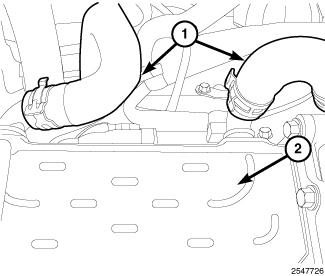
- Install the heat shield (2). Tighten bolts (1) to 9 N.m (80 in. lbs.).
 Courtesy of CHRYSLER LLC
- Install the bolt (1) securing the vacuum tube and tighten to 9 N.m (80 in. lbs.).
 Courtesy of CHRYSLER LLC
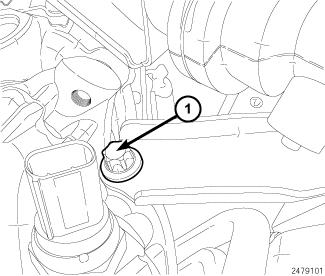
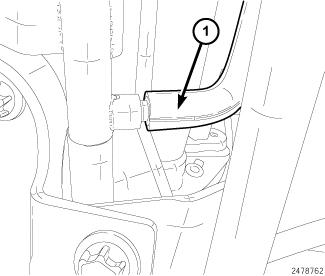
- Install the bolt (1) securing the oil dip stick tube and tighten bolt (1) to 9 N.m (80 in. lbs.).
 Courtesy of CHRYSLER LLC
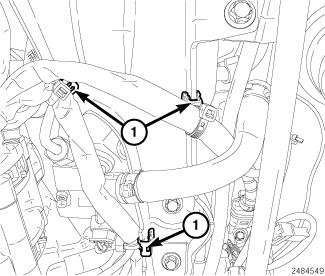
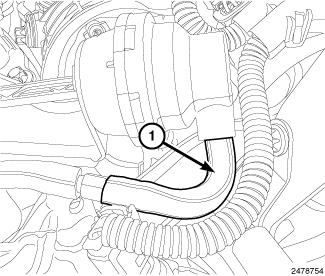
- Connect coolant hoses (1) from the EGR cooler (2).
 Courtesy of CHRYSLER LLC
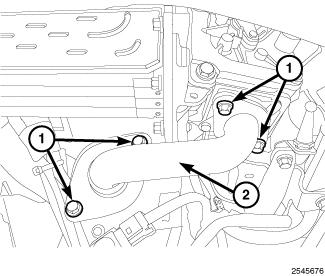
- Install the EGR tube (2). Tighten bolts (1) to 9 N.m (80 in. lbs.).
 Courtesy of CHRYSLER LLC
- Connect the vacuum supply line (1) to the EGR solenoid.
 Courtesy of CHRYSLER LLC
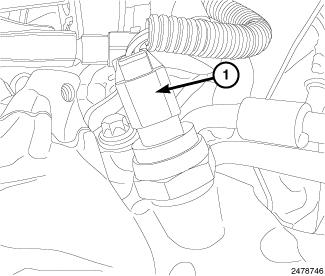
- Connect EGR valve vacuum line (1).
 Courtesy of CHRYSLER LLC
- Connect the EGR back pressure transducer harness connector (1).
- Install engine cover.
- Connect the negative battery cable.