TRAY, Battery: Installation: Installation
 Courtesy of CHRYSLER LLC
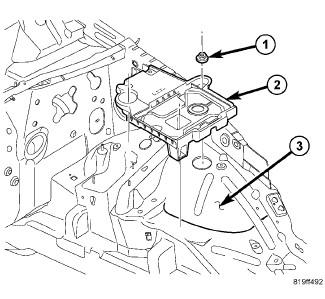
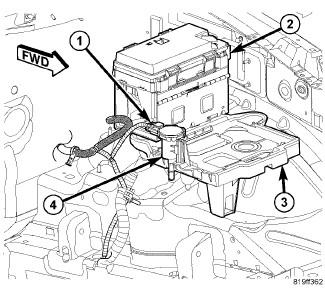
- Position the battery tray (2) into the engine compartment and onto the mounting studs on the left inner fender (3).
- Install the nuts (1) securing the battery tray (2) to the left inner fender (3).
- Tighten the nuts to 10.5 N.m (93 in. lbs.)
 Courtesy of CHRYSLER LLC
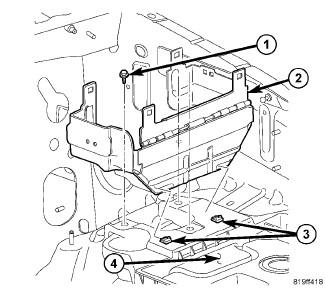
- Position the TIPM bracket (2) onto the battery tray (4). Slide the bracket (2) forward to engage the slots in the bracket with the mounting tabs of the battery tray (3). Install the TIPM bracket retaining screws (1) into the battery tray (4).
 Courtesy of CHRYSLER LLC
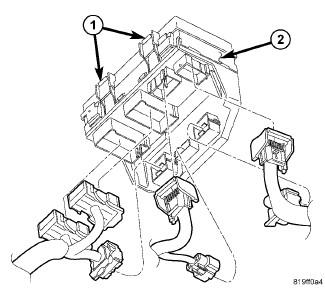
- Position the TIPM (2) into the engine compartment.
- Connect each of the seven TIPM wire harness connectors as shown.
 Courtesy of CHRYSLER LLC
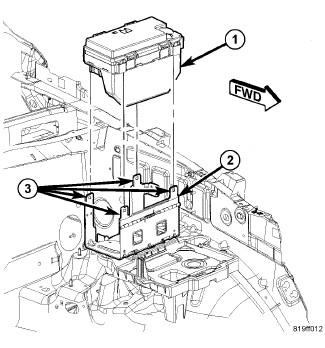
- Position the TIPM (1) onto the mounting bracket (2) and push down until the mounting clips are fully seated onto the mounting tabs (3).
 Courtesy of CHRYSLER LLC
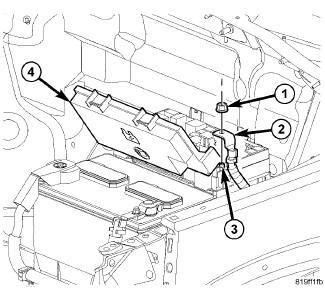
- Position the TIPM positive cable (2) onto the mounting stud (3) and install the retaining nut (1). Tighten the nut to 9 - 11 N.m (80 - 100 in. lbs.).
 Courtesy of CHRYSLER LLC
- On gasoline engine equipped vehicles, position the purge solenoid (4) onto the mounting tab of the battery tray (3) and push downward until the solenoid locks into place. Connect the purge solenoid vacuum hose and electrical connector (1).
- Install the battery. See Electrical - Engine Systems/Battery System/BATTERY - Installation .
- Connect the battery negative cable.
- Close the hood.
- Insert the ignition key and turn it to the "RUN" position and wait twelve seconds. The TIPM will collect the necessary vehicle configuration and VIN data from the CCN and PCM at this time. After twelve seconds turn the ignition key to the "OFF" position and then back to the "ON" position and verify proper vehicle systems operation.