3.8L Engine
 Courtesy of CHRYSLER LLC
- Position the engine in the vehicle.
- Install the transmission bell housing to engine mounting bolts. Refer to ManualINSTALLATION
or to AutomaticINSTALLATION
.
- Tighten the engine mount thru bolts. See INSTALLATION .
- Install the torque converter bolts. (If equipped). Refer to INSTALLATION
.
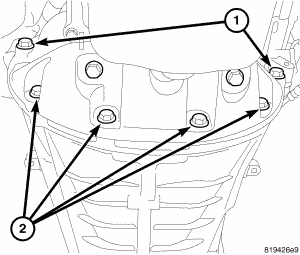
- Install the structural cover (1). See INSTALLATION .
 Courtesy of CHRYSLER LLC
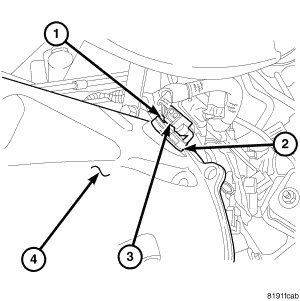
- Install the crank position sensor (2) (CKP).
 Courtesy of CHRYSLER LLC
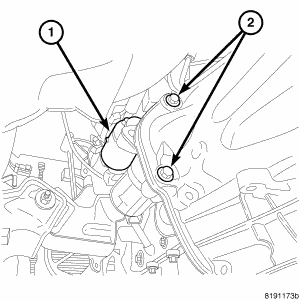
- Install the starter (1). Refer to INSTALLATION
.
 Courtesy of CHRYSLER LLC
- Install the flex plate inspection cover. (If equipped).
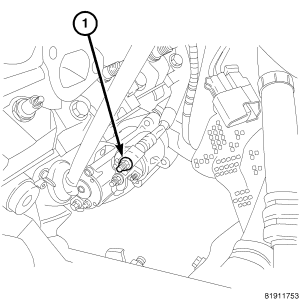
- Connect the starter wiring (1). Refer to INSTALLATION
.
 Courtesy of CHRYSLER LLC
- Connect the knock sensor electrical connector.
- Install the left and right exhaust manifolds.
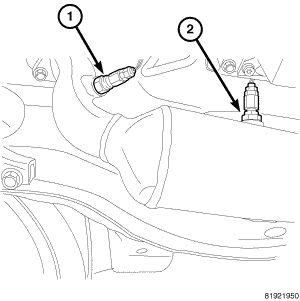
- Connect the exhaust system and connect the right side O2 sensors (1,2).
 Courtesy of CHRYSLER LLC
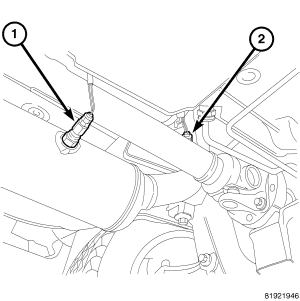
- Connect the left side O2 sensors (1,2).
- Connect the in block heater (if equipped).
- Connect the coolant hose at the engine oil cooler.
 Courtesy of CHRYSLER LLC
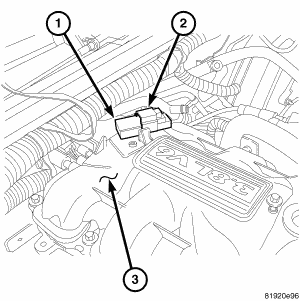
- Connect the oil pressure sending unit (OPS) wiring harness connector.
- Install the upper intake manifold (3). See INSTALLATION .
 Courtesy of CHRYSLER LLC
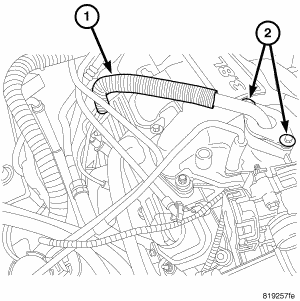
- Install the EGR tube (1). Refer to INSTALLATION
.
- Connect the engine vacuum harnesses.
Courtesy of CHRYSLER LLC
- Route the engine harness to the left cylinder head and attach the purge solenoid.
- Connect the throttle position (TP), idle air control (IAC) motor, oxygen (H02), cam position (CMP), manifold absolute pressure (MAP) (2), and the engine wiring harness connectors.
 Courtesy of CHRYSLER LLC
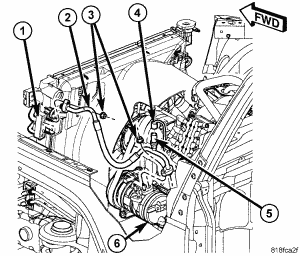
- Connect the A/C discharge line (2) at the compressor. Refer to INSTALLATION
.
 Courtesy of CHRYSLER LLC
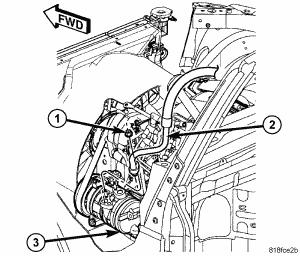
- Connect the A/C suction line (2) at the compressor and compressor electrical connector. Refer to INSTALLATION
.
 Courtesy of CHRYSLER LLC
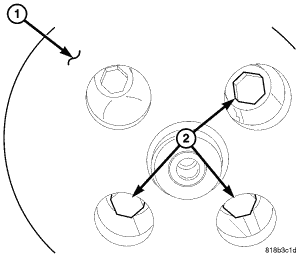
- Install the power steering pump (1). Refer to INSTALLATION
.
 Courtesy of CHRYSLER LLC
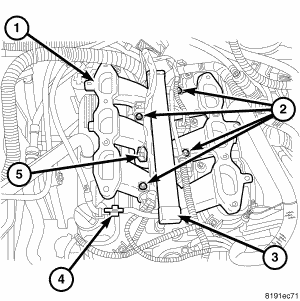
- Connect the fuel line (4) to the fuel rail.
 Courtesy of CHRYSLER LLC
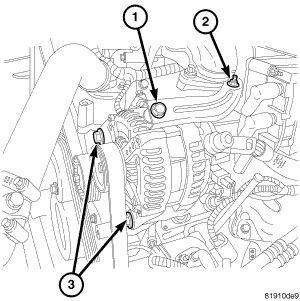
- Install the generator (3). Refer to INSTALLATION
.
 Courtesy of CHRYSLER LLC
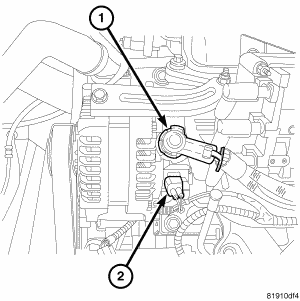
- Reconnect the generator wiring. (1, 2). Refer to INSTALLATION
.
- Install the drive belt.
 Courtesy of CHRYSLER LLC
- Connect the radiator, coolant reservoir and heater hoses.
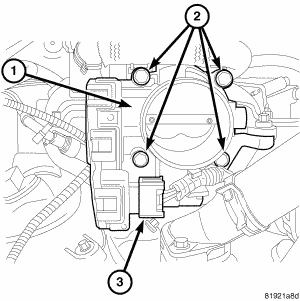
- Connect the throttle wiring harness (ETC) (3).
 Courtesy of CHRYSLER LLC
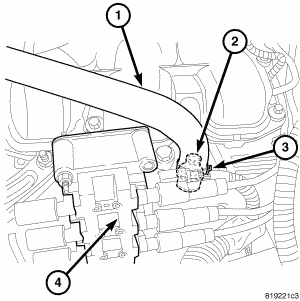
- Install the PCV hose (1).
- Fill the cooling system. Refer to STANDARD PROCEDURE
.
 Courtesy of CHRYSLER LLC
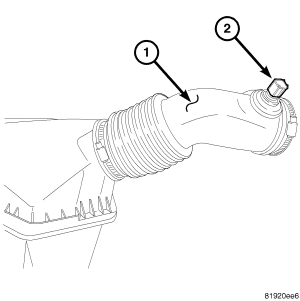
- Install the air cleaner housing, inlet hose (1) and inlet air temp sensor (IAT) (2). See INSTALLATION .
- Evacuate and recharge A/C system. Refer to STANDARD PROCEDURE
.
- Install new oil filter. Fill engine crankcase with proper oil to correct level. Refer to SPECIFICATIONS
.
 Courtesy of CHRYSLER LLC
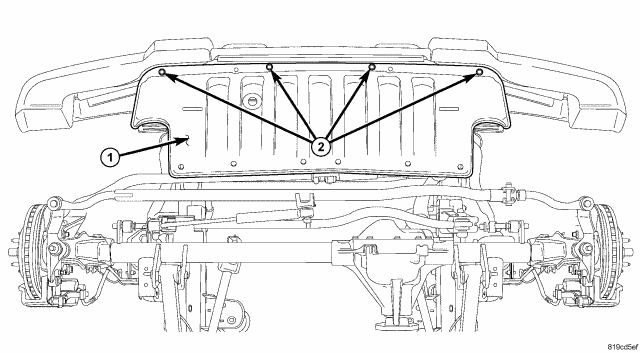
- Install the front splash shield (1).
- Connect negative cable to battery.
- Start engine and run until operating temperature is reached.