Trailing Link
- Raise and support the vehicle. Refer to STANDARD PROCEDURE
.
 Courtesy of CHRYSLER LLC
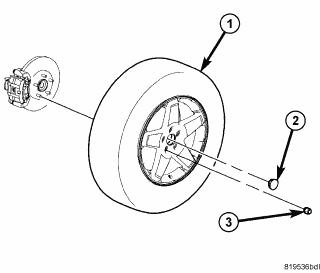
- Remove the wheel mounting nuts (3), then the tire and wheel assembly (1).
 Courtesy of CHRYSLER LLC
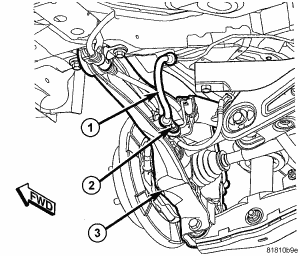
- Remove the screw (2) securing the brake flex hose (1) to the trailing link (3).
 Courtesy of CHRYSLER LLC
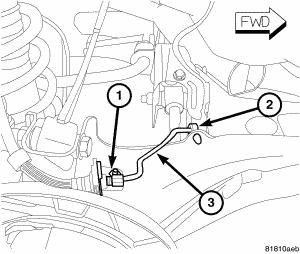
- Remove the nut (1) securing the brake tube routing bracket to the trailing link.
- Remove the brake tube (3) from the routing clip (2) on the trailing link.
 Courtesy of CHRYSLER LLC
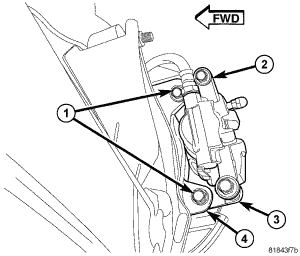
- Remove the two bolts (1) securing disc brake caliper adapter (3) to the brake support plate (4).
- Remove the disc brake caliper (2) and adapter (3) as an assembly. Hang the assembly out of the way using wire or a bungee cord. Use care not to overextend the brake hose and tubing when doing this.
 Courtesy of CHRYSLER LLC
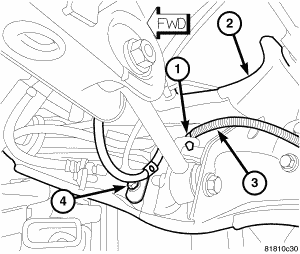
- If equipped, remove the screw (4) fastening the wheel speed sensor (3) to the trailing link (2).
- If equipped, remove the routing clip (1) fastening the wheel speed sensor (3) to the trailing link (2).
- Remove the brake rotor, then hub and bearing. See REMOVAL .
 Courtesy of CHRYSLER LLC
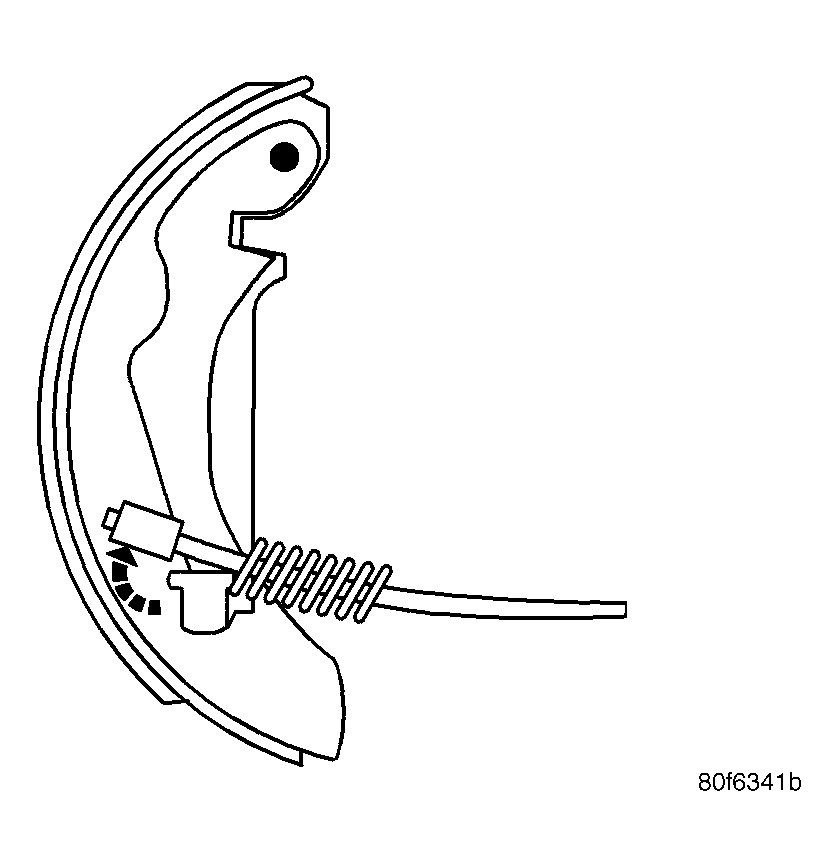
- Remove the parking brake cable from the lever on the parking brake shoe.
 Courtesy of CHRYSLER LLC
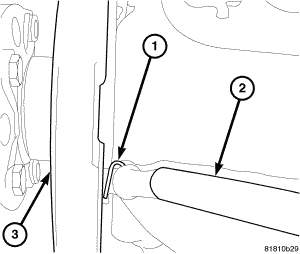
- Remove the hair pin (1) securing the parking brake cable (2) to the brake support plate (3).
- Slide the brake support plate (3) with parking brake shoes off the end of the parking brake cable (2) and remove.
- Pull the parking brake cable from the trailing link.
 Courtesy of CHRYSLER LLC
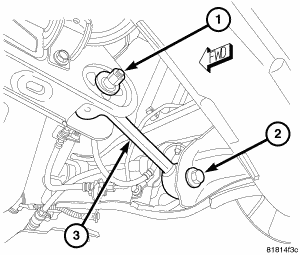
- Remove the bolt (2) securing the toe link (3) to the trailing link.
 Courtesy of CHRYSLER LLC
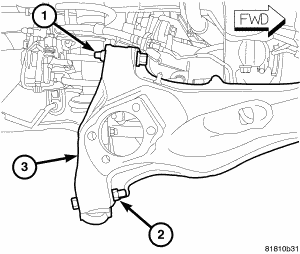
- Remove the nut (2) and bolt securing the lower control arm to the trailing link (3).
- Remove the nut (1) and bolt securing the upper control arm to the trailing link (3).
 Courtesy of CHRYSLER LLC
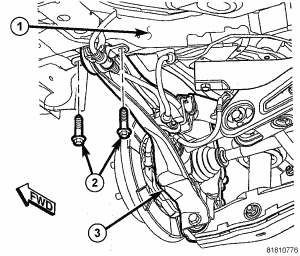
- Remove the two bolts (2) fastening the leading end of the trailing link (3) to the body (1).
- Remove the trailing link.