Transaxle Reassembly
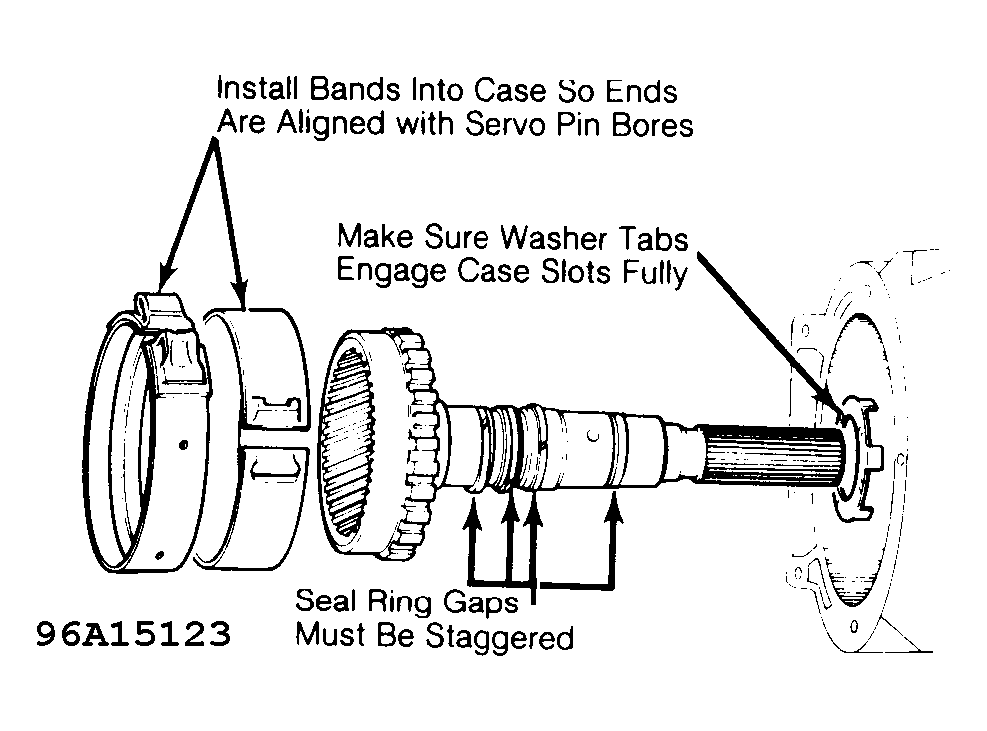
- Coat large tabbed thrust washer with petrolatum and install into case, making sure tabs engage slots in case. Install output shaft and ring gear assembly into case and through thrust washer. Making sure washer is not displaced. Place front and rear bands in position in case. While holding clutch assemblies (previously assembled), install large needle thrust bearing and race onto sun gear shaft, with flange facing away from clutches. See Fig 1
.
 Courtesy of JAGUAR CARS, INC.
- Install center support, clutch and sun gear assembly into planet carrier. Rotate center support until holes on outer diameter are in approximate alignment with center support bolt holes in case, then install entire assembly (clutches, planetary carrier, and support) into transmission case.
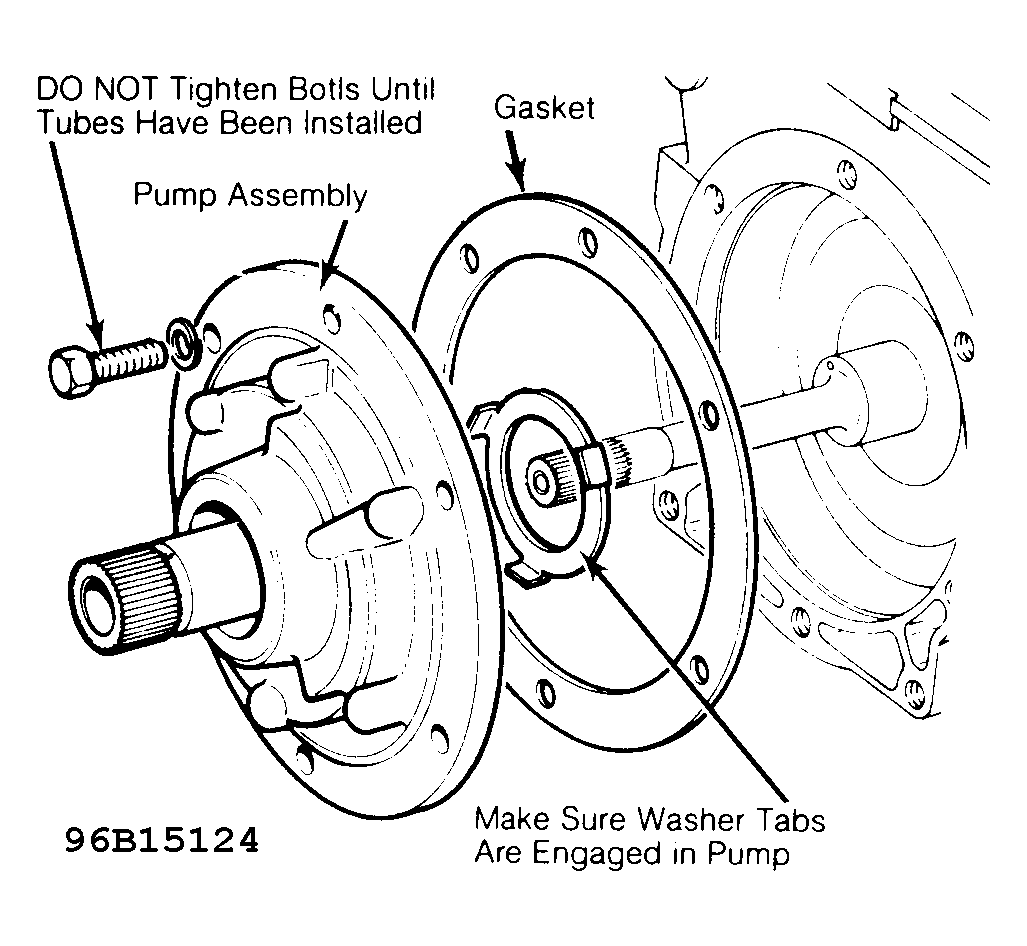
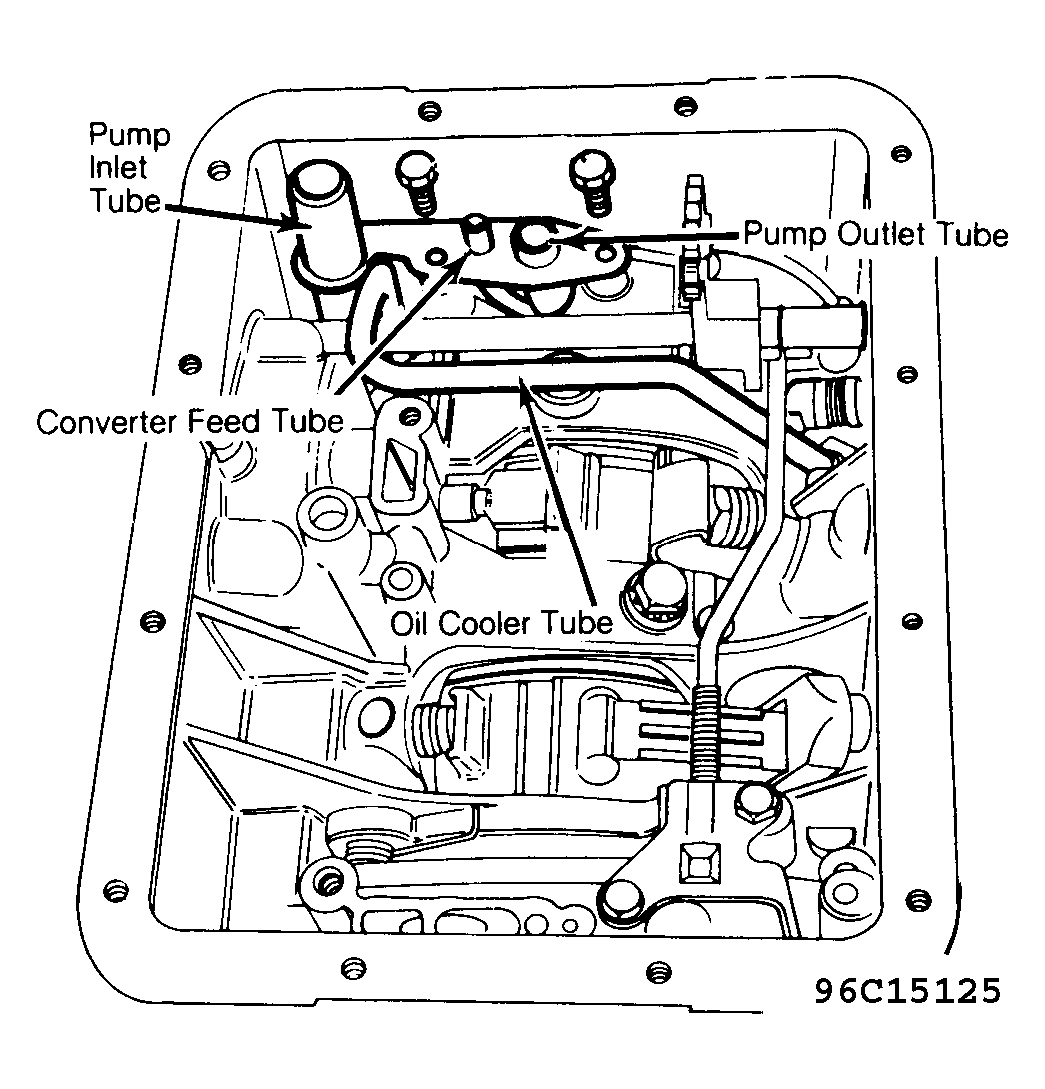
- Position NEW thrust washer and gasket onto rear of oil pump. Mount oil pump to transmission case, and install but do not tighten attaching bolts. Install NEW "O" ring seal on pump inlet tube. Install inlet tube along with outlet tube and converter feed tube into oil pump housing (inside case). Make sure tubes are correctly positioned, install tube retaining plate and attaching bolts, then tighten oil pump-to-case bolts. At this time, also install oil cooler tube into case. See Fig 2
CAUTION:
To prevent damage to internal parts, do not allow components to separate when installing.
 Courtesy of JAGUAR CARS, INC.
- On rear of case, install 3 oil tubes into case and governor support. Slide governor unit onto output shaft and install plug and spring washer, making sure plug enters BLIND hole in output shaft. See Fig 3
 Courtesy of JAGUAR CARS, INC.
- Install speedometer drive gear onto output shaft and against governor. Install NEW seal into extension housing, position NEW extension-to-case gasket, then install housing onto case, tightening nuts and bolts in a diagonal sequence. Install output flange onto shaft, engage parking pawl with parking gear, then install flange attaching bolt or nut and tighten.
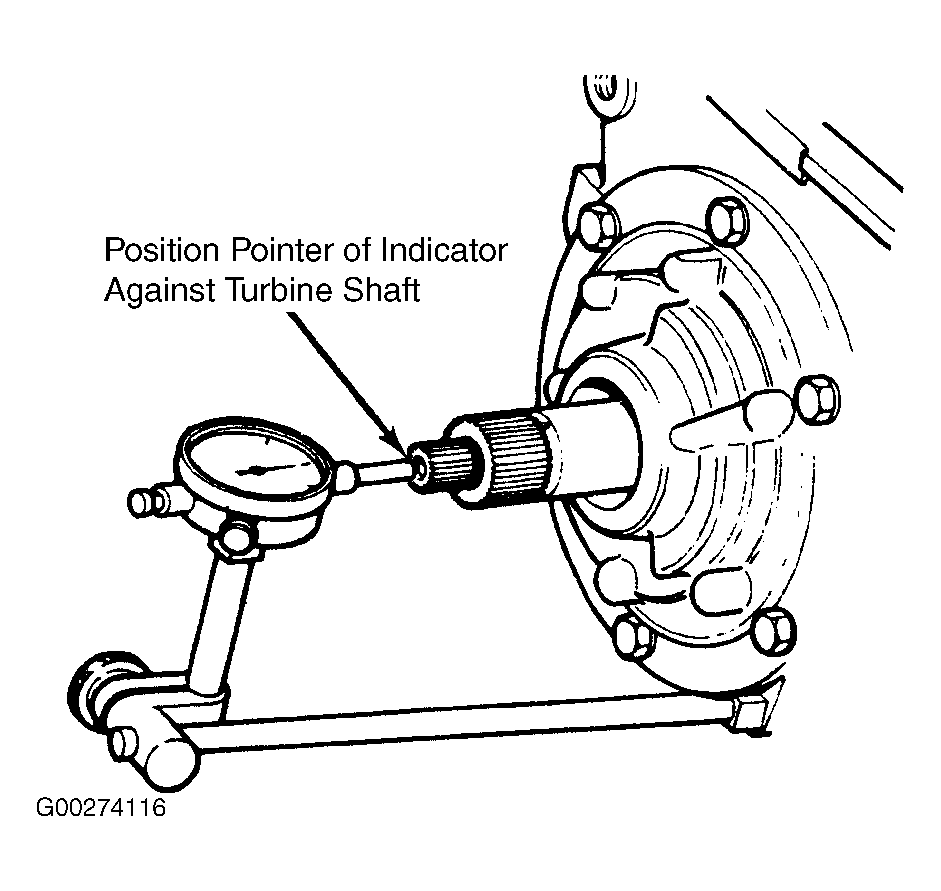
- Position dial indicator assembly on front of transmission case with button of indicator contacting turbine shaft. With screwdriver inserted between front clutch and front of case, pry gear train fully rearward. Zero dial indicator. See Fig 4
. Next, with screwdriver between parking gear and rear clutch, pry gear train forward and note reading on gauge. Reading should be .008-.029" (.20-.73mm). If not, repeat steps 3 4
and 5
, installing thicker or thinner washer as required behind oil pump.
 Courtesy of JAGUAR CARS, INC.
- Coat NEW "O" ring with petrolatum and install onto speedometer driven gear housing. Install driven gear assembly into extension housing and install retainer. Position NEW gasket on front servo, mount servo on case, and install attaching bolts. Install front band strut into servo rod and band. See Fig 5
. Screw in front band adjusting screw until it engages band end. Do not tighten screw or lock nut at this time.
 Courtesy of JAGUAR CARS, INC.
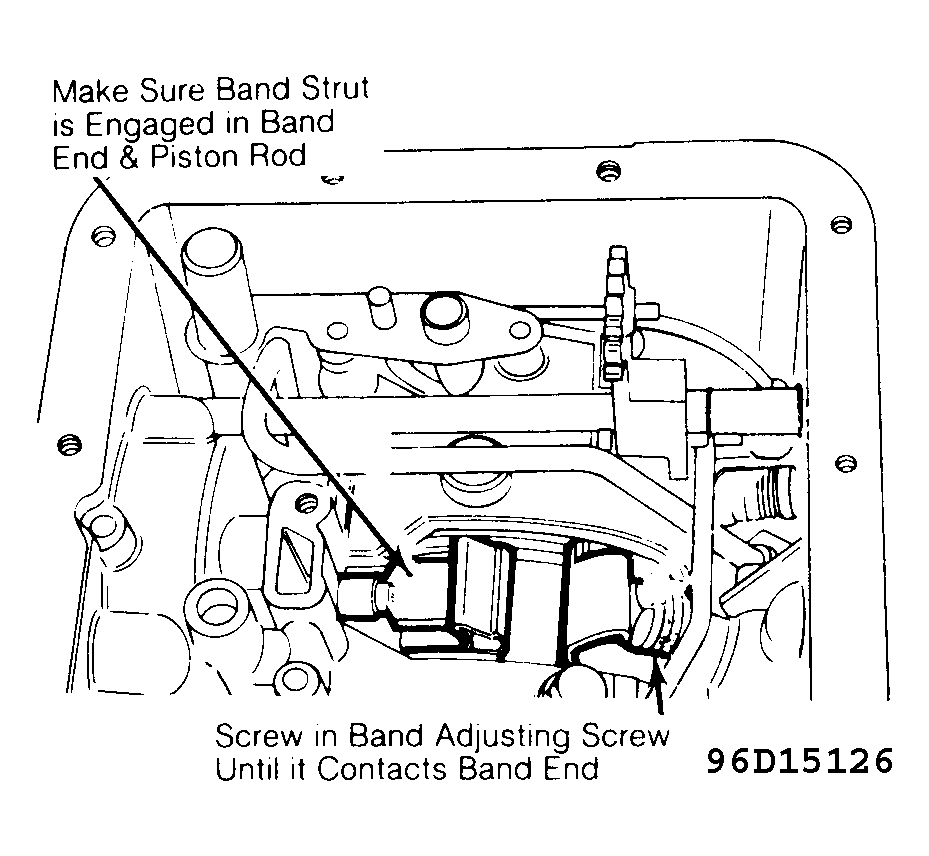
- If removed, install rear servo operating lever in transmission case. Install NEW "O" rings and gasket on rear servo body and mount servo on case. Ensure servo rod engages operating lever. Install rear band strut between band end and operating lever. See Fig 6
. Screw in band adjusting screw until contact is just made with band, tighten servo body-to-case bolts. At this time, install oil tube which will be partially covered by valve body. See tube "D" in Fig 7
.
 Courtesy of JAGUAR CARS, INC.
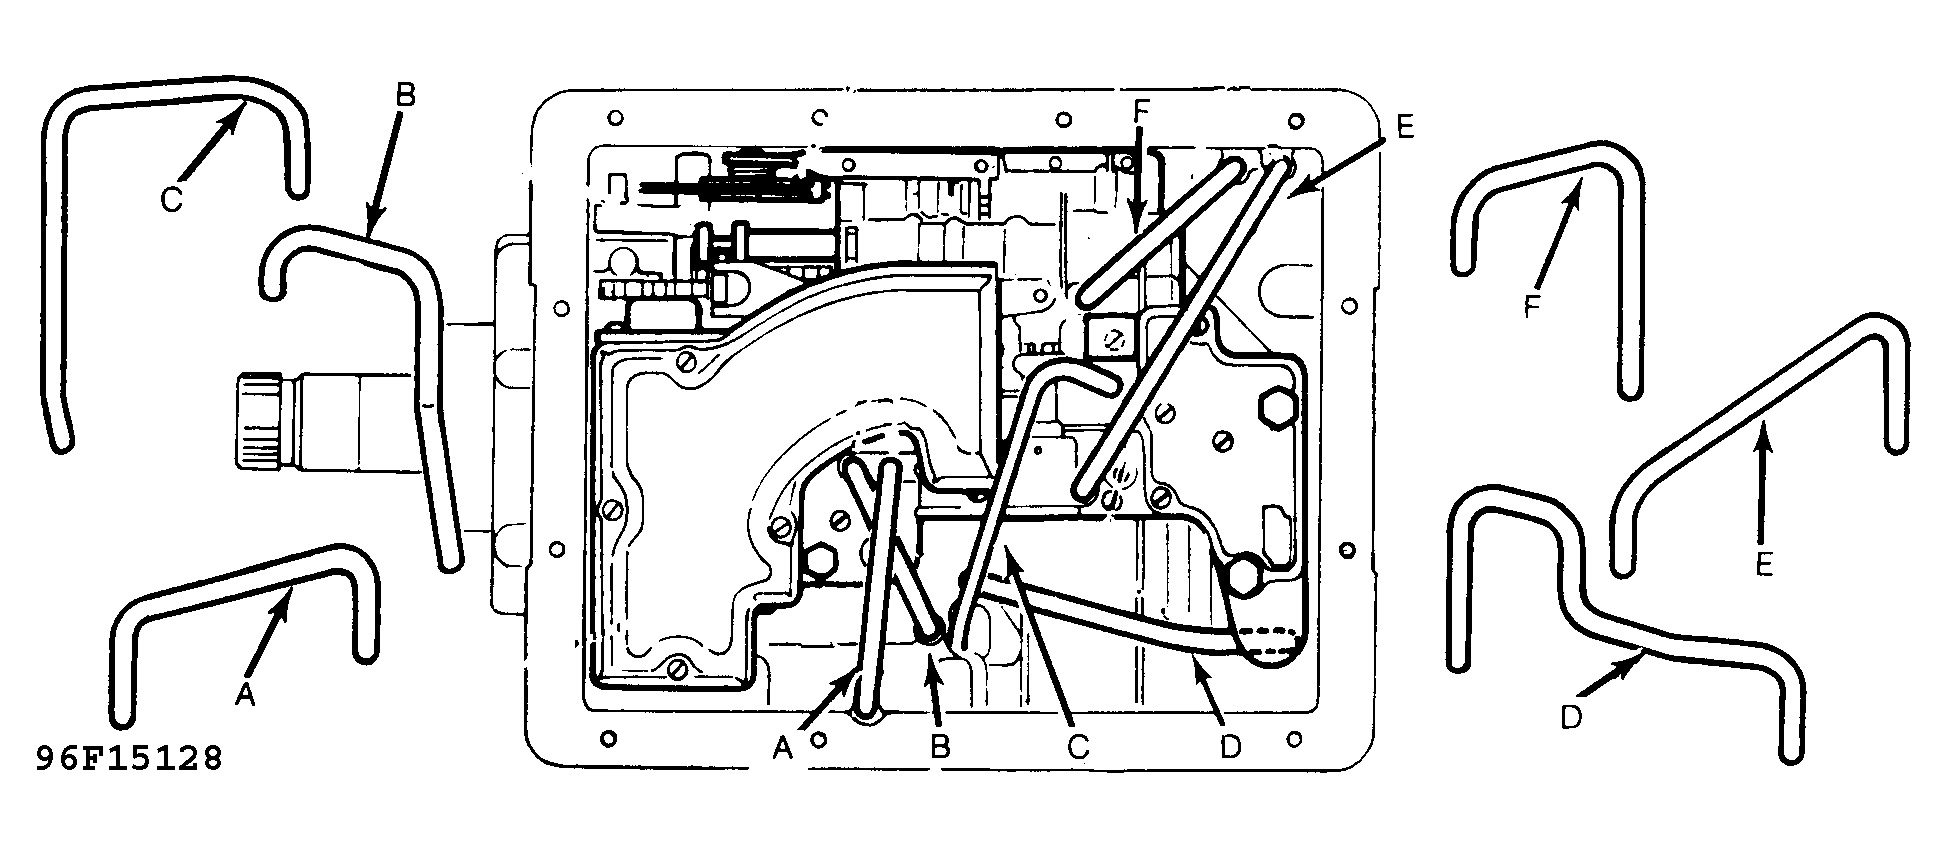
- Install valve body into case. Make sure manual valve engages detent lever and that valve body fully engages oil pump tubes. Install valve body-to-case bolts, noting that shortest bolt is installed at front. Connect kickdown cable to cam. Install valve body oil tubes. See Fig 7
.
 Courtesy of JAGUAR CARS, INC.
- Install oil pan using NEW gasket. Install converter housing, oil filler tube, and breather. To complete assembly, adjust both bands as follows: Tighten band adjusting screw to 60 INCH lbs. (7 N.m.), back out screw 3/4 of a turn, hold in position and tighten adjusting screw lock nut.