Lower Control Arm: Removal
- Raise the vehicle and support the frame with suitable safety stands.
- Remove wheel and tire assembly. Refer to WHEEL
.
- Remove the tie-rod end from the knuckle. Refer to POWER STEERING UNIT
.
- Remove the retaining ring from the front axle driving shaft to release the shaft from hub (Except 2WD model). Refer to FRONT HUB AND DISC (2WD MODEL)
and FRONT HUB AND DISC (4WD MODEL)
.
- Support lower control arm with a jack.
- Remove front nut.
- Remove rear nut.
- Remove torsion bar, refer to TORSION BAR
.
- Remove torsion bar arm bracket.
- Disconnect the stabilizer link at the lower control arm.
- Remove the shock absorber lower end from the lower control arm.
- Remove the lower ball joint from the lower control arm.
- Remove front bolt.
- Remove rear bolt.
- Remove lower control arm.
- Remove torsion bar arm bolt.
- Remove lower ball joint bolt.
- Remove front bushing by using remover J-36833.
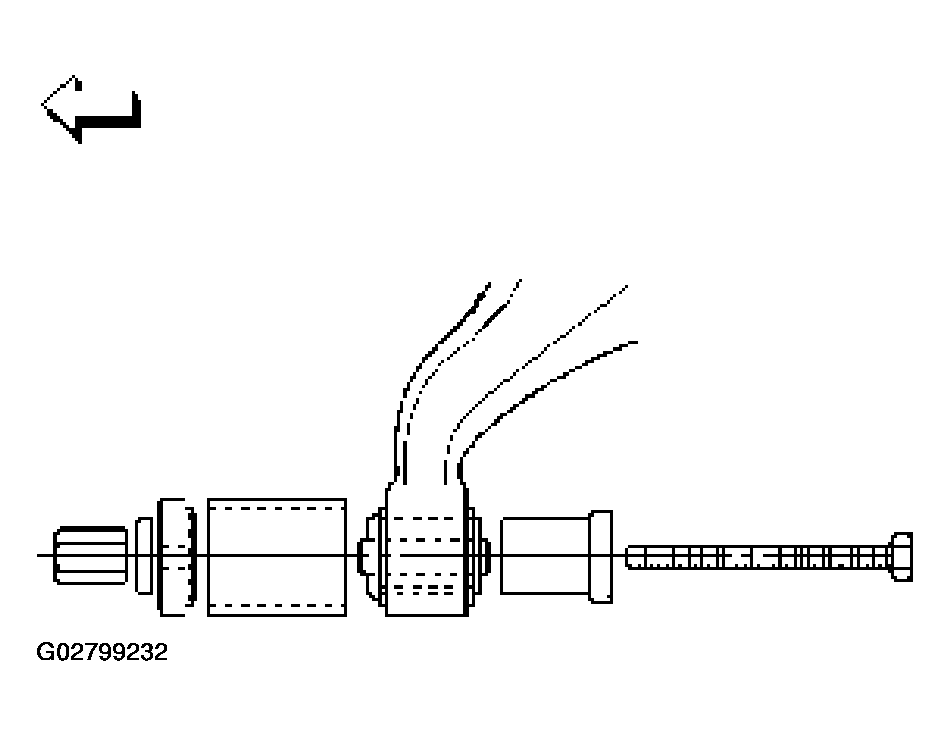 Courtesy of ISUZU MOTOR CO.
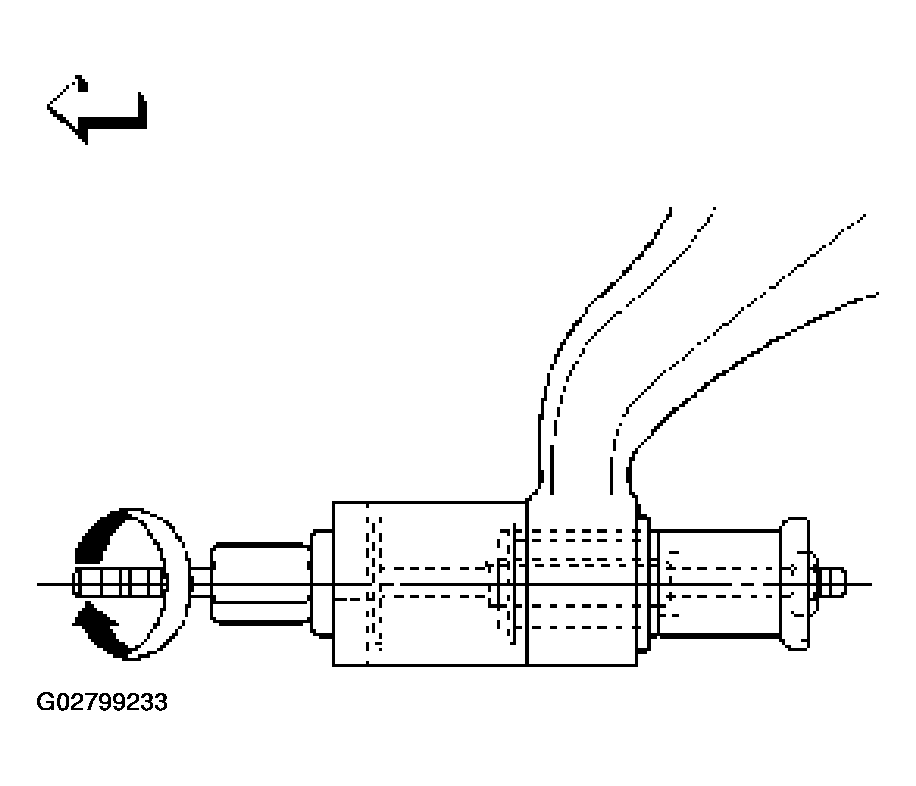 Courtesy of ISUZU MOTOR CO.
- Remove rear bushing by using remover J-36834.
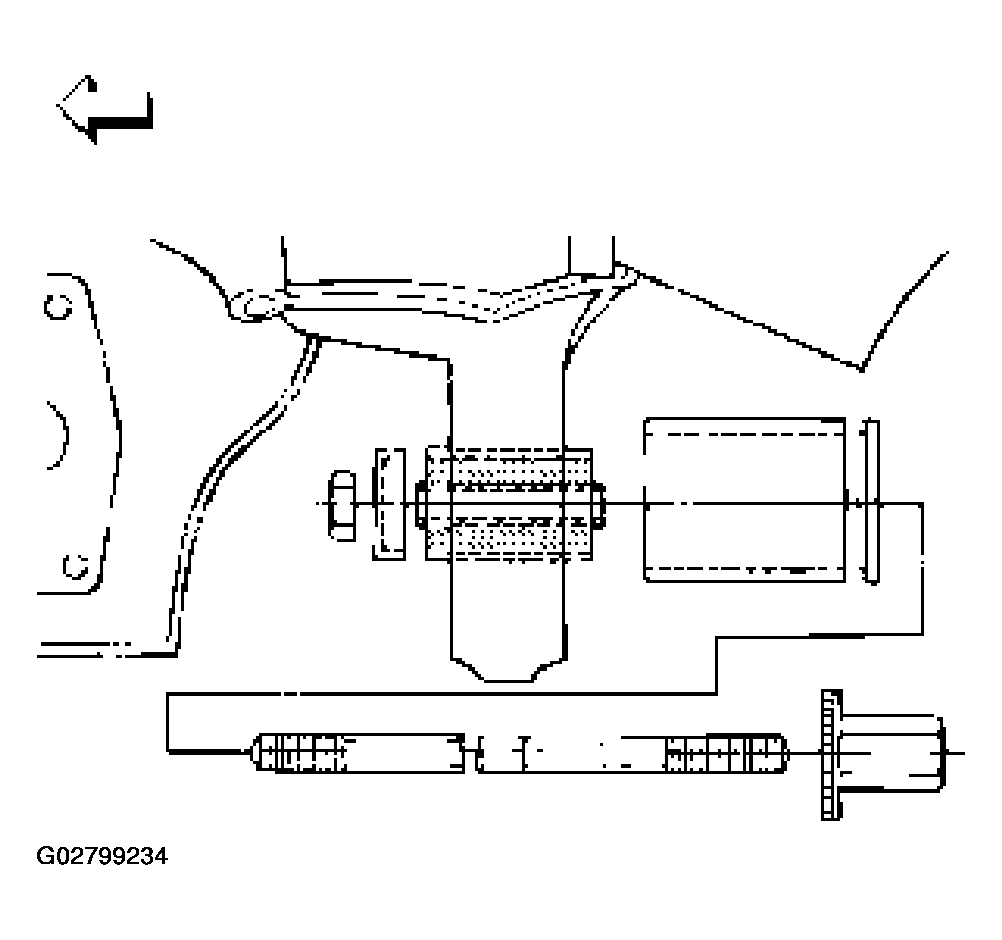 Courtesy of ISUZU MOTOR CO.
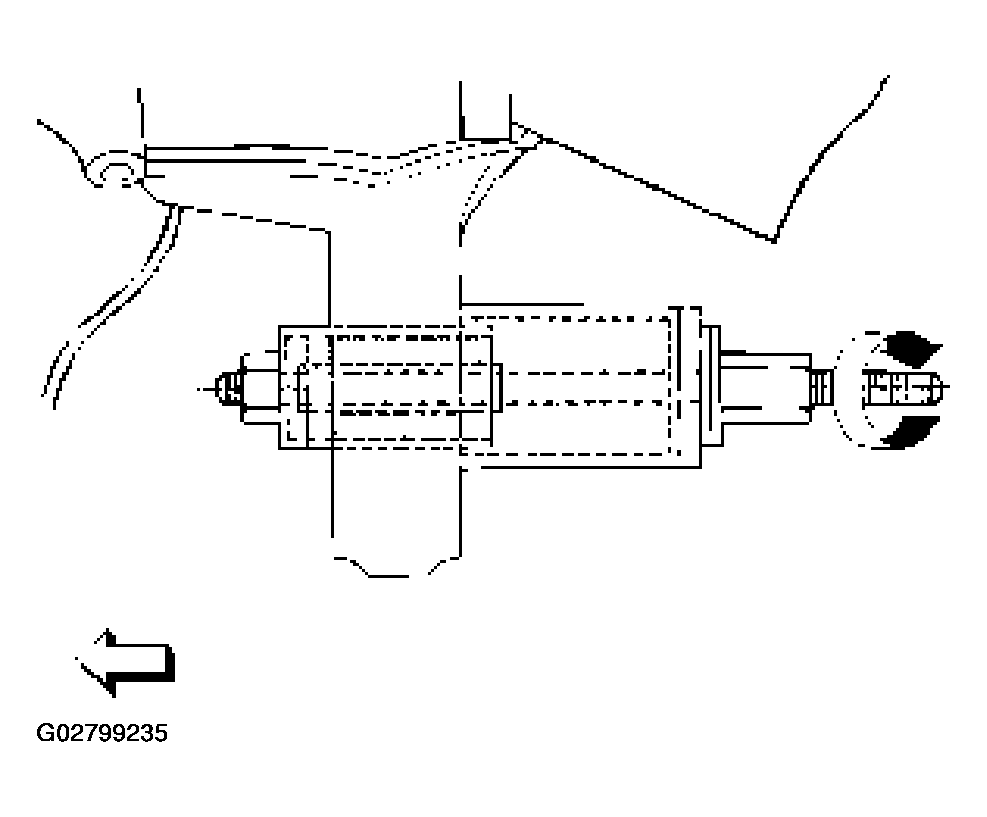 Courtesy of ISUZU MOTOR CO.