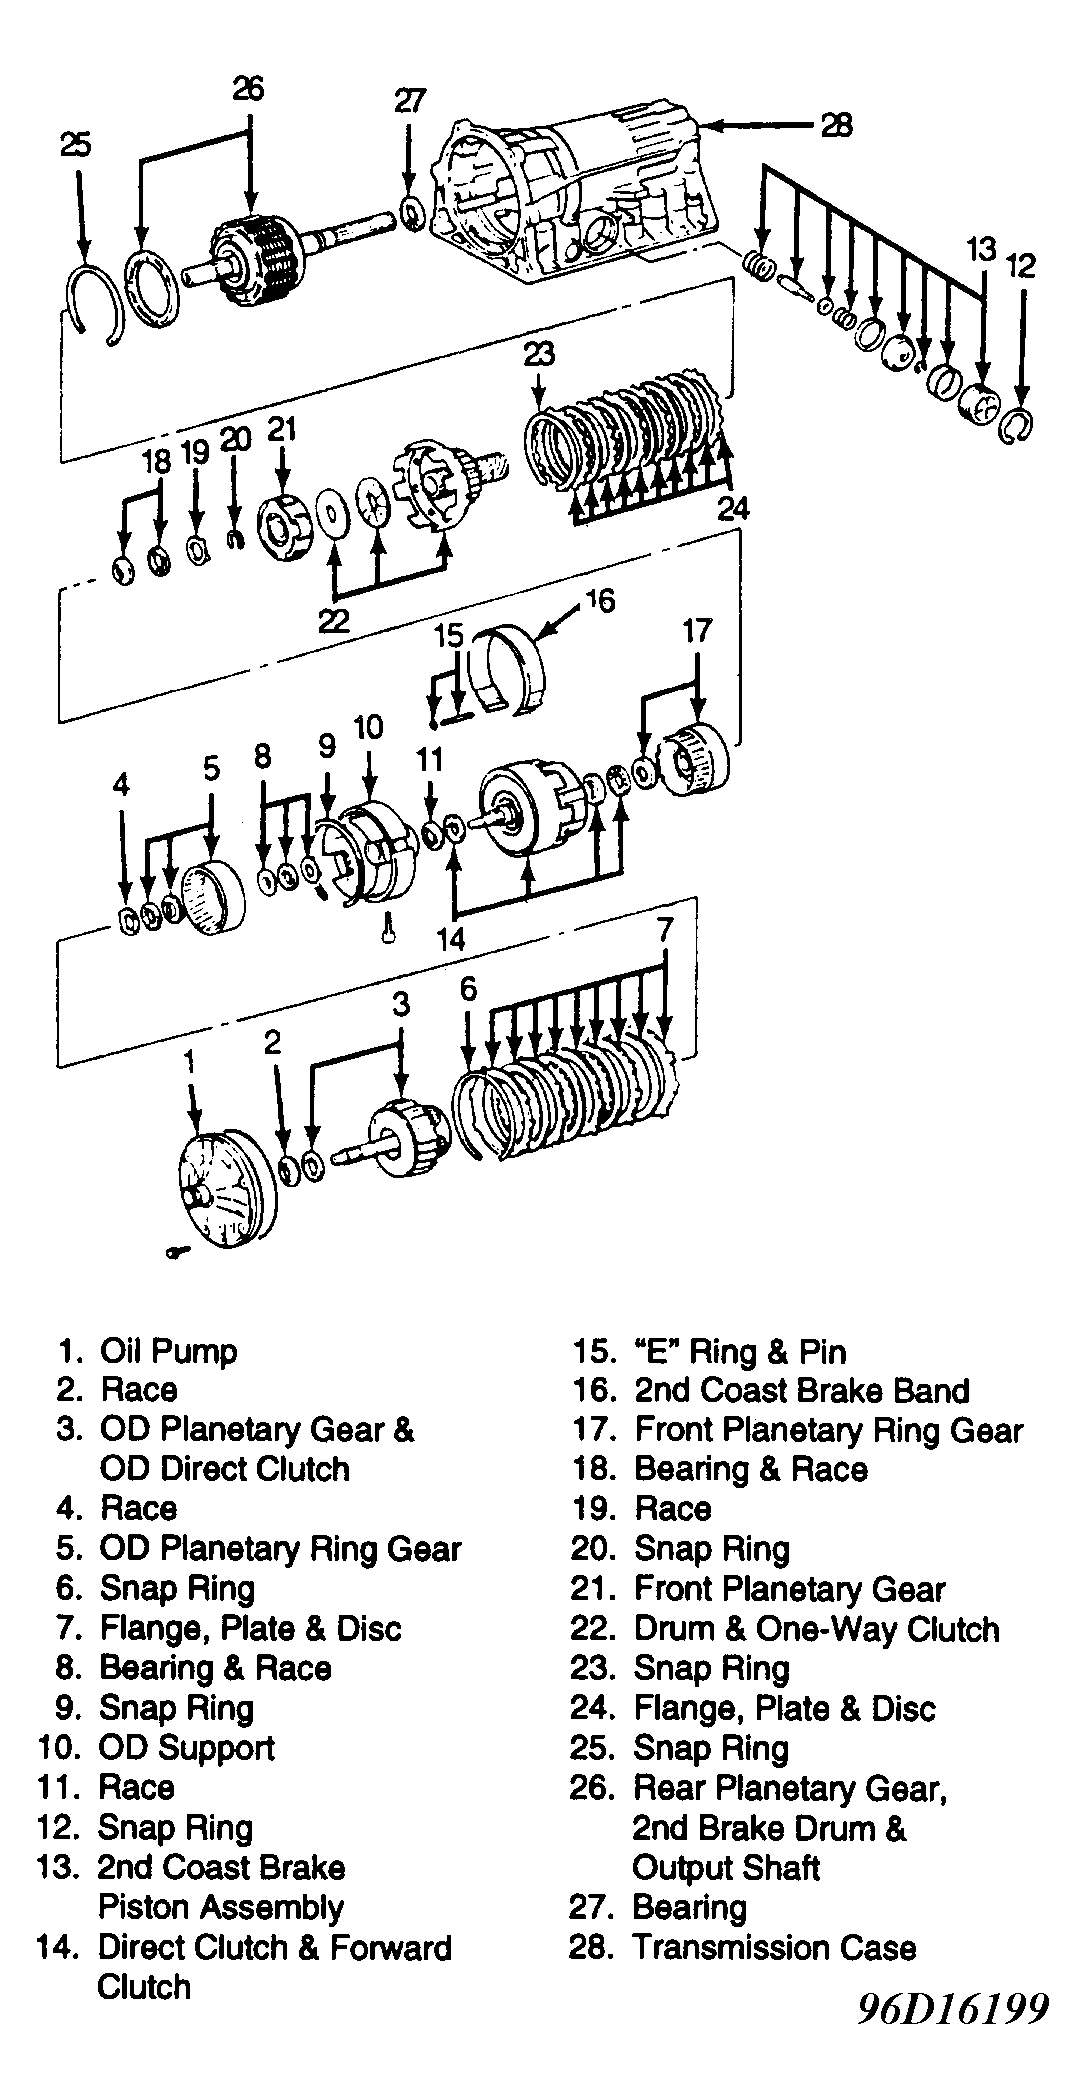
Transmission Disassembly
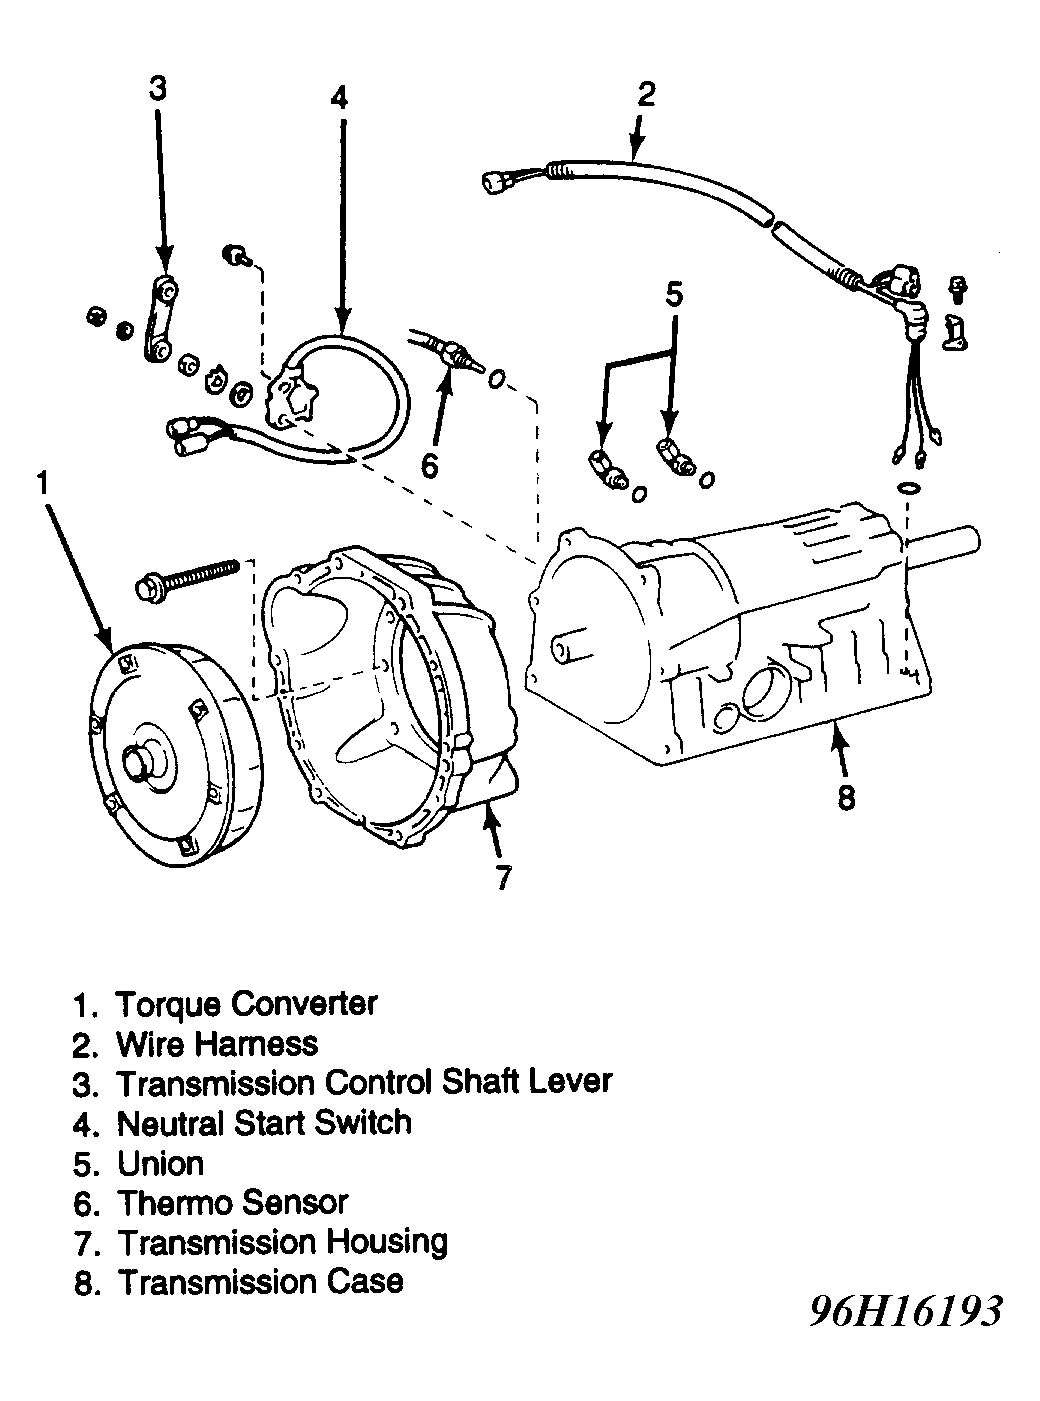
- Remove wire harness and throttle cable clamp. Remove transmission control shaft lever and neutral start switch. Remove 2 side unions from transmission case. Remove thermo sensor from right side of transmission and transfer chain case. See Fig 1
. Install Holding Fixture (J-37227) and Fixture Base (J-3289-20) to transmission unit.
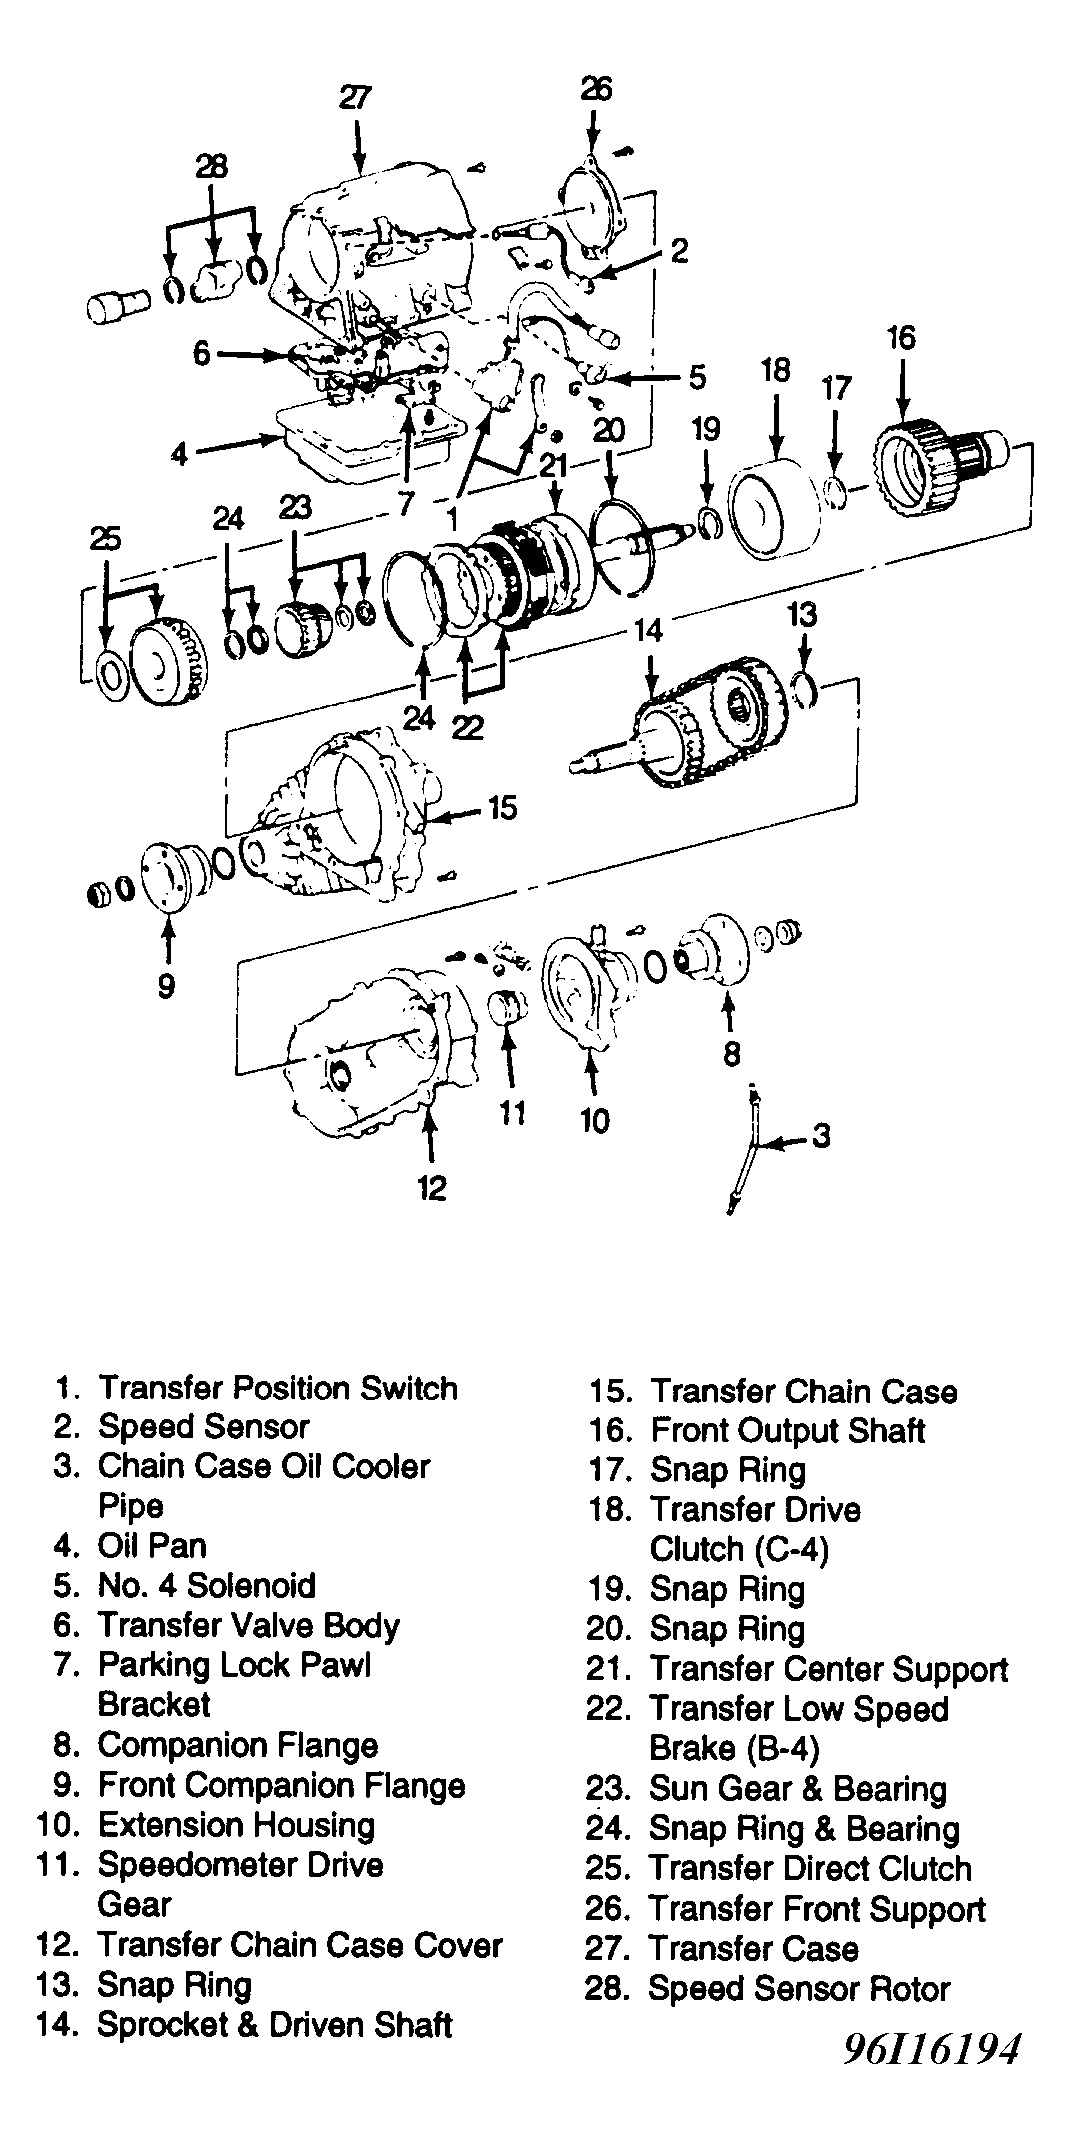
- Remove transfer position switch. Remove speed sensor. Remove chain case oil cooler pipes. Remove transfer case oil pan. To prevent contaminating valve body with foreign matter from bottom of oil pan, DO NOT
turn transmission over.
- Remove magnet from oil pan. Disconnect and remove No. 4 solenoid. Remove transfer valve body. Remove parking lock pawl bracket. Using hammer and chisel, loosen staked part of front and rear companion flange nut. Using Holding Wrench (J-8614-01), remove front and rear companion flange.
- Remove extension housing. Remove speedometer drive gear. Remove transfer chain case cover. Using a plastic hammer, separate transfer chain cover from transfer chain case. Remove sprocket and driven shaft snap ring. Remove chain with sprocket and driven shaft.
- Using a plastic hammer, separate transfer chain case from transfer case. Remove front output shaft. Remove snap ring from transfer drive clutch (C-4). Grasp and pull out front drive clutch.
- Remove snap rings from output shaft and transfer case. Remove transfer center support with low speed brake (B-4). Remove low speed brake inner flange from transfer case. Remove sun gear. Remove bearing and races from sun gear. Remove bearing and races from transfer direct clutch. Remove snap ring from transfer case.
- Lift transfer direct clutch from transfer case. Remove front support from transfer case. Remove bearing and race from front support. Remove transfer case from transmission case. Remove rear snap ring and remove sensor rotor and key. Remove front snap ring. See Fig 2
.
- Remove transmission housing. Remove transmission oil pan. Remove magnet. Remove oil strainer and oil strainer case. Remove 3 oil tubes. Disconnect No. 1, No. 2 and No. 3 solenoids. Remove solenoid wiring stopper plate from transmission case. Remove wiring from case.
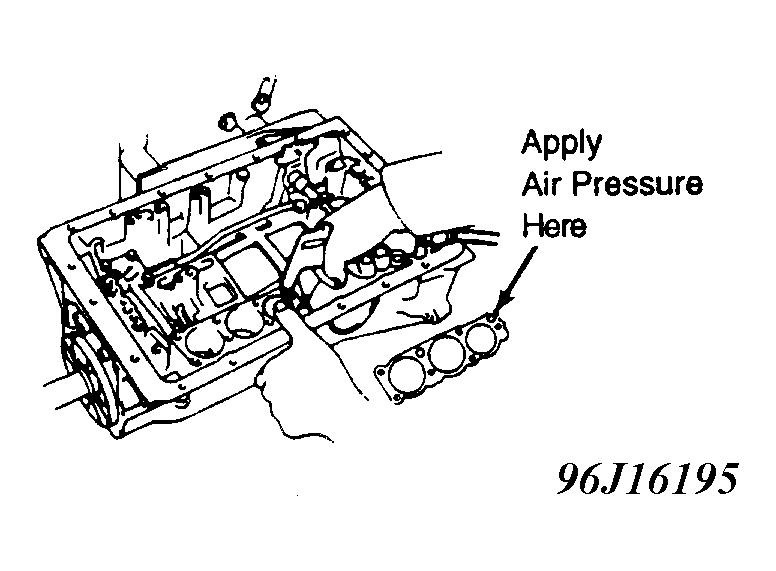
- Disconnect throttle cable from cam. Remove transmission valve body. Remove check ball body and spring. Remove 3 springs and 2 pins from accumulator piston. Remove 2nd brake, direct clutch and OD direct clutch accumulator pistons and springs (if equipped) from transmission case. Applying compressed air to oil hole, remove OD brake accumulator piston and spring. See Fig 3
. Note spring and piston locations. Remove throttle cable from transmission case. See Fig 4
.
- Using Puller (J-37230), remove oil pump from case. Remove race from oil pump. Remove OD planetary gear and OD direct clutch with thrust needle bearing from case. Remove race from OD planetary gear. Remove OD planetary ring gear.
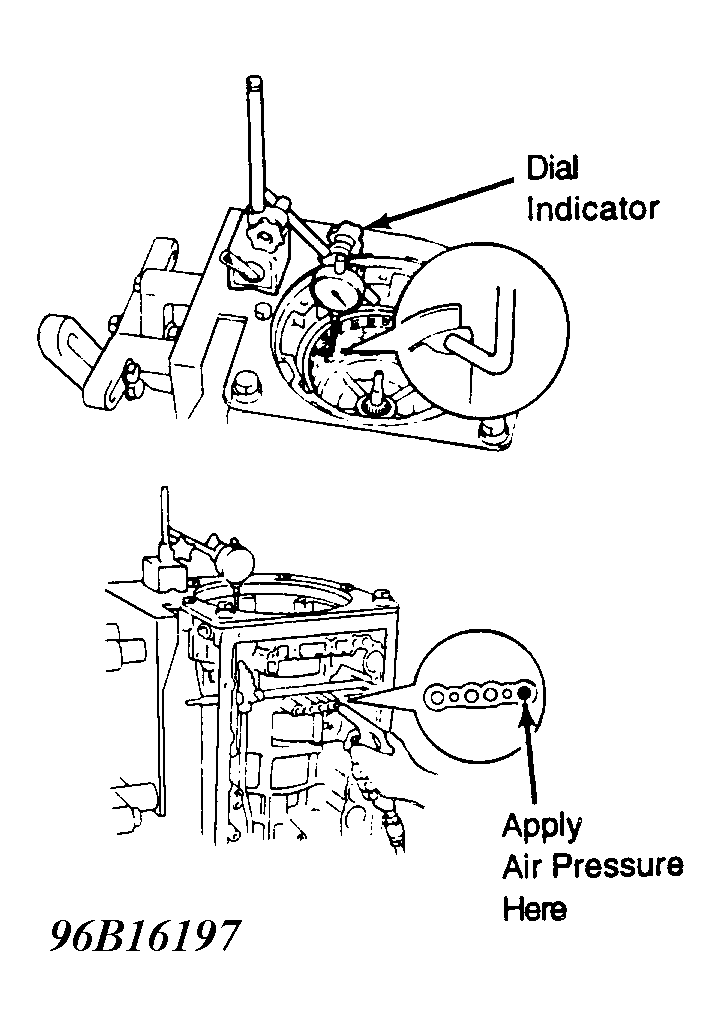
- Place dial indicator on OD brake piston. Measure piston stroke by applying low pressure compressed air to opening in case. See Fig 5
. Piston stroke should be .0520-.0638" (1.320-1.620 mm). If piston stroke is not within specification, replace disc or flange.
- Remove snap ring. Remove OD brake clutch pack, 2 flanges, 2 plates and 3 discs. Note location of flanges, plates and discs at time of removal. Remove thrust bearing and 2 races.
- Remove snap ring. Remove 2 bolts holding overdrive support assembly to case. Install 2 removed bolts to OD support. Pull out OD support assembly. Remove OD support race.
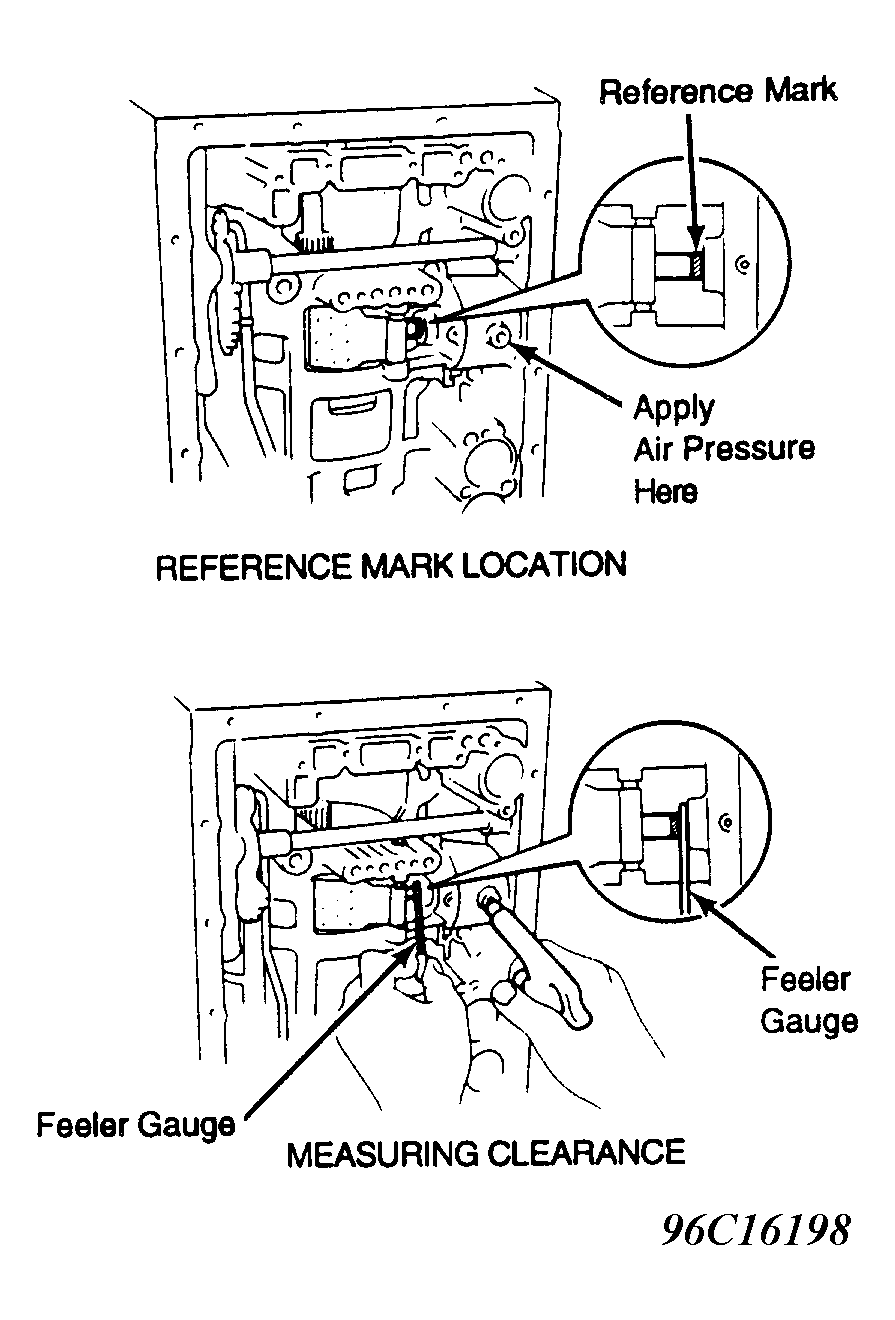
- Place reference mark on 2nd coast brake piston rod. Apply low pressure compressed air at opening of transmission case. Using feeler gauge, measure clearance between reference mark and case. See Fig 6
. Piston stroke should be .059-.118" (1.49-2.99 mm). If piston stroke is not within specification, replace piston rod. Recheck piston stroke. If piston stroke is not within specification, replace brake band. Piston rods are available in 2 thicknesses: 2.811" (71.40 mm) and 2.870" (72.90 mm).
- Remove 2nd coast brake cover snap ring. Carefully apply air pressure to oil hole in step 14) to remove 2nd coast brake cover, piston and spring. Remove direct clutch and forward clutch from case. Remove "E" ring from 2nd coast brake band pin and remove pin. Remove 2nd coast brake band.
- Remove front planetary ring gear from case. Remove bearing and races. Remove front planetary gear snap ring. Remove front planetary gear from case. Remove sun gear input drum and one-way clutch.
- Measure 2nd brake clearance between snap ring and flange. See Figure
. Standard clearance should be .0197-.0693" (.500-1.760 mm). If clearance is not within specification, replace discs. Remove 2nd brake snap ring. Remove flange, 4 discs and 4 plates.
- Measure 1st and reverse brake clearance between 2nd brake drum and plate. See Figure
. Standard clearance should be .0197-.0701 500-1.780 mm). If clearance is not within specification, replace discs.
- Remove rear planetary gear snap ring. Remove rear planetary gear, 2nd brake drum and output shaft as an assembly. Remove thrust bearing and race from case. See Fig 7
.
 Courtesy of ISUZU MOTOR CO.
 Courtesy of ISUZU MOTOR CO.
 Courtesy of ISUZU MOTOR CO.
 Courtesy of ISUZU MOTOR CO.
 Courtesy of ISUZU MOTOR CO.
 Courtesy of ISUZU MOTOR CO.
 Courtesy of ISUZU MOTOR CO.