Disassembly And Assembly: Disassembly
- Remove center console assembly. Refer to REMOVAL AND INSTALLATION .
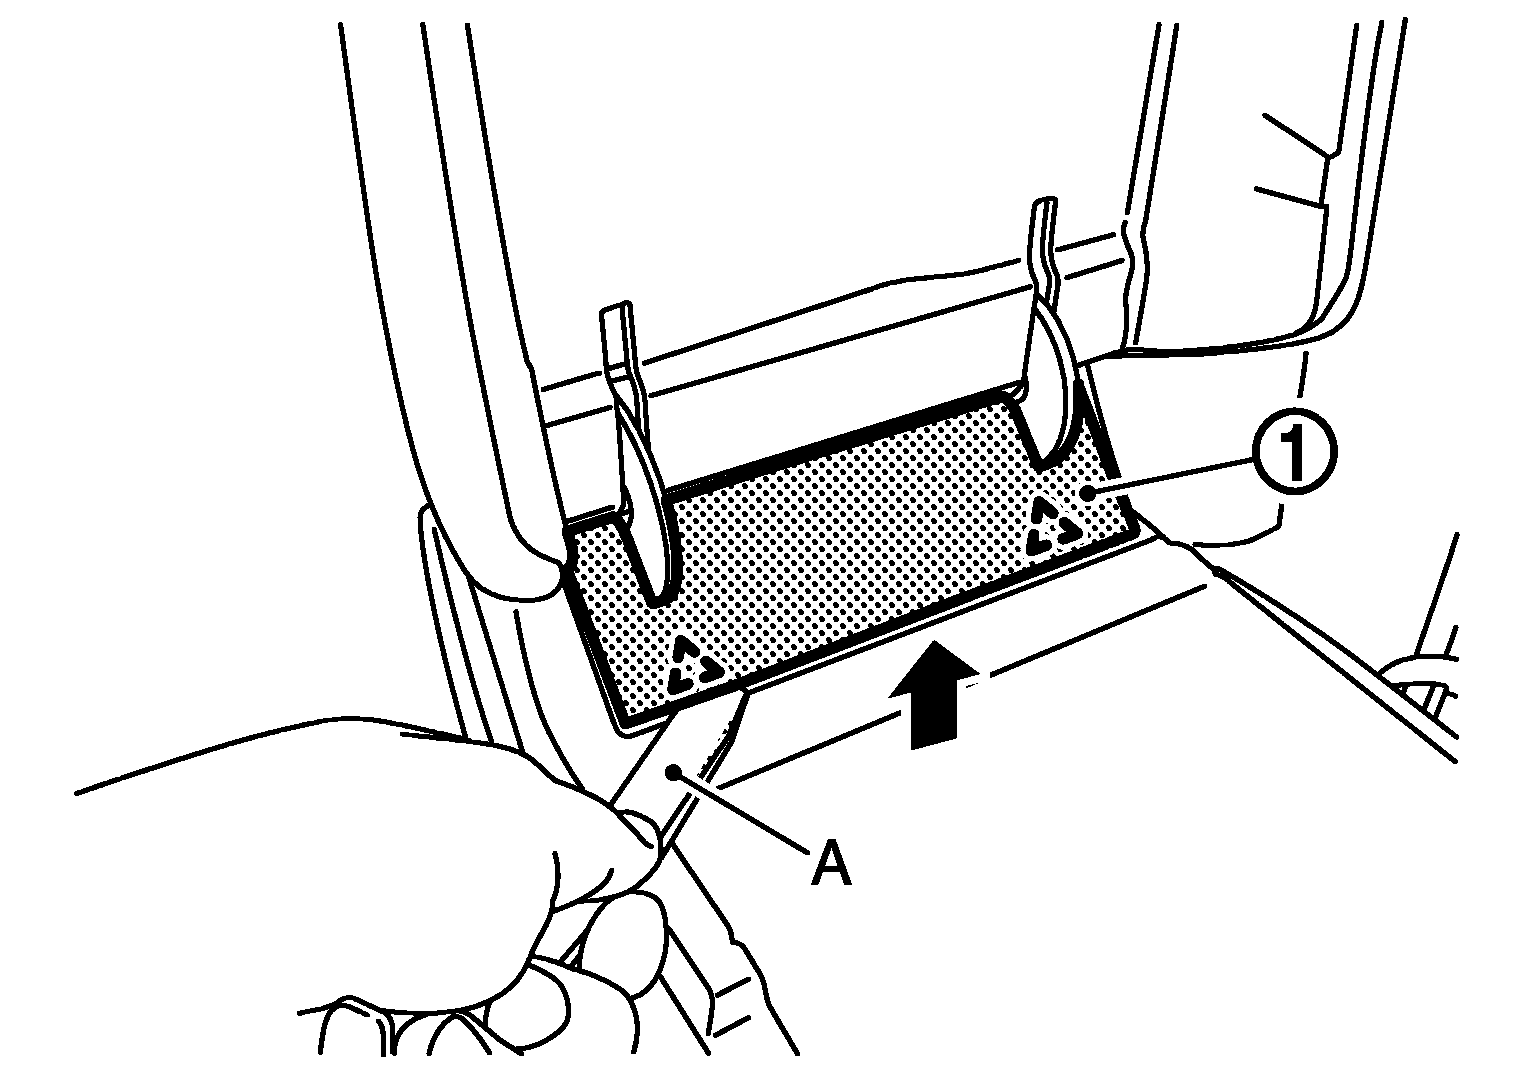
- Remove console mask.
 Courtesy of NISSAN NORTH AMERICA, INC.
- Open the console lid.
- Remove console mask (1) fixing pawls with remover tool (A).
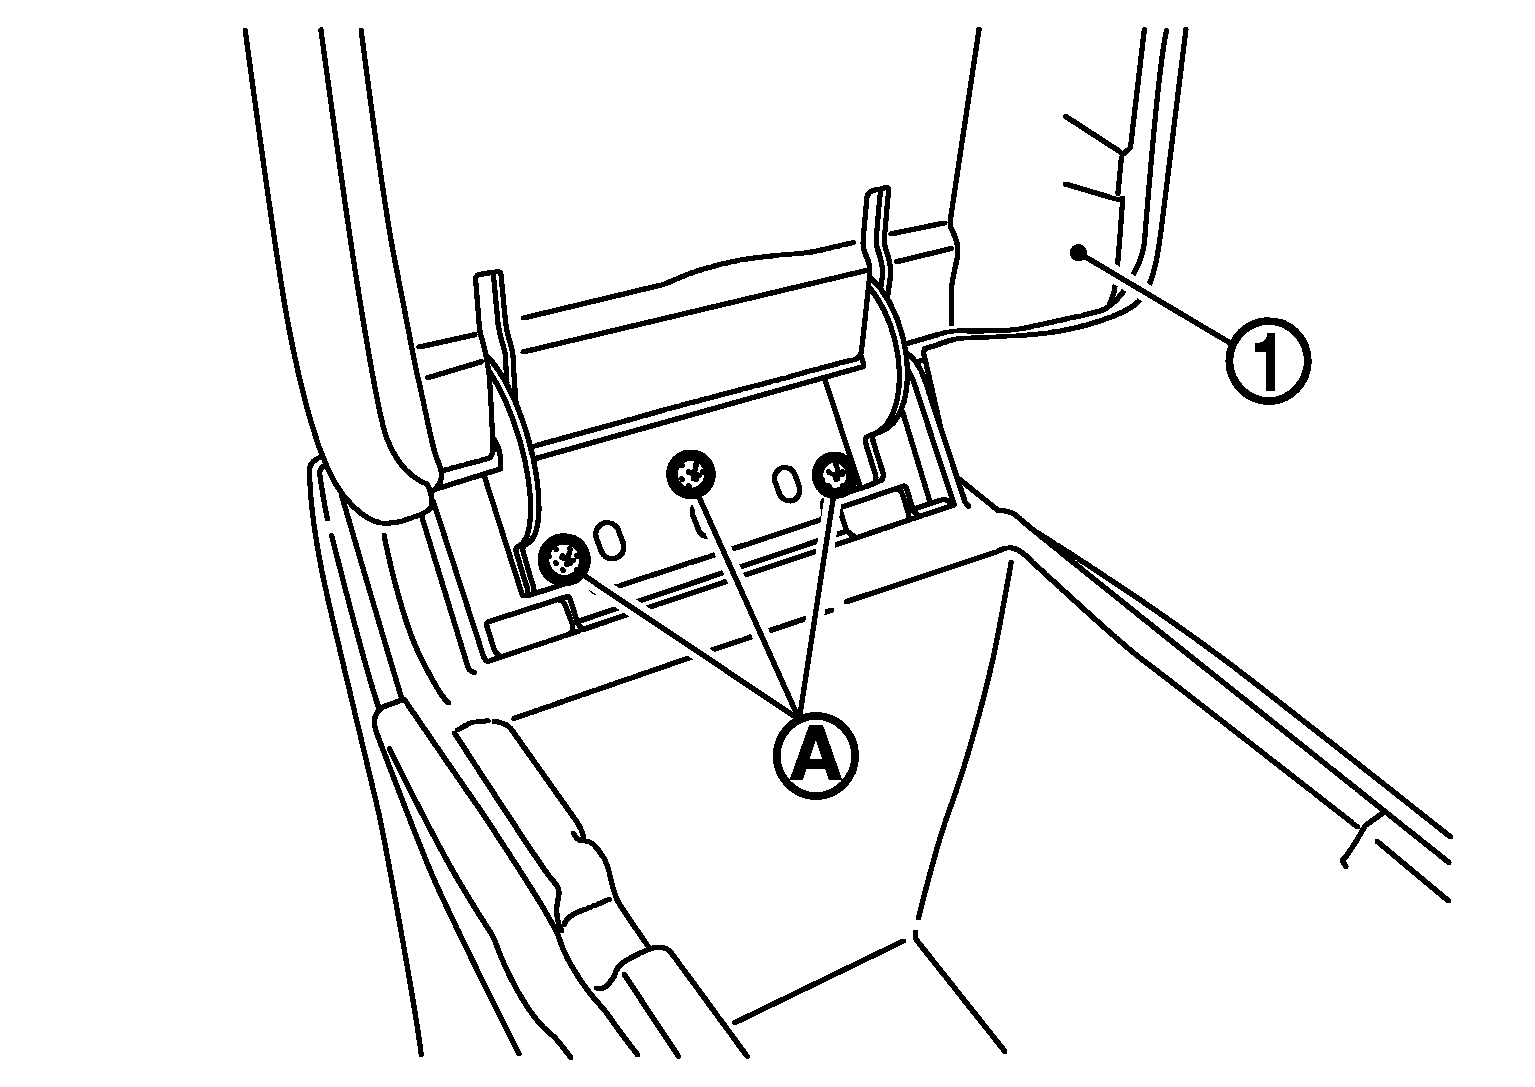
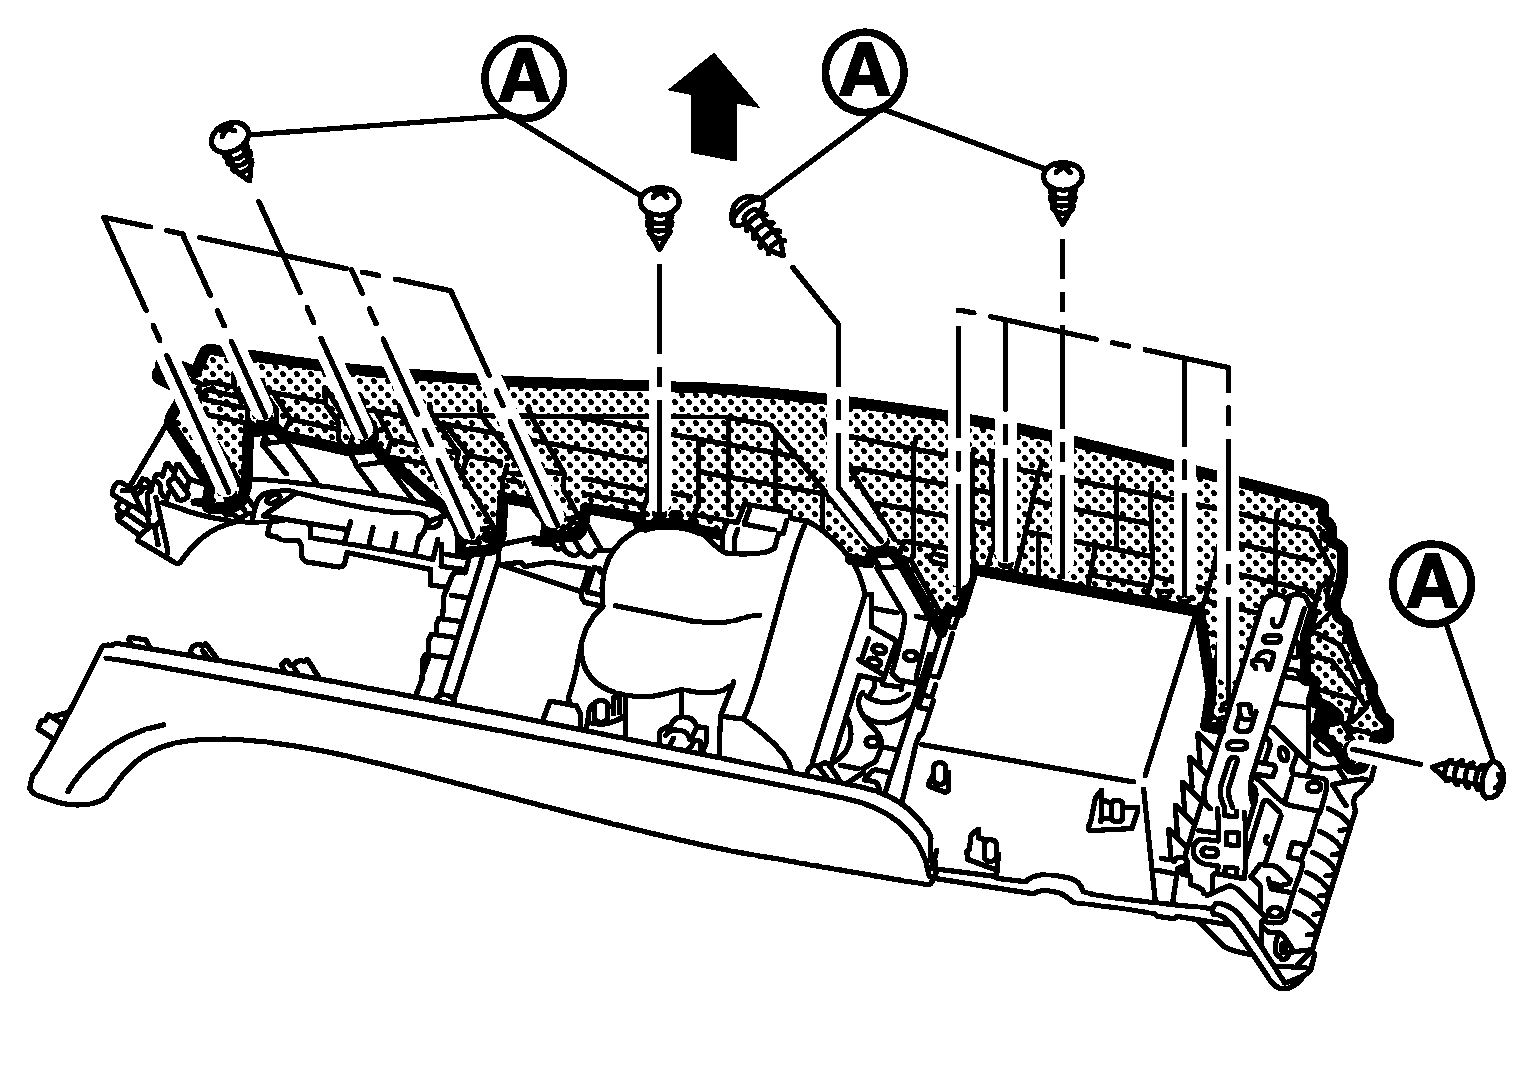
- Remove console lid assembly (1) fixing screws (A), and then remove console lid assembly.
 Courtesy of NISSAN NORTH AMERICA, INC.
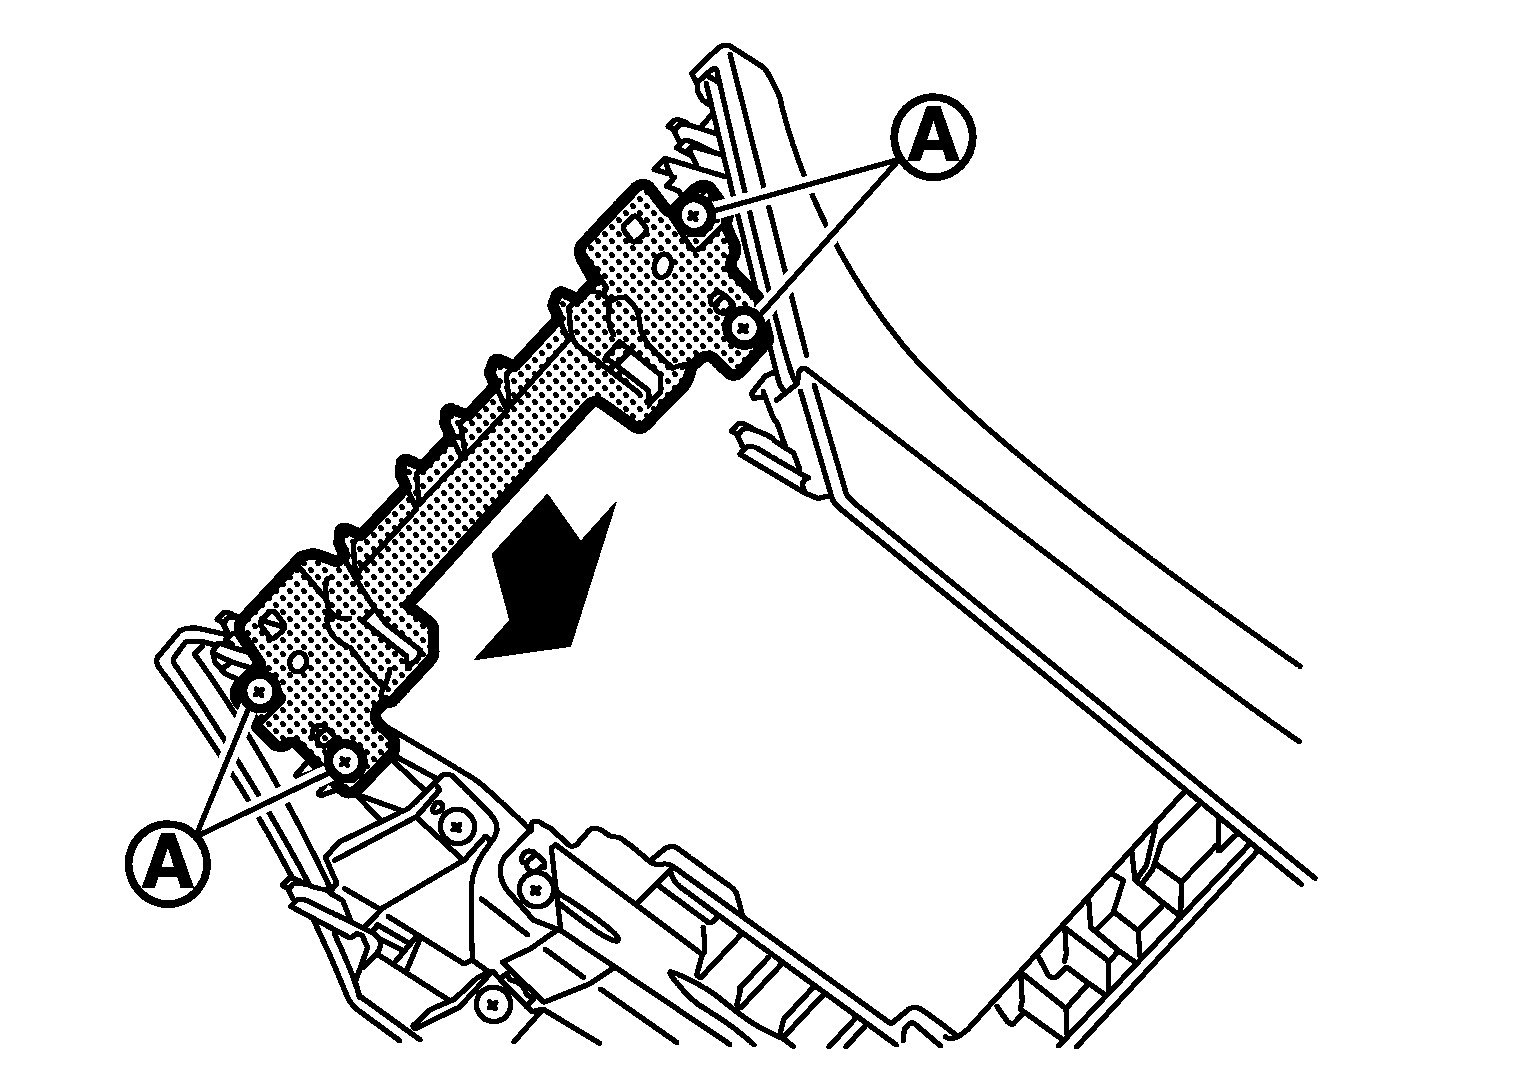
- Remove console front bracket.
 Courtesy of NISSAN NORTH AMERICA, INC.
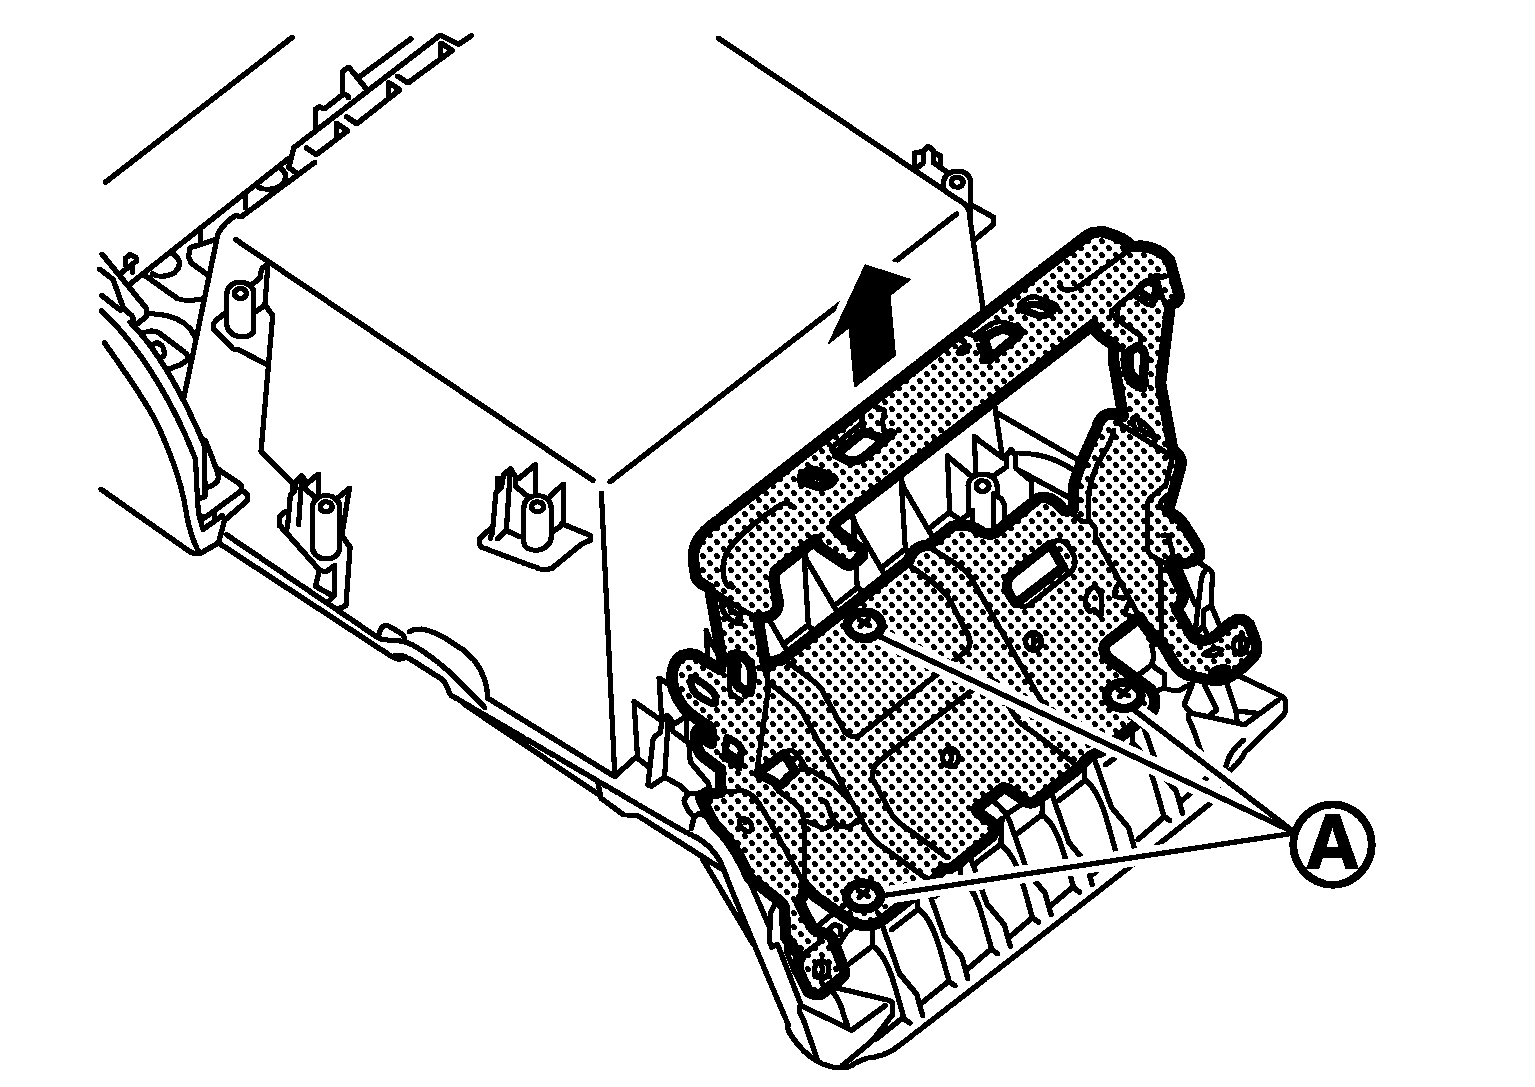
- Remove console front bracket fixing screws (A).
- Pull the console front bracket toward the direction of the arrow.
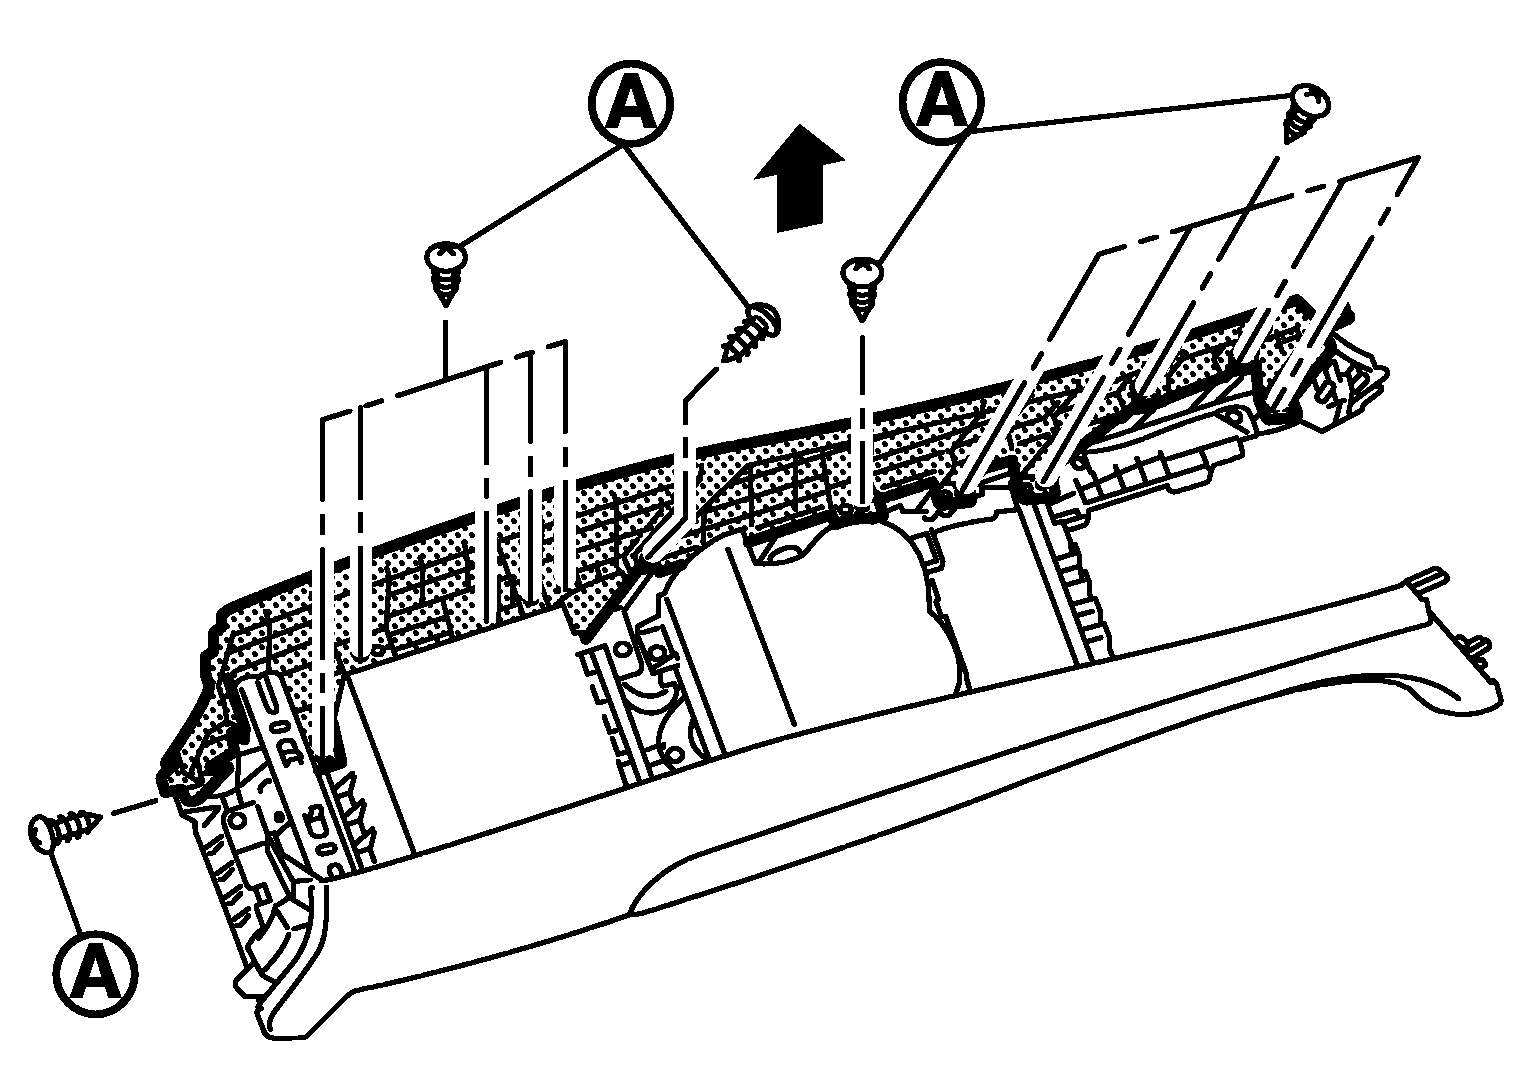
- Remove console body RH.
 Courtesy of NISSAN NORTH AMERICA, INC.
- Remove console body RH fixing screws (A).
- Pull the console body RH toward the direction of the arrow.
- Remove console body LH.
 Courtesy of NISSAN NORTH AMERICA, INC.
- Remove console body LH fixing screws (A).
- Pull the console body LH toward the direction of the arrow.
- Remove console reinforcement.
 Courtesy of NISSAN NORTH AMERICA, INC.
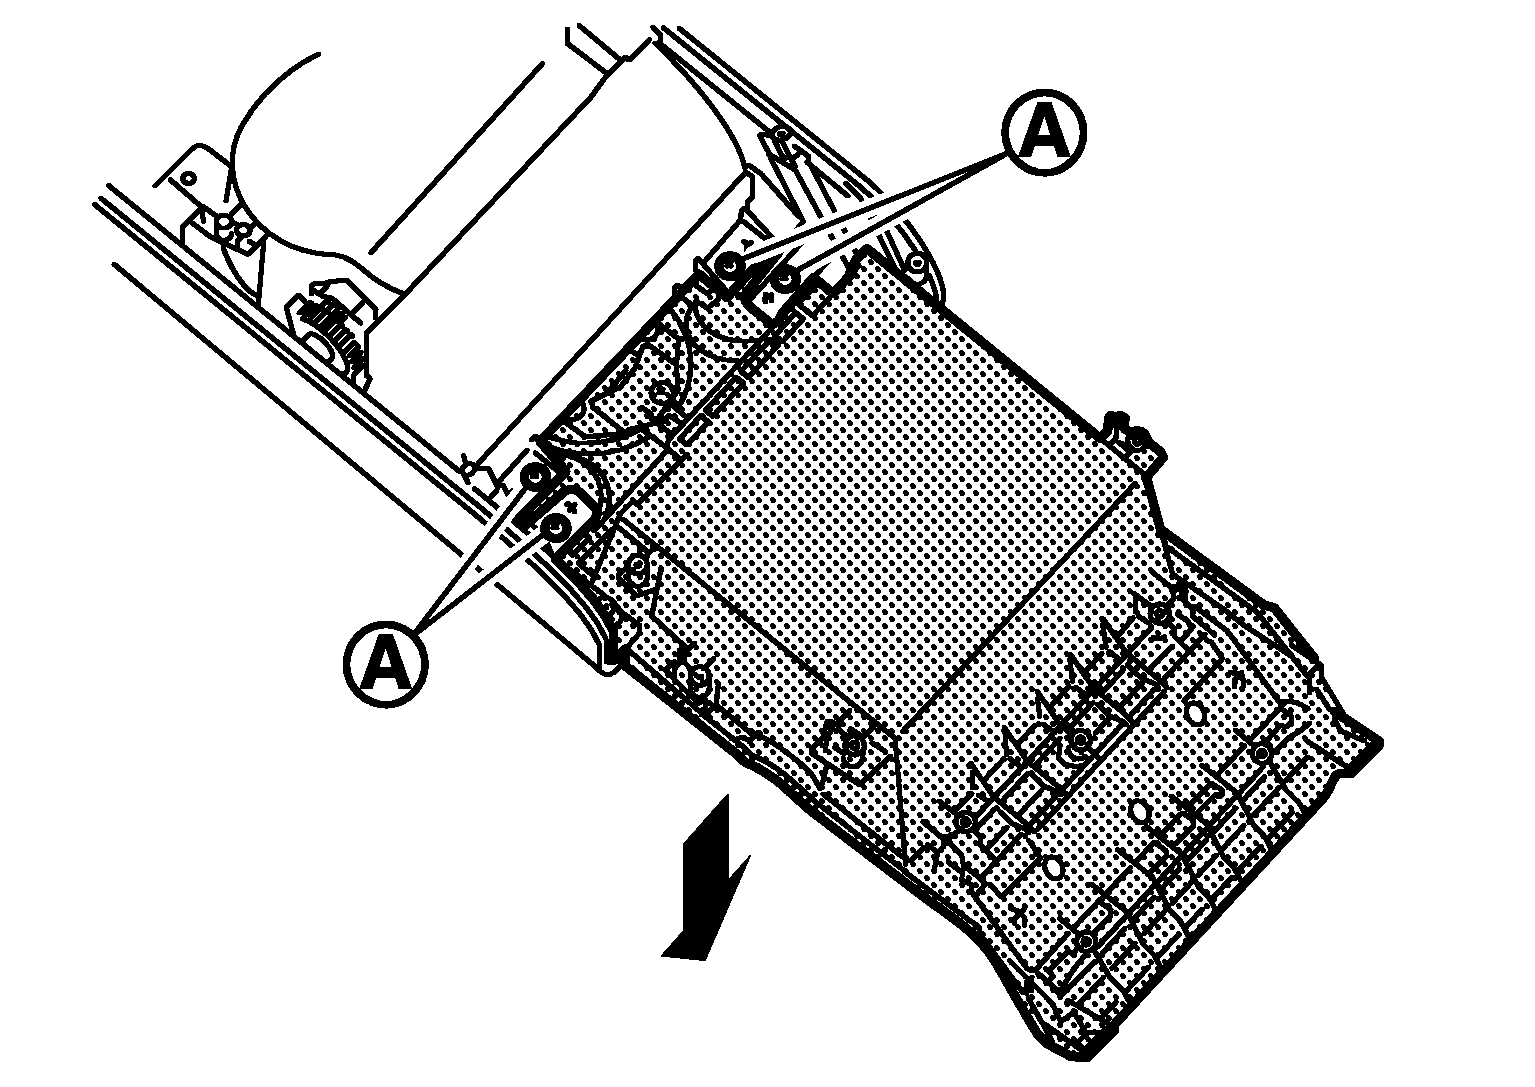
- Remove console reinforcement fixing screws (A).
- Pull the console reinforcement toward the direction of the arrow.
- Remove console box assembly.
 Courtesy of NISSAN NORTH AMERICA, INC.
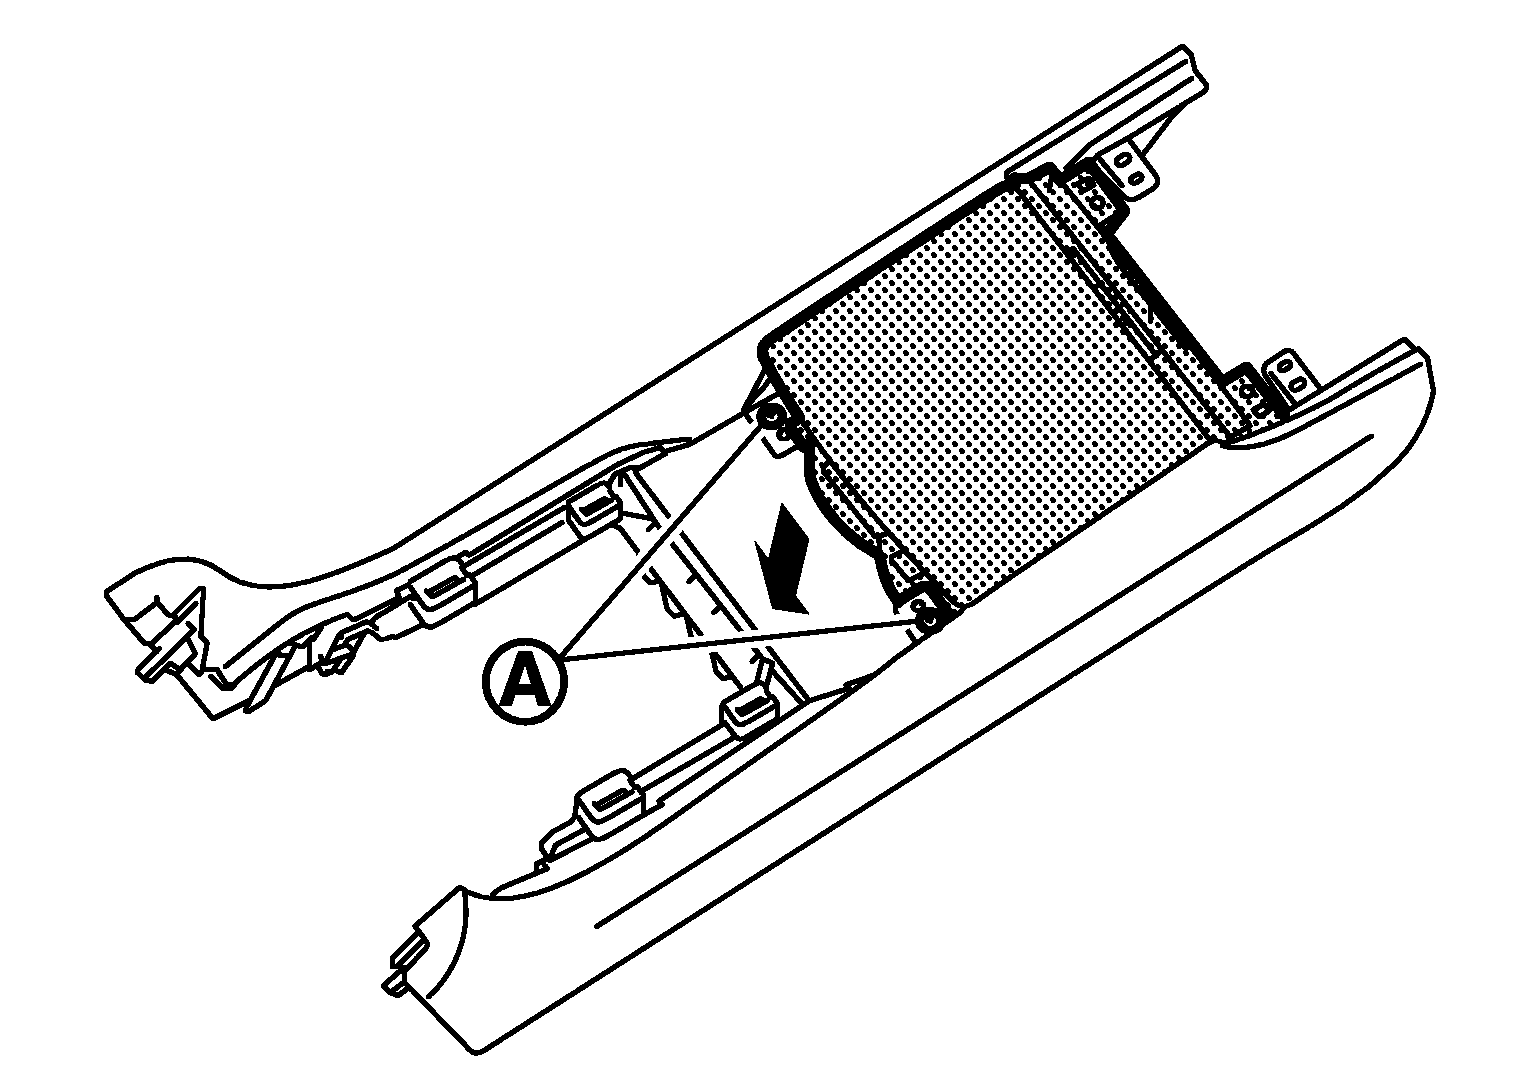
- Remove console box assembly fixing screws (A).
- Pull the console box assembly toward the direction of the arrow.
- Remove cup holder assembly.
 Courtesy of NISSAN NORTH AMERICA, INC.
- Remove cup holder assembly fixing screws (A).
- Pull the cup holder assembly toward the direction of the arrow.