- Remove drain plug and filler plug.
- Remove harness brackets.
- Remove main shaft oil seal from front case.
CAUTION:
Never damage the front case and main shaft.
- Remove front oil seal from front case.
CAUTION:
Never damage the front case and front drive shaft.
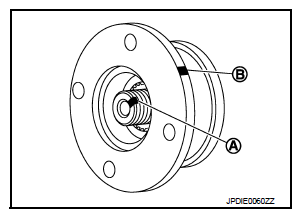
- Remove self-lock nut.
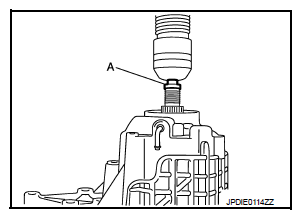
- Put a matching mark (A) on the end of main shaft. The mark should be in line with the mark (B) on the companion flange.
CAUTION:
For the matching mark, use paint. Never damage main shaft.
 Courtesy of NISSAN NORTH AMERICA, INC.
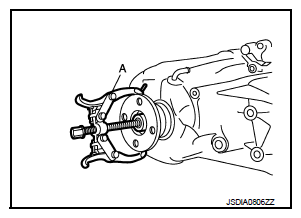
- Remove companion flange with a puller (A) (commercial service tool).
CAUTION:
Never damage the companion flange.
 Courtesy of NISSAN NORTH AMERICA, INC.
- Remove rear oil seal from rear case with the puller (A) [SST: KV381054S0 (J-34286)].
CAUTION:
Never damage the rear case.
 Courtesy of NISSAN NORTH AMERICA, INC.
- Remove spacer from main shaft.
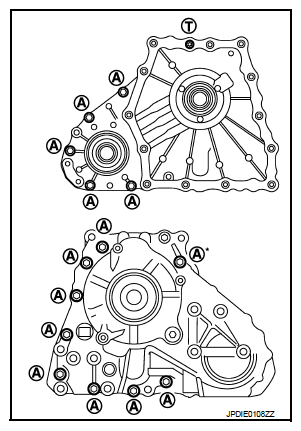
- Remove front case and rear case fixing bolts, then remove harness bracket.
| Bolts symbol |
Quantity |
| A |
14 |
| T (TORX bolt) |
1 |
| *: With harness bracket. |
 Courtesy of NISSAN NORTH AMERICA, INC.
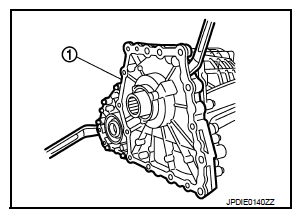
- Remove front case (1) from rear case by levering it up with a suitable tool.
CAUTION:
Never damage the mating surface.
 Courtesy of NISSAN NORTH AMERICA, INC.
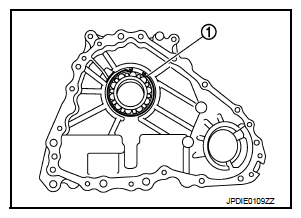
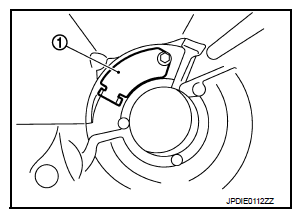
- Remove snap ring (1) from front case.
CAUTION:
Never damage front case.
 Courtesy of NISSAN NORTH AMERICA, INC.
- Remove main shaft bearing from front case.
CAUTION:
Never use tools. Always remove by hand.
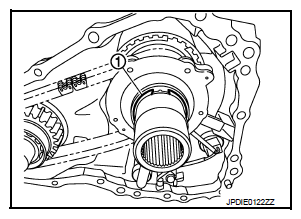
- Remove snap ring (1) from main shaft.
CAUTION:
Never damage main shaft.
 Courtesy of NISSAN NORTH AMERICA, INC.
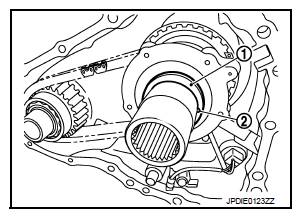
- Remove spacer (1) and steel ball (2) from main shaft.
CAUTION:
Be careful not to drop the steel ball.
- Remove Oil pump from main shaft.
- Remove drive chain and front drive shaft.
CAUTION:
Never use tools. Always remove by hand.
 Courtesy of NISSAN NORTH AMERICA, INC.
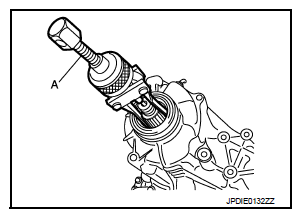
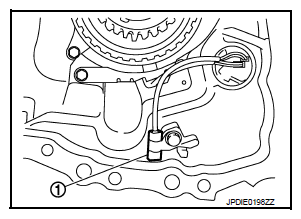
- Remove transfer fluid temperature sensor bolt from rear case. And then, remove transfer fluid temperature sensor (1).
 Courtesy of NISSAN NORTH AMERICA, INC.
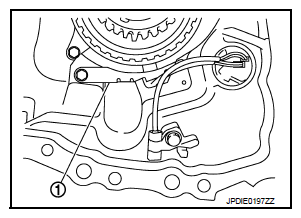
- Remove oil cover bolts from rear case. And then, remove oil cover (1).
 Courtesy of NISSAN NORTH AMERICA, INC.
- Remove retainer from AWD solenoid harness connector.
- Remove AWD solenoid harness connector from rear case.
- Remove O-ring from AWD solenoid harness connector.
- Remove main shaft assembly from rear case with the drift (A) [SST: ST33052000 (-)].
 Courtesy of NISSAN NORTH AMERICA, INC.
- Remove snap ring (1) from rear case.
 Courtesy of NISSAN NORTH AMERICA, INC.
- Remove rear bearing from rear case.
CAUTION:
Never use tools. Always remove by hand.
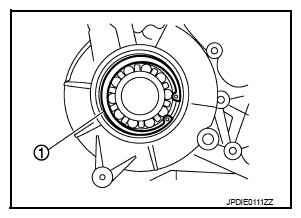
- Remove baffle plate (1) from rear case.
 Courtesy of NISSAN NORTH AMERICA, INC.
- Remove breather tube from rear case.
- Remove breather tube from front case.
- Perform inspection after disassembly. Refer to
"INSPECTION ".