Repair procedures: Replacement
- Disconnect the negative (-) battery terminal.
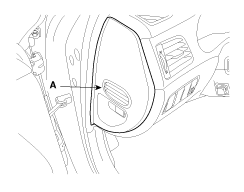
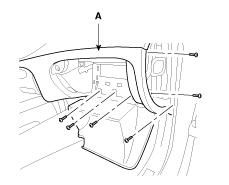
- Remove the crash pad side cover (A).
 Courtesy of HYUNDAI MOTOR AMERICA
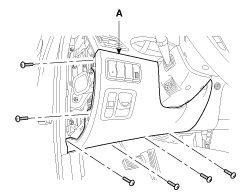
- After loosening the crash pad lower panel mounting screws, then remove the lower panel (A).
 Courtesy of HYUNDAI MOTOR AMERICA
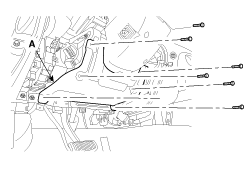
- After loosening the mounting bolts, then remove the reinforcing panel (A).
 Courtesy of HYUNDAI MOTOR AMERICA
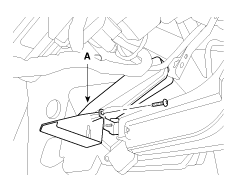
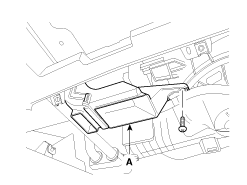
- Remove the shower duct (A).
 Courtesy of HYUNDAI MOTOR AMERICA
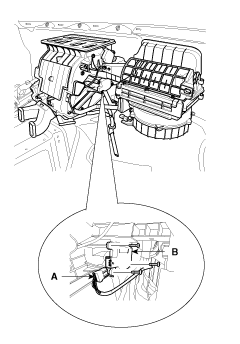
- Disconnect the temperature control actuator connector (A) after removing the air duct.
- Loosen the mounting screw and then remove the temperature control actuator (B).
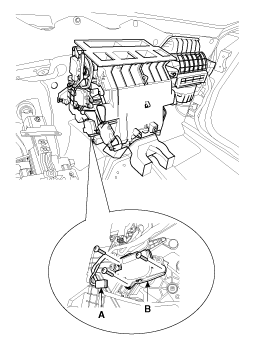 Courtesy of HYUNDAI MOTOR AMERICA
- Remove the crash pad side cover (A).
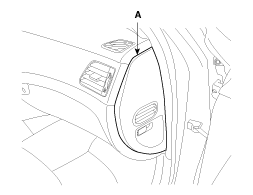 Courtesy of HYUNDAI MOTOR AMERICA
- Remove the crash pad under cover (A).
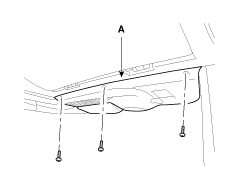 Courtesy of HYUNDAI MOTOR AMERICA
- Disconnect the damper (B) from the glove box (C).
- Remove the glove box from the lift (B).
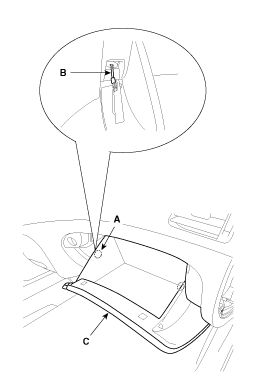 Courtesy of HYUNDAI MOTOR AMERICA
- After loosening the mounting screws, then remove the glove box housing (A).
 Courtesy of HYUNDAI MOTOR AMERICA
- Remove the shower duct (A).
 Courtesy of HYUNDAI MOTOR AMERICA
- Loosen the mounting screw and then remove the temperature control actuator (B).
 Courtesy of HYUNDAI MOTOR AMERICA
- Installation is the reverse order of removal.