Repair Procedures: Reassembly
- Wrap tape around the driveshaft spline (TJ) to prevent damage to the boots.
- Assemble the transaxle side joint boot and bands.
- Using the alignment marks (D) made during disassembly as a guide, install the spider assembly (A) and snap ring (B) on the driveshaft splines (C).
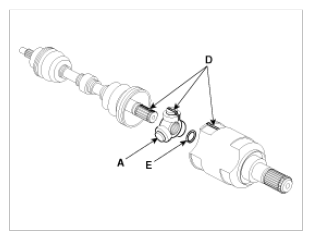 Courtesy of HYUNDAI MOTOR AMERICA
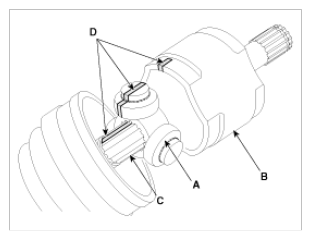 Courtesy of HYUNDAI MOTOR AMERICA
- Add specified grease to the joint boot as much as it was wiped away at inspection.
- Install the both boot band.
- To control the air in the TJ boot, keep the specified distance between the boot bands when they are tightened.
| Engine |
TM |
Distance (L) mm (in) |
| LH |
RH |
| Gasoine 1.6 GDI |
AT |
523.2(20.6) |
815.0(32.1) |
| MT |
546.3(21.5) |
826.6(32.5) |
| Gamma 1.6 GDI |
DCT |
493.5(19.4) |
879.0(34.6) |
- Using the SST (09495-3K000), secure the TJ boot band.
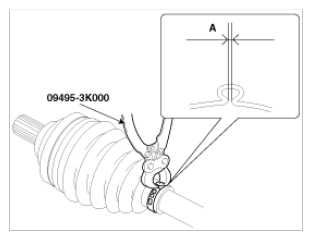 Courtesy of HYUNDAI MOTOR AMERICA