Removal Procedure
 Courtesy of GENERAL MOTORS CORP.
- Disconnect the negative battery cable. Refer to Battery Negative Cable Disconnect/Connect Procedure .
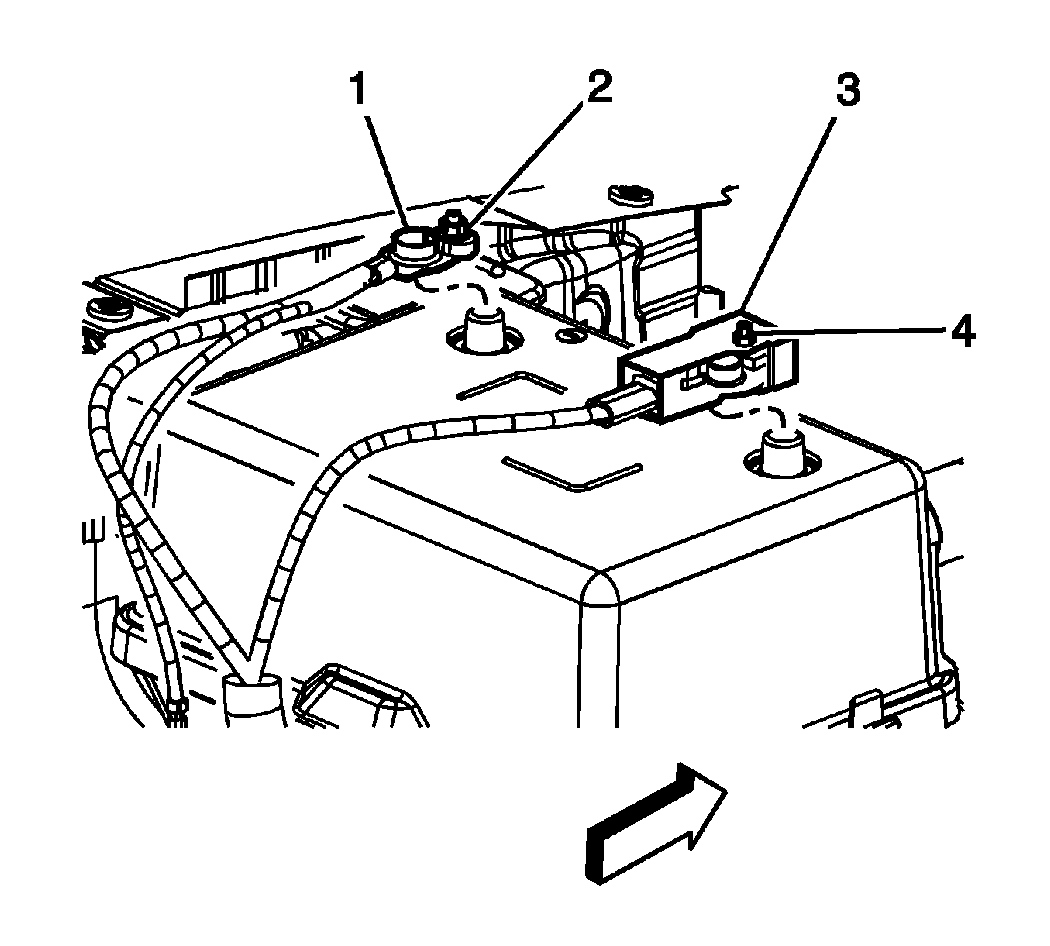
- Open the protective cover to access the positive battery cable terminal.
- Loosen the positive battery cable nut (3).
- Remove the positive battery cable (4) from the battery.
- Remove the bolt (1) securing the negative battery cable ground (2) to the battery tray.
 Courtesy of GENERAL MOTORS CORP.
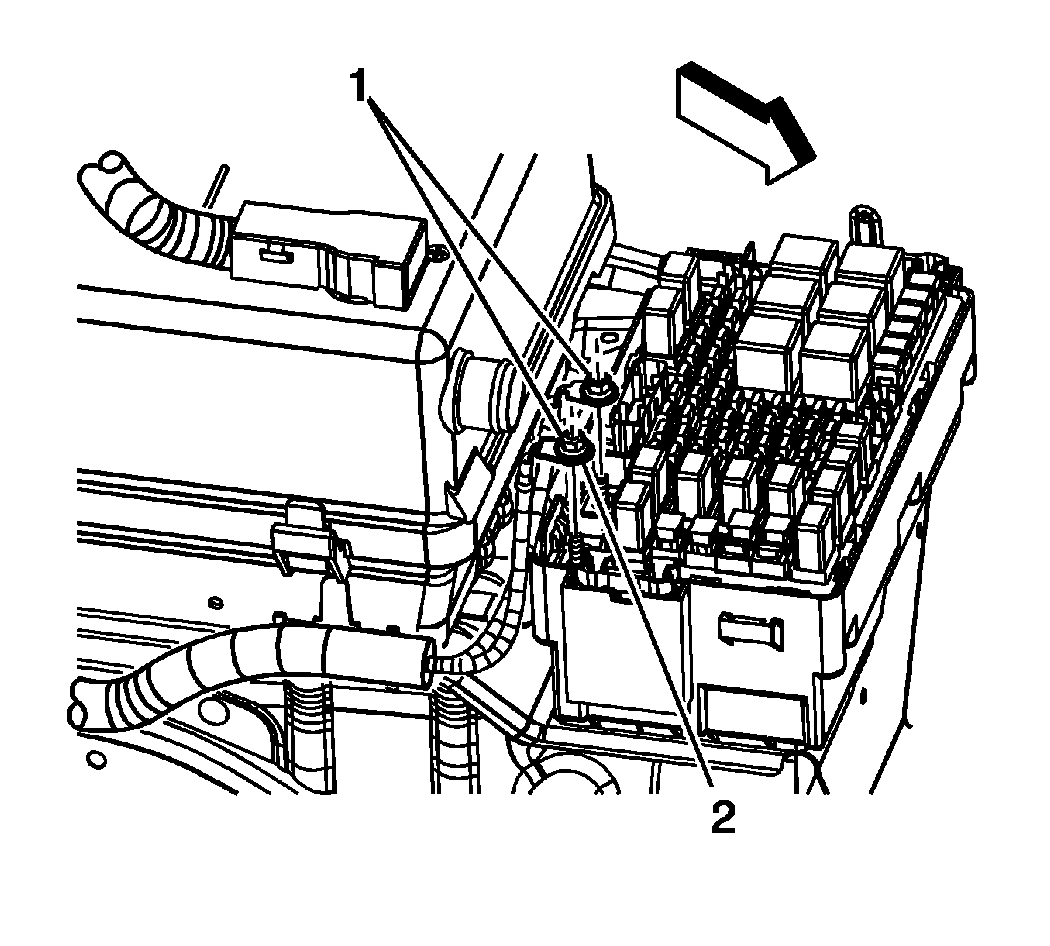
- Press the locking tabs inward in order the remove the underhood fuse block cover from the underhood fuse block.
- Remove the nuts (1) securing the battery cables to the underhood fuse block.
 Courtesy of GENERAL MOTORS CORP.
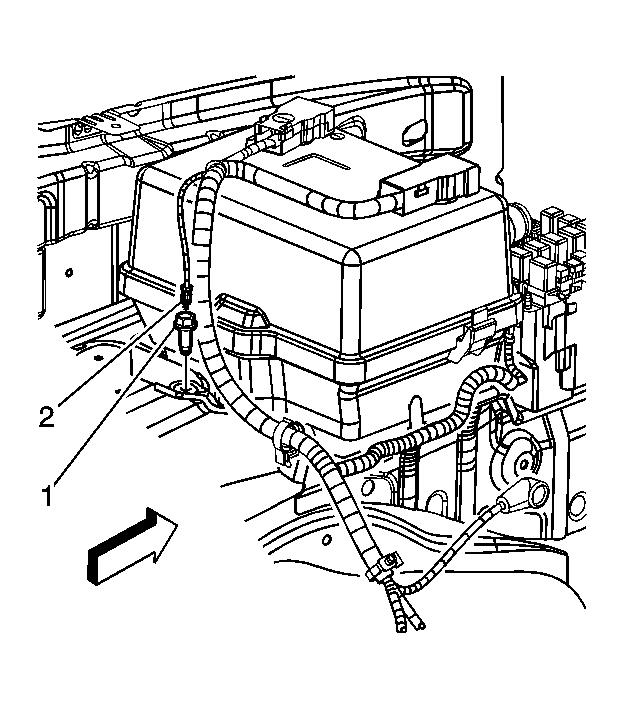
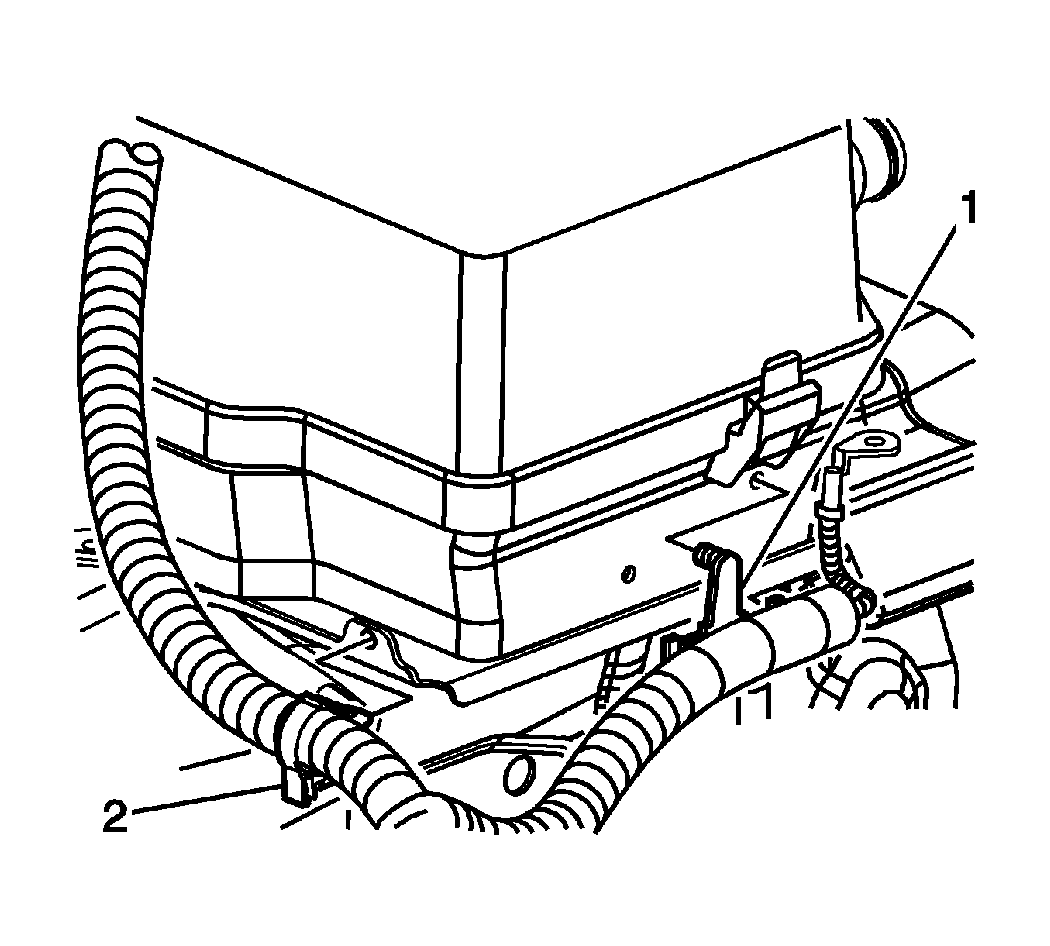
- Remove the battery cable harness clips (1, 2) from the battery tray.
 Courtesy of GENERAL MOTORS CORP.
- Remove the left wheelhouse liner. Refer to Wheelhouse Panel Replacement
.
 Courtesy of GENERAL MOTORS CORP.
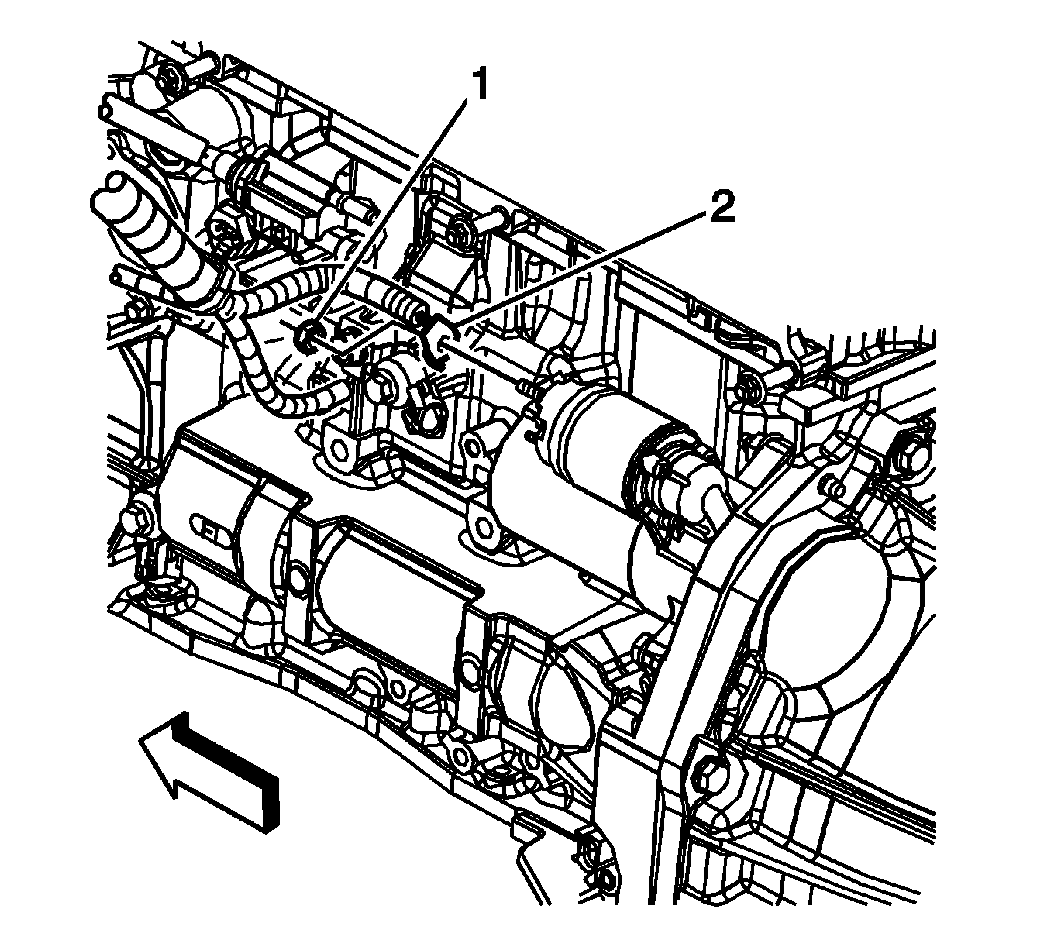
- Remove the starter terminal nut (1) and remove the positive battery cable terminal (2) from the starter.
 Courtesy of GENERAL MOTORS CORP.
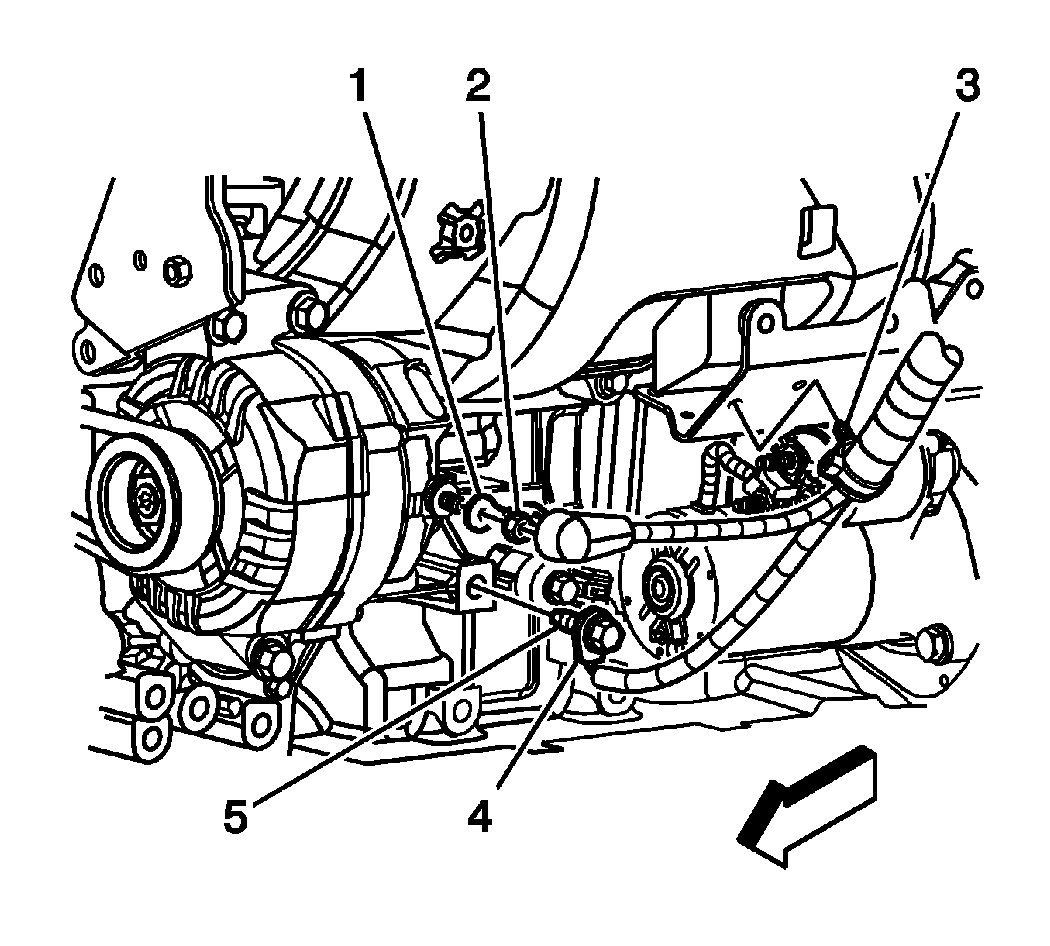
- Remove the bolt (5) securing the negative battery cable ground terminal (4) to the engine block.
- Remove the battery cable clip (3) from the engine wiring harness bracket.
- Remove the battery cables from the vehicle.