EPS Control Unit Removal/Installation
- Do the battery terminal disconnection procedure (see BATTERY TERMINAL DISCONNECTION AND RECONNECTION
).
- Remove the under-dash fuse/relay box (see REMOVAL AND INSTALLATION
).
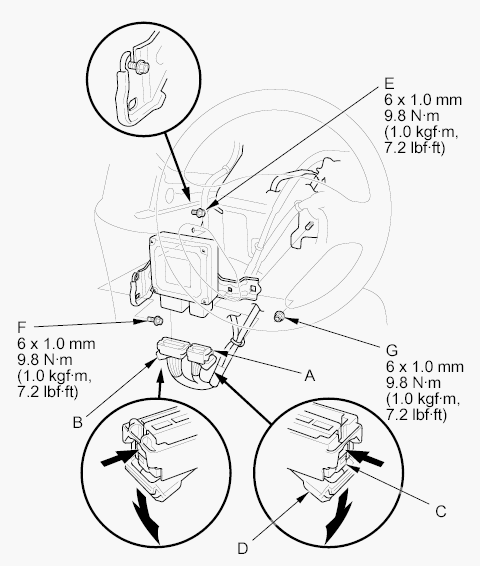
- Disconnect EPS control unit connector A (11P) and connector B (16P) by pushing the lock (C) and pulling down the lever (D) from the EPS control unit.
 Courtesy of AMERICAN HONDA MOTOR CO., INC.
- Loosen the bolt (E).
- Remove the bolt (F) and nut (G) from the EPS control unit bracket.
- Remove the EPS control unit with the bracket from the body.
- Install the EPS control unit in the reverse order of removal.
NOTE:
- Install the bracket with the EPS control unit as shown in position.
- Connect EPS control unit connector A (11P) and connector B (16P), then confirm the connectors are fully seated.
- Do the battery terminal reconnection procedure (see BATTERY TERMINAL DISCONNECTION AND RECONNECTION
).
- After installation, start the engine, allow it to idle, and turn the steering wheel from lock to lock several times. Make sure that the EPS indicator does not come on.