Intake Manifold Removal and Installation: Installation
- Reassemble the intake manifold.
NOTE:
Refer to the Exploded View if needed during this procedure.
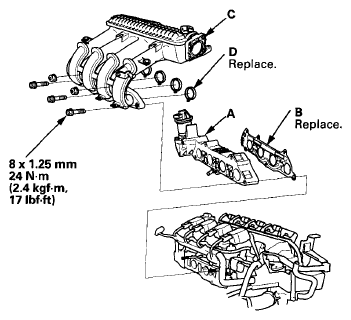
- Install the EGR plate (A) with a new gasket (B).
 Courtesy of AMERICAN HONDA MOTOR CO., INC.
- Install the intake manifold (C) with new gaskets (D), and tighten the bolts/nuts in a crisscross pattern in three steps, beginning with the inner bolt.
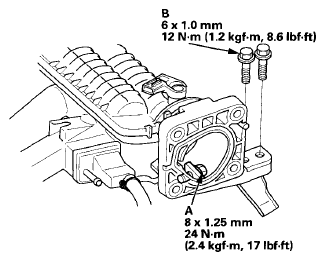
- Loosen the intake manifold bracket mounting bolt (A). Tighten the mounting bolts (B), then tighten the mounting bolt (A).
 Courtesy of AMERICAN HONDA MOTOR CO., INC.
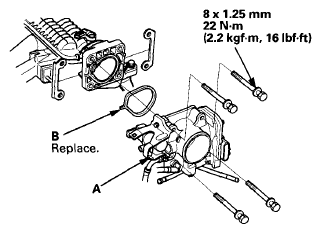
- Install the throttle body (A) with a new gasket (B).
 Courtesy of AMERICAN HONDA MOTOR CO., INC.
- Install the dipstick.
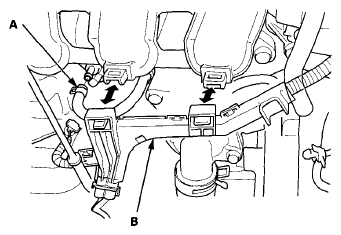
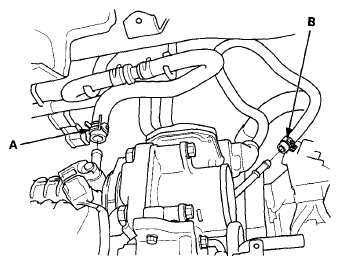
- Connect the PCV hose (A), and install the harness holder (B).
 Courtesy of AMERICAN HONDA MOTOR CO., INC.
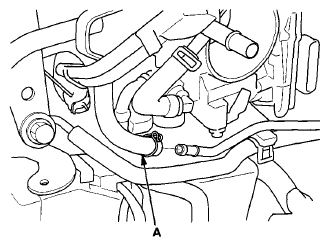
- Connect the EVAP canister purge hose (A).
 Courtesy of AMERICAN HONDA MOTOR CO., INC.
- Connect the brake booster vacuum hose (A) and the EVAP canister hose (B).
 Courtesy of AMERICAN HONDA MOTOR CO., INC.
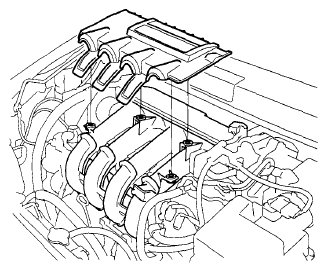
- Install the engine wire harness connectors and the wire harness clamps to the intake manifold:
- Throttle actuator connector
- MAP sensor connector
- EGR valve connector
- EVAP canister purge valve connector
- Install the air cleaner (see
AIR CLEANER REMOVAL/INSTALLATION
).
- Install the engine cover.
 Courtesy of AMERICAN HONDA MOTOR CO., INC.