Oil Pump Chain Replacement: Installation
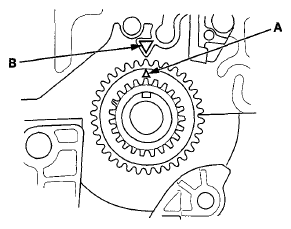
- Set the crankshaft to top dead center (TDC). Align the TDC mark (A) on the crankshaft sprocket with the pointer (B) on the engine block.
 Courtesy of AMERICAN HONDA MOTOR CO., INC.
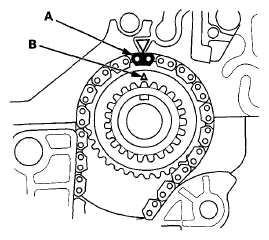
- Install the oil pump chain on the crankshaft sprocket with the colored link plate (A) aligned with the TDC mark (B) on the crankshaft sprocket.
 Courtesy of AMERICAN HONDA MOTOR CO., INC.
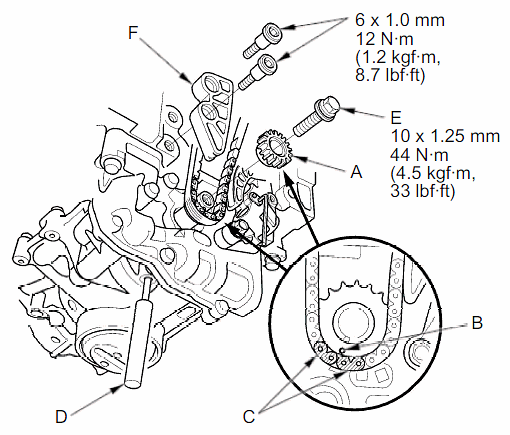
- Set the oil pump chain on the oil pump chain sprocket (A) with the punch mark (B) aligned with the center of the colored link plates (C), then install the oil pump chain sprocket to the oil pump.
 Courtesy of AMERICAN HONDA MOTOR CO., INC.
- To hold the rear balancer shaft, insert a 6 mm long pin punch (D) (Snap-on PPC108LA or equivalent) into the maintenance hole in the balancer shaft holder and through the rear balancer shaft.
- Apply new engine oil to the threads of the oil pump sprocket mounting bolt (E), then install the oil pump sprocket mounting bolt and the oil pump chain guide (F).
- Remove the 6 mm long pin punch.
- Check the auto-tensioner cam position. If the position is not aligned, set the first cam to the first edge of the rack (see step 4.
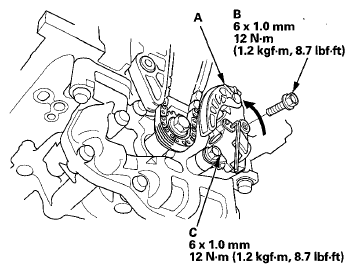
- Turn the oil pump chain auto-tensioner (A) counterclockwise, then install the upper oil pump chain auto-tensioner bolt (B), and tighten the lower oil pump chain auto-tensioner bolt (C).
 Courtesy of AMERICAN HONDA MOTOR CO., INC.
- Remove the 3.0 mm (7/64 in) diameter pin (A) from the oil pump chain auto-tensioner.
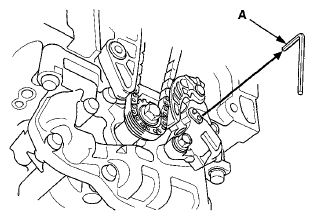 Courtesy of AMERICAN HONDA MOTOR CO., INC.
- Install the cam chain:
- Remove the wood block and the jack.
- Install the oil pan (see
OIL PAN INSTALLATION
).
- Install the drive belt (see
DRIVE BELT REMOVAL/INSTALLATION
).