Alternator Removal and Installation: Removal
- Remove the air intake duct (see step 1 on FRONT BULKHEAD COVER REPLACEMENT
).
- Do the battery terminal disconnection procedure (see BATTERY TERMINAL DISCONNECTION AND RECONNECTION
).
- Remove the engine cover (see IGNITION COIL REMOVAL/INSTALLATION
).
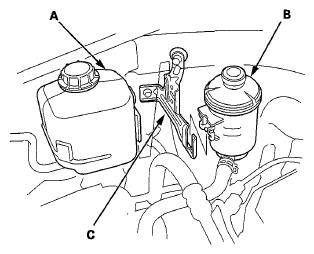
- Remove the coolant reservoir (A) and the power steering (P/S) fluid reservoir (B), then remove the holder bracket (C).
 Courtesy of AMERICAN HONDA MOTOR CO., INC.
- Remove the drive belt (see DRIVE BELT REPLACEMENT
).
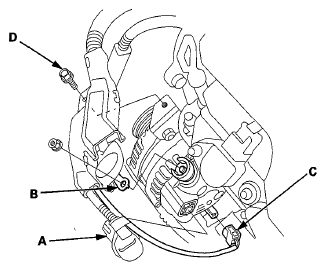
- Disconnect the alternator connector (A) and the positive alternator cable (B) from the alternator.
 Courtesy of AMERICAN HONDA MOTOR CO., INC.
- Disconnect the A/C compressor clutch connector (C) from the A/C compressor.
- Remove the bolt (D) securing the harness holder.
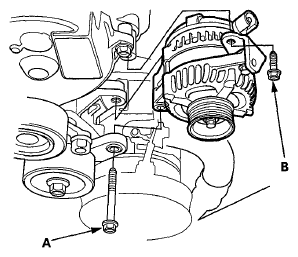
- Remove the mounting bolt (A) and the alternator bracket mounting bolt (B), then remove the alternator.
 Courtesy of AMERICAN HONDA MOTOR CO., INC.