Starter Removal and Installation: Installation
- Install the starter to the engine. Connect the starter cable (A) and connector (B). Make sure the crimped side of the starter cable terminal faces away from the starter when you connect it.
 Courtesy of AMERICAN HONDA MOTOR CO., INC.
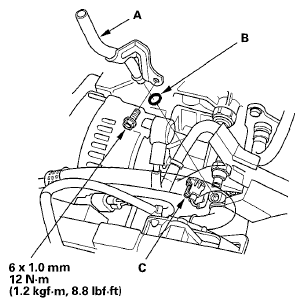
- Install the dipstick tube (A) with a new O-ring (B).
 Courtesy of AMERICAN HONDA MOTOR CO., INC.
- Connect the oil pressure switch connector (C).
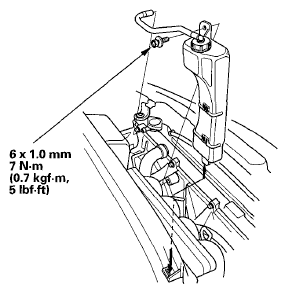
- Install the coolant reservoir.
 Courtesy of AMERICAN HONDA MOTOR CO., INC.
- Install the intake manifold (see INSTALLATION
).
- Do the battery terminal reconnection procedure (see BATTERY TERMINAL DISCONNECTION AND RECONNECTION
).
- Start the engine to make sure the starter works properly.