Hatch Adjustment
- Close the tailgate securely.
- Remove the support strut from each side (see HATCH SUPPORT STRUT REPLACEMENT
).
- Loosen each bolt slightly.
- Adjust the hatch (A) alignment in the following sequence:
- Pull down the rear portion of the headliner (see HEADLINER REMOVAL/INSTALLATION
). Take care not to bend the headliner excessively. Adjust the hatch hinges (B) right and left, as well as forward and rearward, using the elongated holes.
- Turn the hatch edge cushions (C), in or out as necessary, to make the hatch fit flush with the body at the side edges.
- Adjust the fit between the hatch and hatch opening by moving the striker (D).
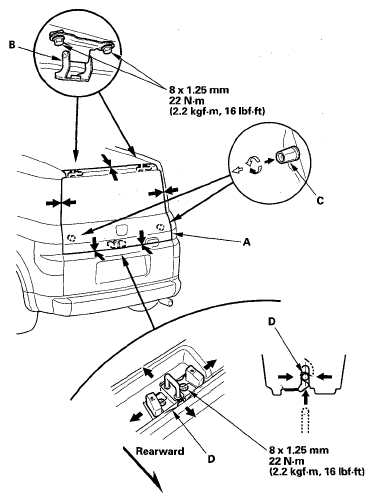 Courtesy of AMERICAN HONDA MOTOR CO., INC.
- Tighten each bolt securely.
- Check that the hatch opens properly and locks securely.
- Reinstall the support struts securely.
- Apply touch-up paint to the hinge mounting nuts and around the hinges.
- Apply multipurpose grease to the pivot portion of the hatch hinges (A) as indicated by the arrows.
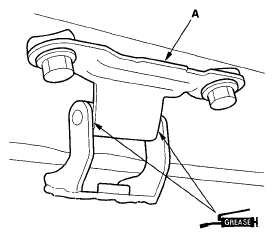 Courtesy of AMERICAN HONDA MOTOR CO., INC.