Transfer Assembly Installation
- Clean the areas where the transfer assembly contacts the transmission with solvent, and dry with compressed air. Then apply transmission fluid to the seal contact area.
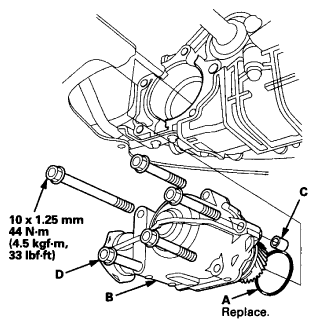
- Install a new O-ring (A) on the transfer assembly (B).
 Courtesy of AMERICAN HONDA MOTOR CO., INC.
- Install the dowel pin.(C) in the transfer housing.
- Install the one bolt (D) part-way in the rear lower of the transfer housing, and install the transfer assembly on the transmission.
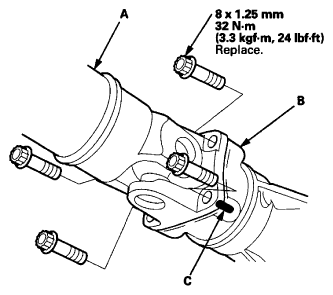
- Install the propeller shaft (A) to the transfer companion flange (B) by aligning the reference mark (C).
 Courtesy of AMERICAN HONDA MOTOR CO., INC.
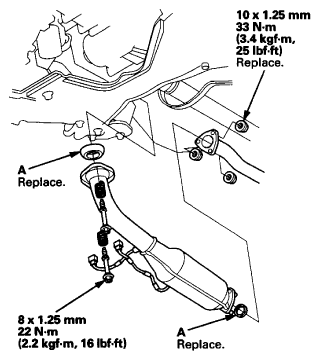
- Install the three-way catalytic converter (K24Z1 engine) or the under-floor three-way catalytic converter (K24Z6 engine) with the bolts, new self-locking nuts, and new gaskets (A).
 Courtesy of AMERICAN HONDA MOTOR CO., INC.
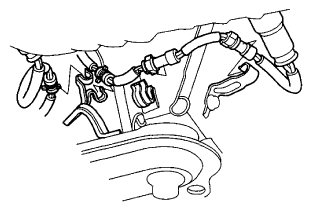
- Connect the A/F sensor connector (K24Z1 engine) and the secondary HO2S connector.
 Courtesy of AMERICAN HONDA MOTOR CO., INC.
- K24Z1 engine: Install the A/F sensor harness and the secondary HO2S harness in the harness clamps. K24Z6 engine: Install the secondary HO2S harness in the harness clamp.
 Courtesy of AMERICAN HONDA MOTOR CO., INC.
- Refill the transmission with ATF (see step 4
).