Transfer Assembly Removal
- Raise the vehicle, and make sure it is supported securely.
- Shift the transmission into the N position.
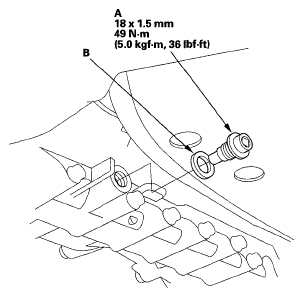
- Remove the drain plug (A), and drain the automatic transmission fluid (ATF).
 Courtesy of AMERICAN HONDA MOTOR CO., INC.
- Reinstall the drain plug with a new sealing washer (B). Tighten the drain plug to the specified torque.
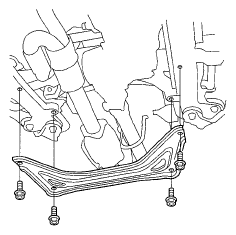
- Remove the front subframe stiffener.
 Courtesy of AMERICAN HONDA MOTOR CO., INC.
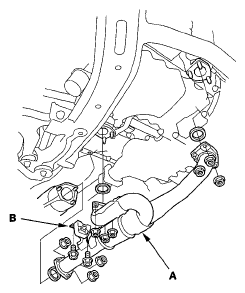
- Remove exhaust pipe A and its mount (B).
 Courtesy of AMERICAN HONDA MOTOR CO., INC.
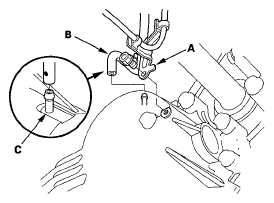
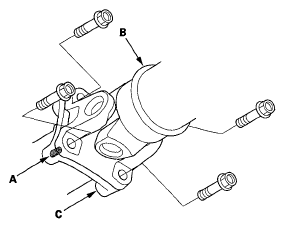
- Remove the bolt securing the transfer breather hose bracket (A), and disconnect the breather hose (B) from the breather pipe (C) on the transfer assembly.
 Courtesy of AMERICAN HONDA MOTOR CO., INC.
- Make a reference mark (A) across the propeller shaft (B) and the transfer companion flange (C) separate the propeller shaft from the transfer companion flange.
 Courtesy of AMERICAN HONDA MOTOR CO., INC.
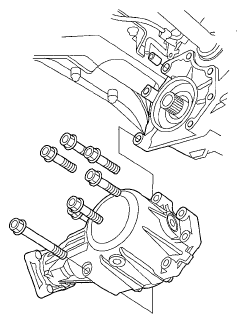
- Remove the transfer assembly from the transmission.
 Courtesy of AMERICAN HONDA MOTOR CO., INC.