Blower Unit Removal/Installation
- Remove the glove box housing (see
LOWER GLOVE BOX REMOVAL/INSTALLATION
).
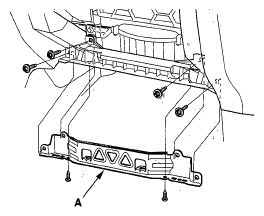
- Remove the self-tapping screws, the bolts and the glove box frame (A).
 Courtesy of AMERICAN HONDA MOTOR CO., INC.
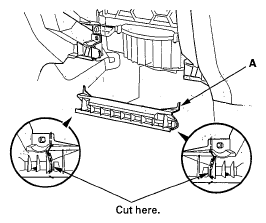
- Cut the plastic cross brace (A) in the glove box opening with diagonal cutters in the area shown, and discard it.
 Courtesy of AMERICAN HONDA MOTOR CO., INC.
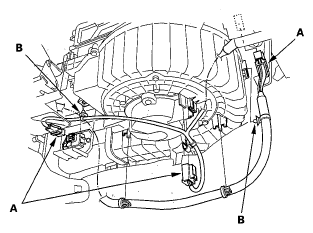
- Disconnect the connectors (A) from the front climate control unit, the front blower motor, and the front power transistor, then remove the wire harness clips (B).
 Courtesy of AMERICAN HONDA MOTOR CO., INC.
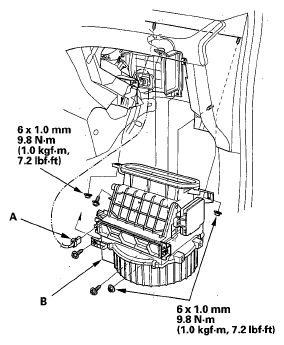
- Disconnect the connector (A) from the recirculation control motor, then remove the bolts, the mounting nuts and the blower unit (B).
 Courtesy of AMERICAN HONDA MOTOR CO., INC.
- Install the unit in the reverse order of removal. Make sure that there is no air leakage.