Starter Removal and Installation: Installation
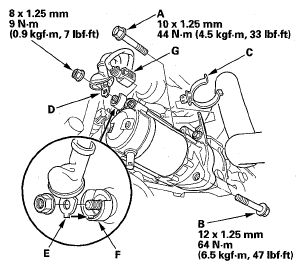
- Install the starter, then loosely install the upper mounting bolt (A) and the lower mounting bolt (B).
 Courtesy of AMERICAN HONDA MOTOR CO., INC.
- Tighten the upper mounting bolt and the lower mounting bolt.
- Install the water hose clamp (C).
- Install the starter cable (D) by aligning the tab on the terminal (E) and the groove (F) of the terminal holder, then install the connector (G).
- Install the splash shield (see step 34 on
ENGINE INSTALLATION
).
- Lower the vehicle on the lift.
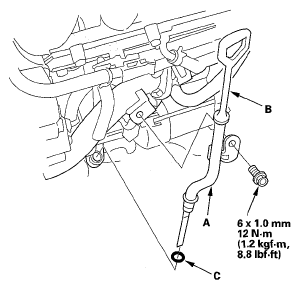
- Install the dipstick tube (A) and the dipstick (B) with new O-ring (C).
 Courtesy of AMERICAN HONDA MOTOR CO., INC.
- Connect the negative cable to the battery.
- Start the engine to make sure the starter works properly.
- Enter the anti-theft code for the audio system.
- Set the clock.