Starter Removal and Installation: Installation
- Install the starter (A) using a new gasket (B), then install the harness clamp (C), and connect the starter cable (D) to the B terminal and BLK wire (E) to the solenoid S terminal. Make sure the crimped side of the ring terminal faces away from the starter when you connect it.
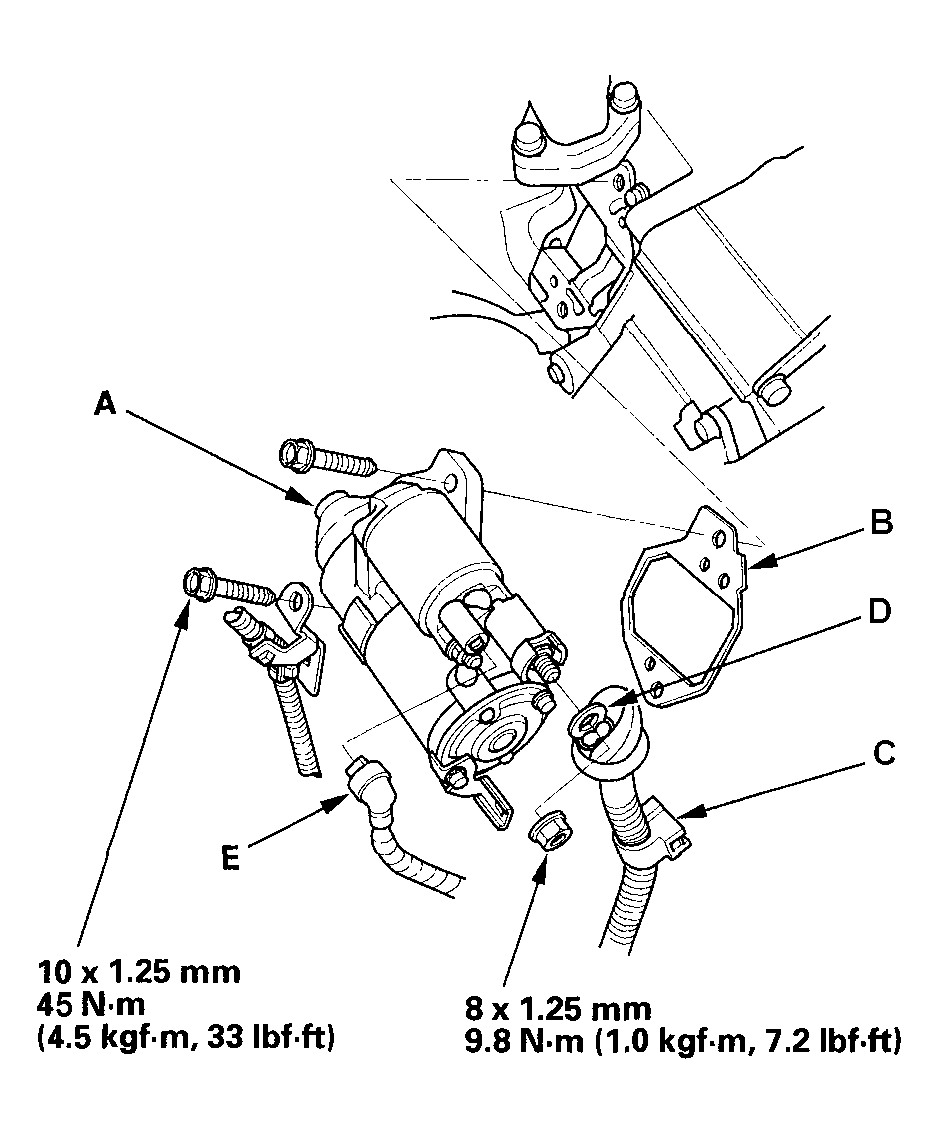 Courtesy of AMERICAN HONDA MOTOR CO., INC.
- Install the automatic transmission fluid (ATF) dipstick.
- Connect the positive cable to the battery first, then connect the negative cable.
- Start the engine to make sure the starter works properly.
- Enter the anti-theft codes for the radio and the navigation system, then enter the customer's audio presets.
- Do the power window control unit reset procedure (see RESETTING THE POWER WINDOW CONTROL UNIT
).
- Set the clock (on vehicles without navigation).