Special Tools Required
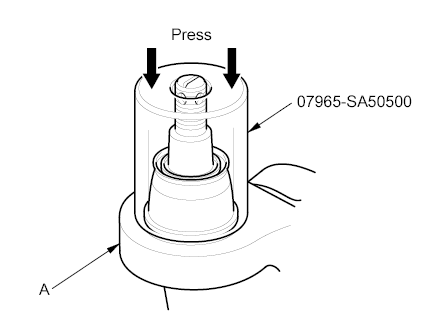
- Attachment, 36 mm 07965-SA50500
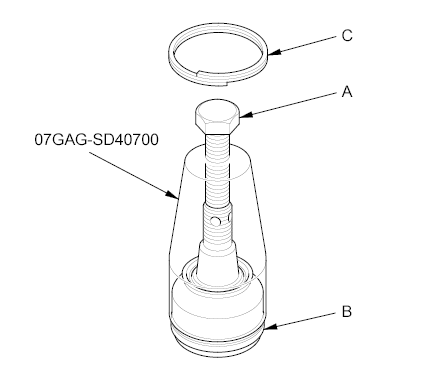
- Ball joint boot clip guide, 42 x 44 mm 07GAG-SD40700
- Check the ball joint boot for weakness, damage, cracks, and grease leaks.
NOTE:
- If the ball joint boot is damaged with grease leaks, replace the appropriate part as an assembly.
- If the ball joint boot is soft and cracked without grease leaks, go to step 2. Replace the appropriate ball joint boot.
- Remove the front knuckle (see KNUCKLE/HUB REPLACEMENT
).
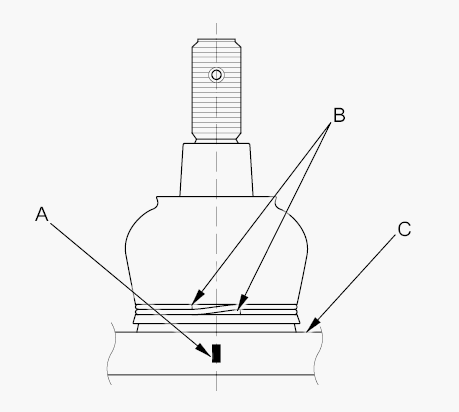
- SC model: Paint a alignment mark (A) in the center between the both boot clip end faces (B) on the appropriate part (C).
 Courtesy of AMERICAN HONDA MOTOR CO., INC.
- Except SC model: Remove the boot.
- SC model: Remove the boot clip and the boot.
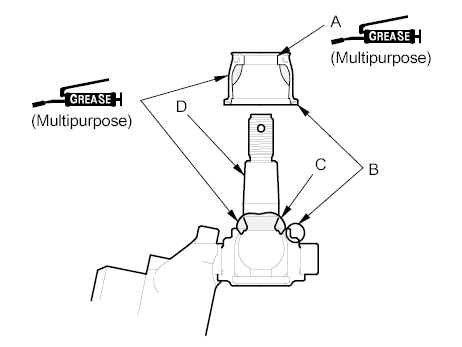
- Pack the interior and lip (A) of a new boot with grease. Keep the grease off of the boot-to-housing mating surfaces (B).
 Courtesy of AMERICAN HONDA MOTOR CO., INC.
- Pack fresh grease into the base (C). Do not let dirt or other foreign materials get into the boot.
- Install the boot on the ball joint, then squeeze it gently to force out any air, then wipe the grease off the tapered portion of the ball joint (D).
- Except SC model: Press the boot with the attachment until the bottom seats on the knuckle (A) all the way around.
 Courtesy of AMERICAN HONDA MOTOR CO., INC.
- SC model: Adjust the ball joint boot clip guide with the adjusting bolt (A) until its base is just above the groove around (B) the bottom of the boot. Then slide the clip (C) over the ball joint boot clip guide and into position on the boot.
 Courtesy of AMERICAN HONDA MOTOR CO., INC.
- SC model: Align the center between the both end faces of the boot clip to alignment mark of the appropriate part.
- After installing a boot, wipe any grease off the exposed portion of the ball joint pin.
- Install all of the removed parts.