Intake Manifold Removal and Installation: Installation
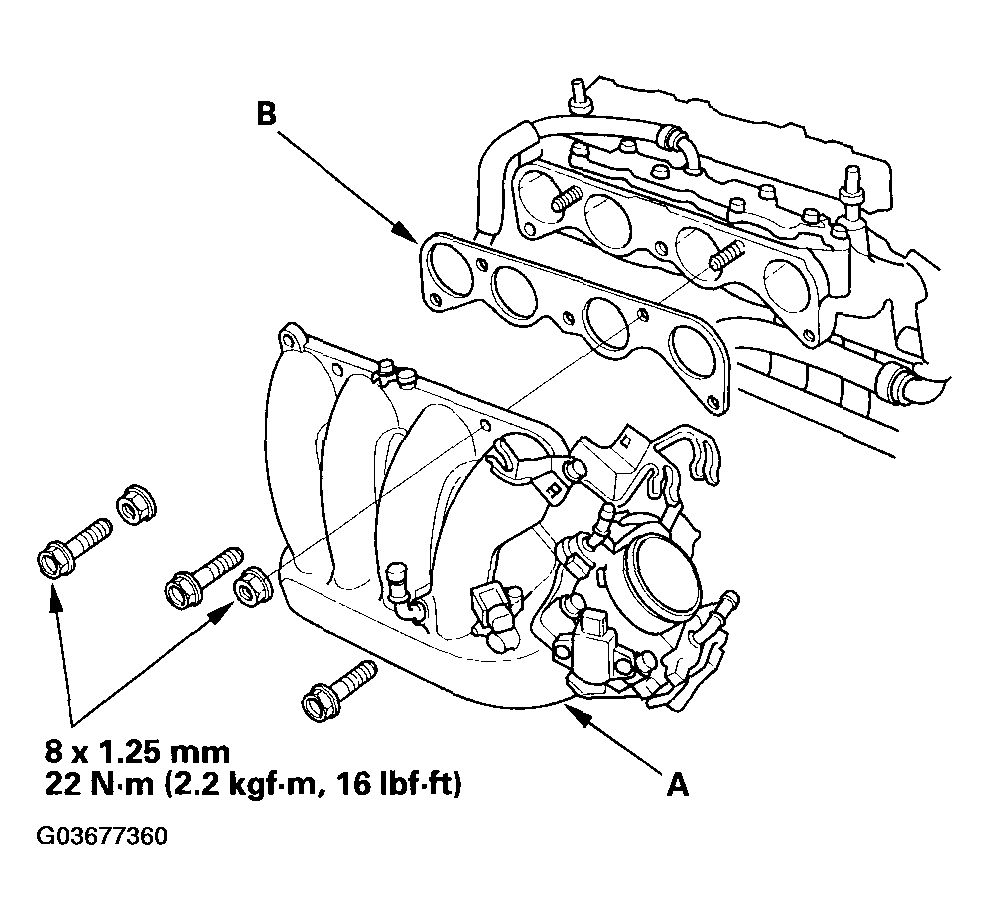
- Install the intake manifold (A) with a new gasket (B), and tighten the bolts/nuts in a crisscross pattern in two or three steps, beginning with the inner bolt.
 Courtesy of AMERICAN HONDA MOTOR CO., INC.
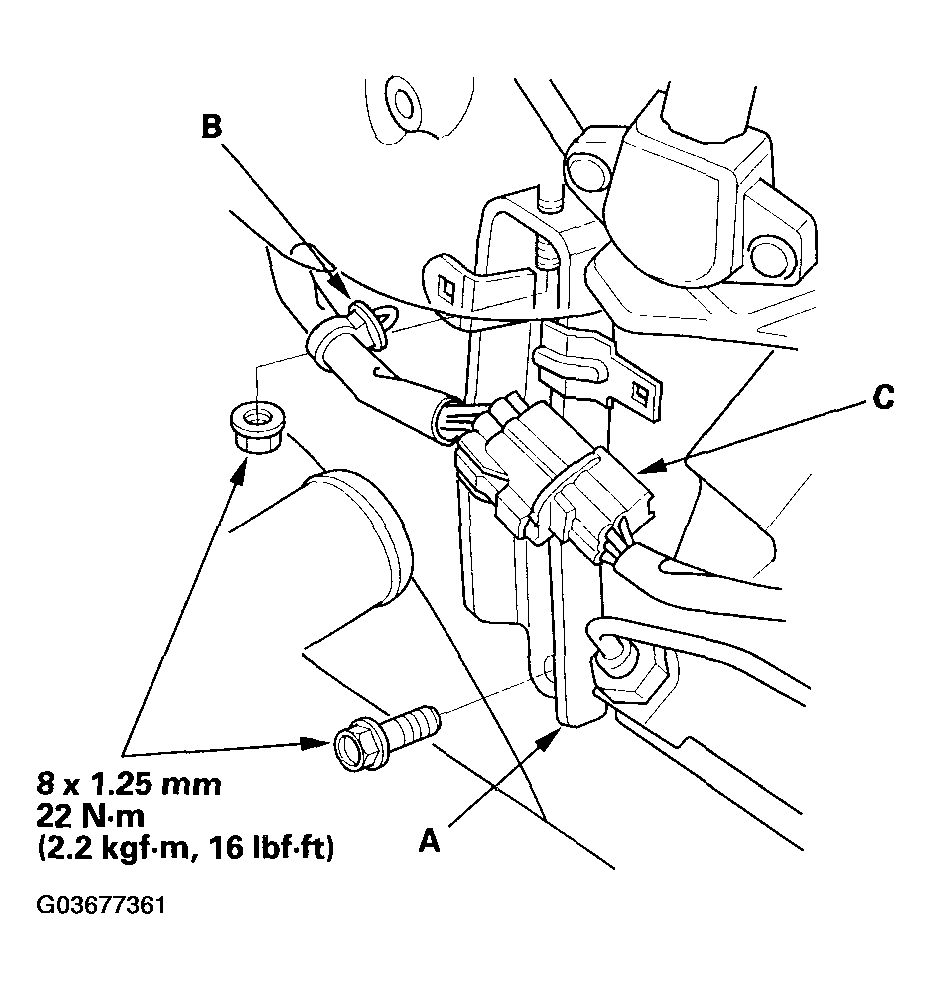
- Install the intake manifold bracket (A), then install the harness clamp (B), and harness connector (C) to the intake manifold bracket.
 Courtesy of AMERICAN HONDA MOTOR CO., INC.
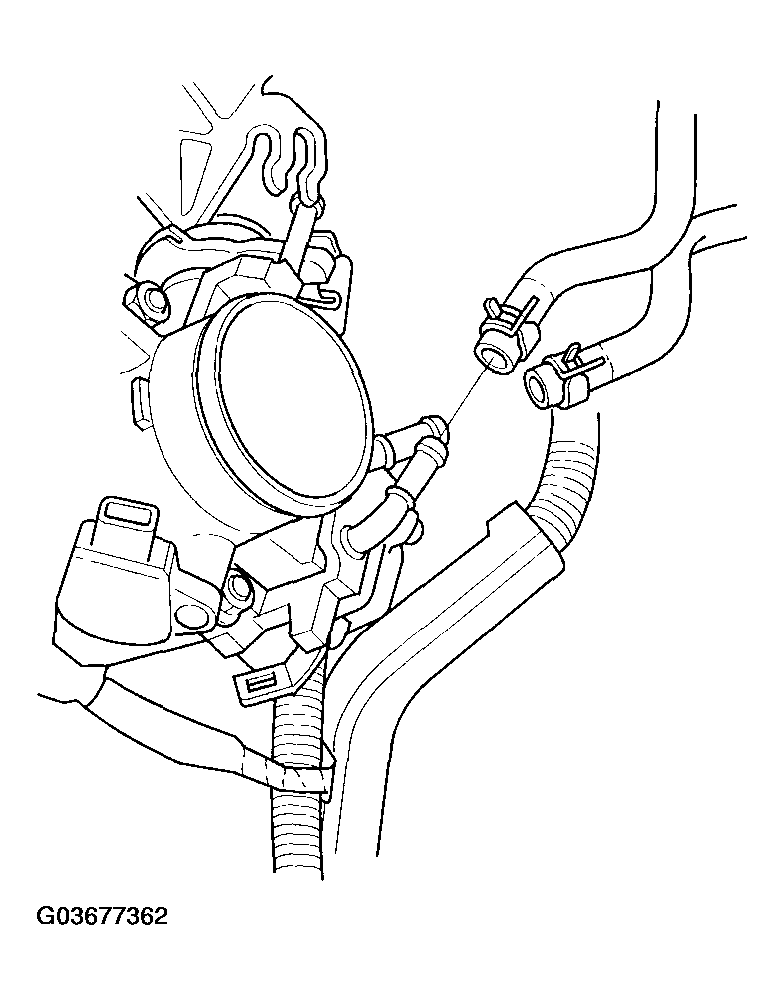
- Install the water bypass hoses.
 Courtesy of AMERICAN HONDA MOTOR CO., INC.
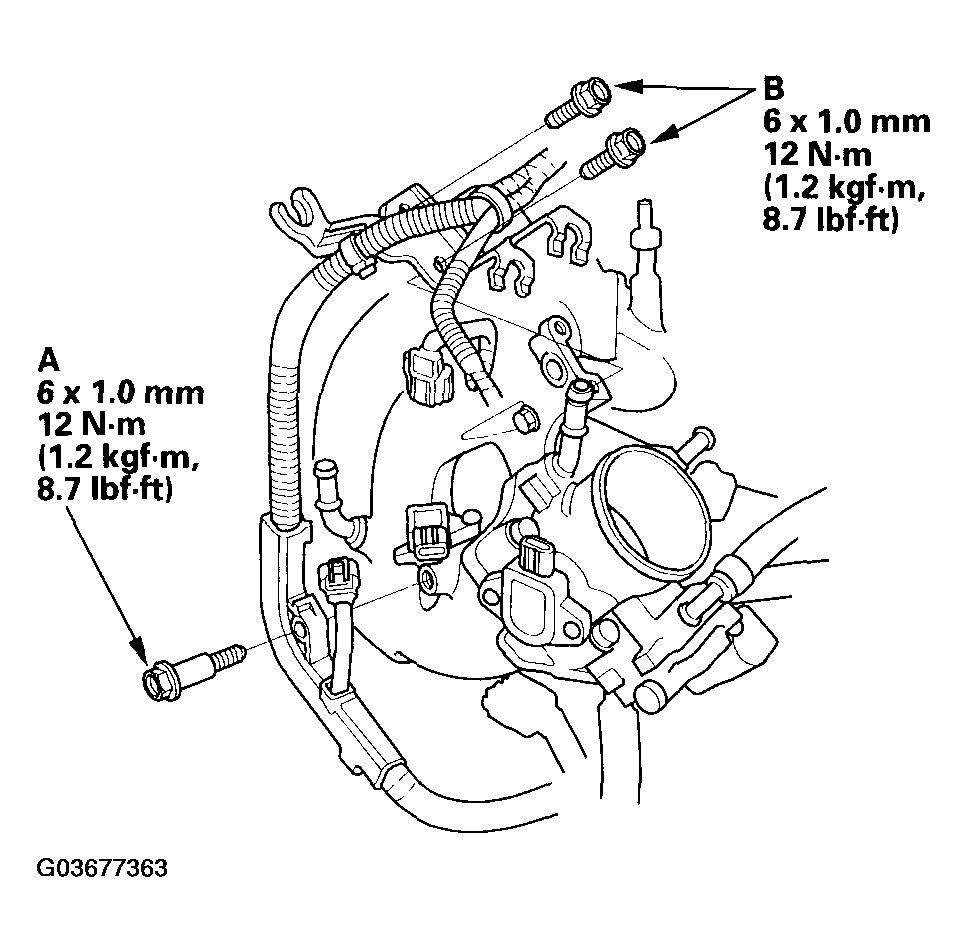
- Tighten the bolt (A) securing the harness holder, and tighten the two bolts (B) securing the throttle cable bracket.
 Courtesy of AMERICAN HONDA MOTOR CO., INC.
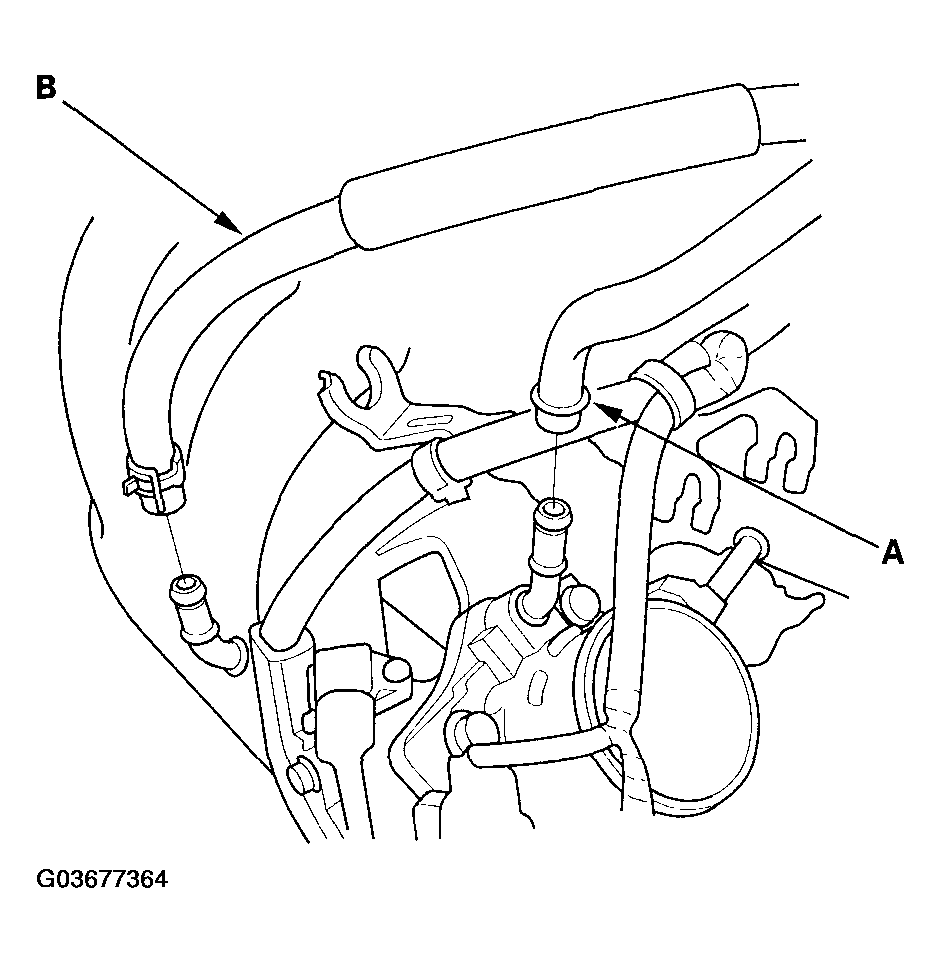
- Install the evaporative emission (EVAP) canister hose (A) and brake booster vacuum hose (B).
 Courtesy of AMERICAN HONDA MOTOR CO., INC.
- Install the throttle cable (see
THROTTLE CABLE REMOVAL/INSTALLATION
), then adjust the cable (see
THROTTLE CABLE ADJUSTMENT
).
- Install the cruise control actuator cable (see
CRUISE CONTROL ACTUATOR/CABLE REPLACEMENT
), then adjust the cable (see
CRUISE CONTROL ACTUATOR CABLE ADJUSTMENT
).
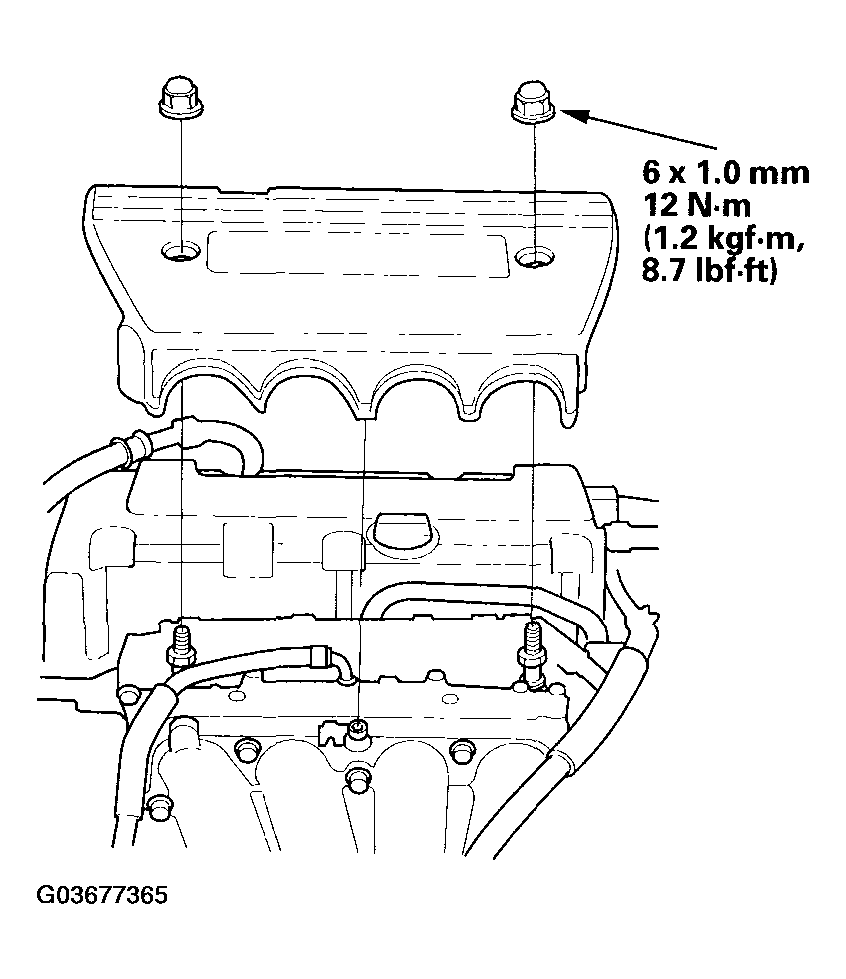
- Install the intake manifold cover.
 Courtesy of AMERICAN HONDA MOTOR CO., INC.
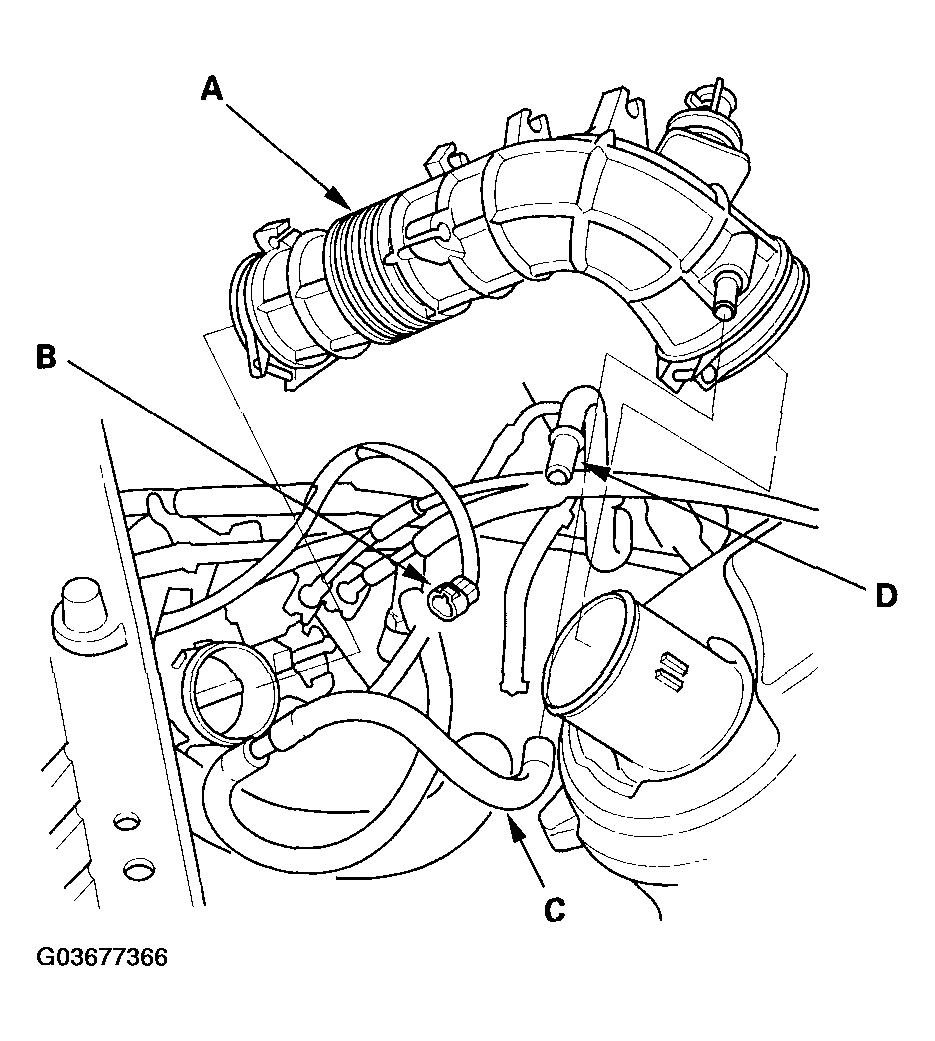
- Install the intake air duct (A), then connect the intake air temperature (IAT) sensor connector (B), and install the vacuum hose (C) and breather pipe (D).
 Courtesy of AMERICAN HONDA MOTOR CO., INC.
- Clean up any spilled engine coolant.
- After installation, check that all tubes, hoses, and connectors are installed correctly.
- Refill the radiator with engine coolant, and bleed air from the cooling system with the heater valve open (see step 7 on COOLANT REPLACEMENT
).