Damper/Spring Replacement: Removal
- Raise the front of the vehicle, and support it with safety stands in the proper locations (see SAFETY STANDS
).
- Remove the front wheel.
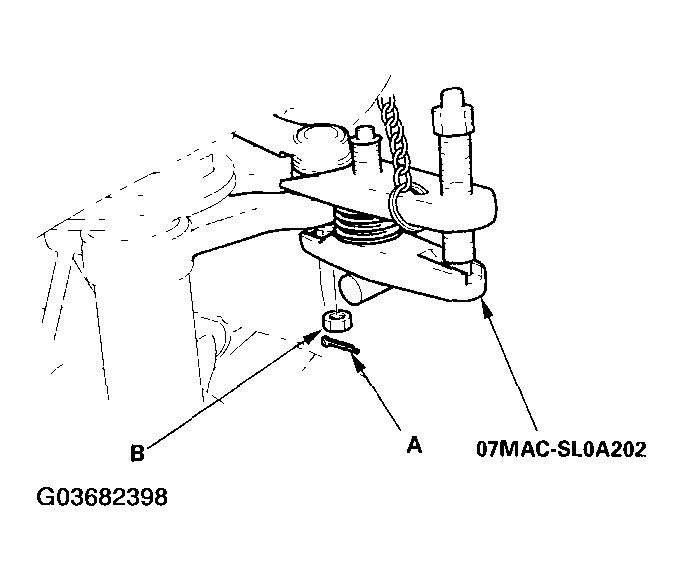
- Remove the cotter pin (A) from the tie-rod end ball joint, and remove the nut (B).
 Courtesy of AMERICAN HONDA MOTOR CO., INC.
- Disconnect the tie-rod end ball joint from the damper using the special tools (see BALL JOINT REMOVAL
).
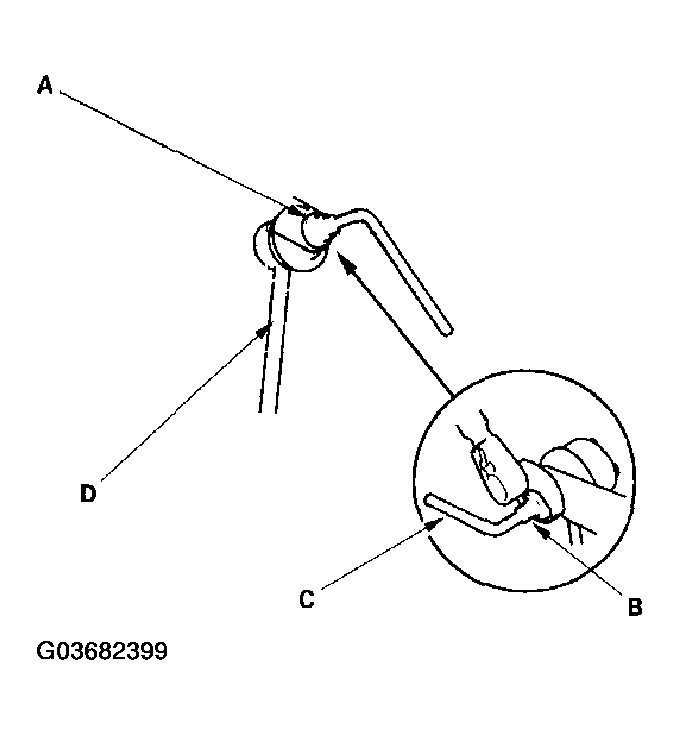
- Remove the flange nut (A) while holding the joint pin (B) with a hex wrench (C), and disconnect the stabilizer link (D) from the damper.
 Courtesy of AMERICAN HONDA MOTOR CO., INC.
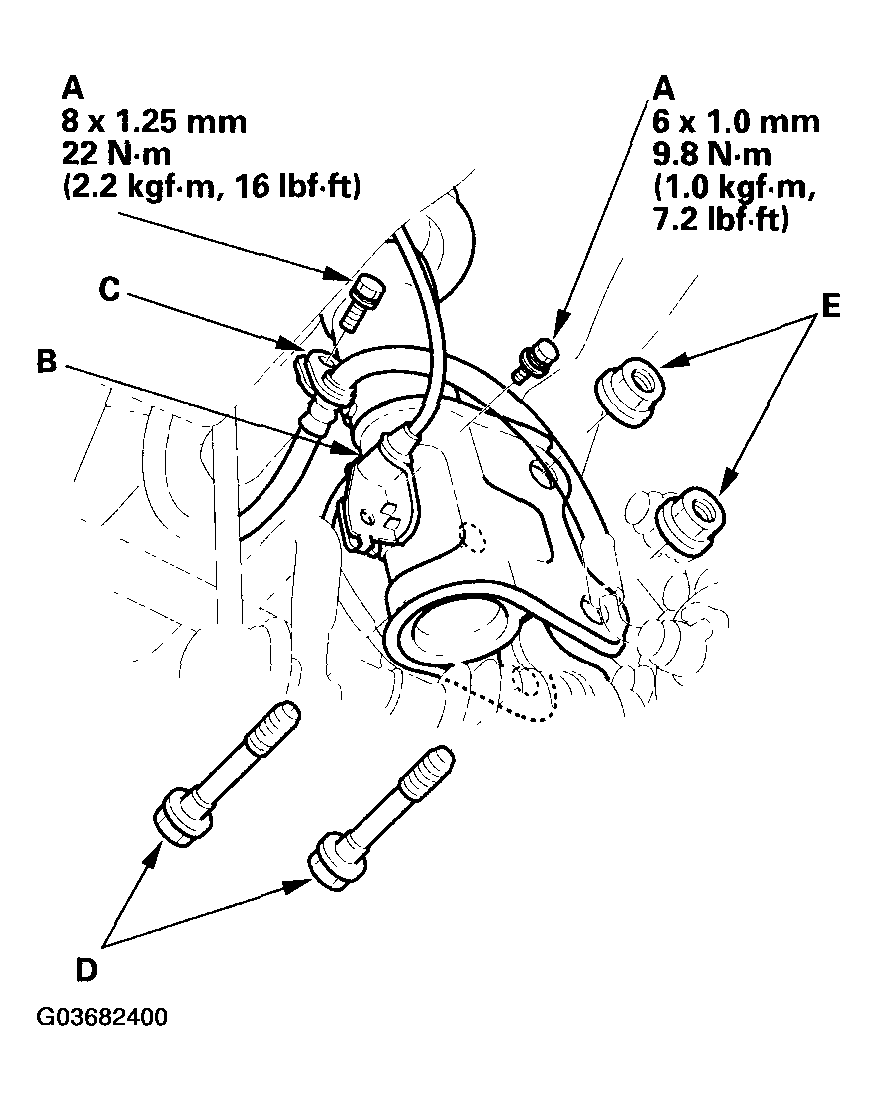
- Remove the bolts (A), and remove the wheel sensor harness bracket (B) and brake hose bracket (C) from the damper. Do not disconnect the wheel sensor connector.
 Courtesy of AMERICAN HONDA MOTOR CO., INC.
- Remove the damper pinch bolts (D) while holding the nuts (E).
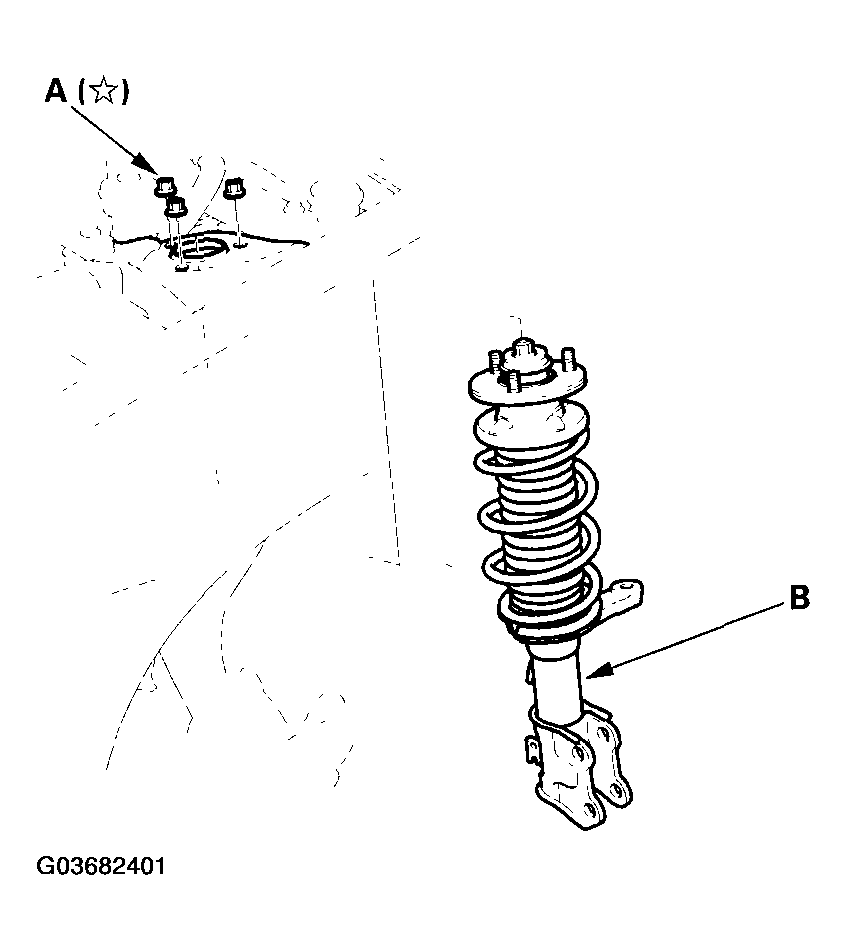
- Remove the self-locking nuts (A) from the top of the damper.
 Courtesy of AMERICAN HONDA MOTOR CO., INC.
- Lower the lower arm, and remove the damper assembly (B).