Alternator Removal and Installation: Installation
- Install the alternator.
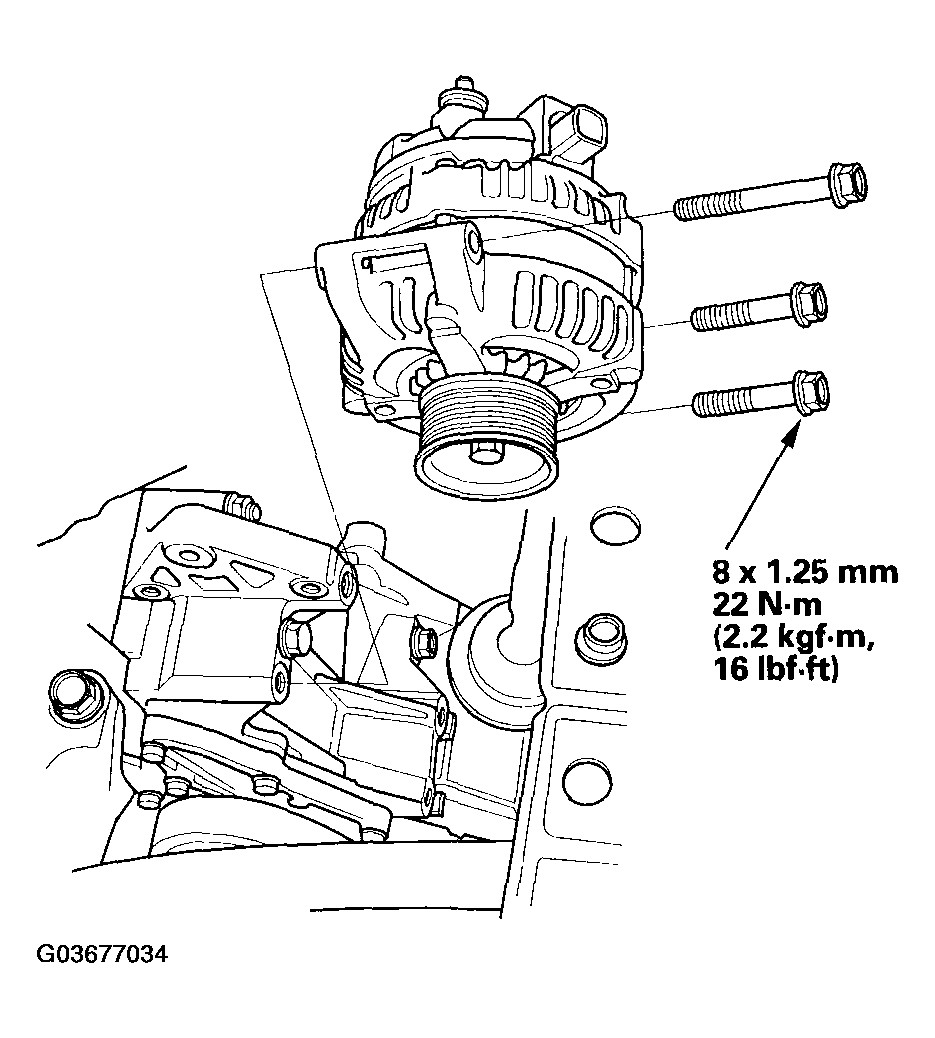 Courtesy of AMERICAN HONDA MOTOR CO., INC.
- Install the positive crankcase (PCV) valve (see
PCV VALVE REPLACEMENT
).
- Connect the alternator connector (A), BLK wire (B), and harness clamp (C) to the alternator.
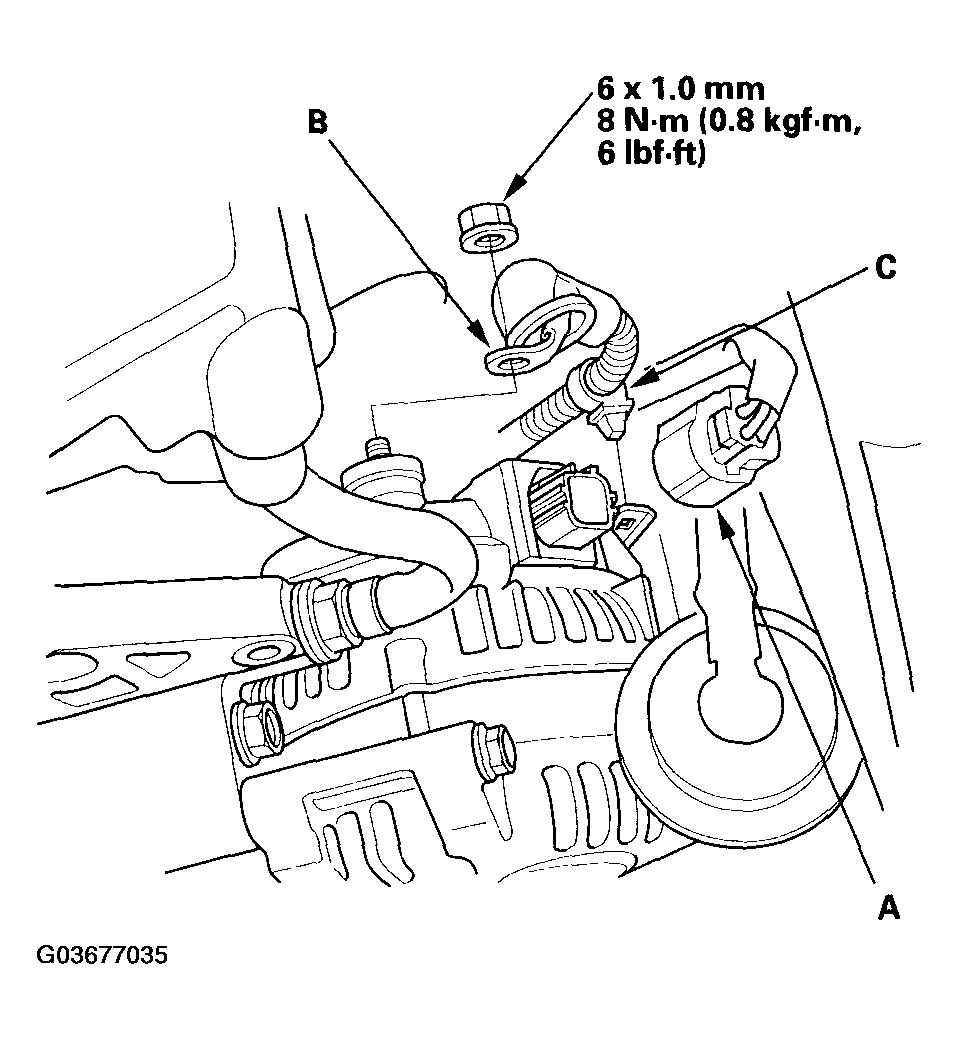 Courtesy of AMERICAN HONDA MOTOR CO., INC.
- Install the auto-tensioner (see
DRIVE BELT AUTO-TENSIONER REPLACEMENT ).
- Install the drive belt (see
DRIVE BELT INSPECTION ).
- Connect the battery positive cable to the battery first, then connect the negative cable.
- Enter the anti-theft code for the radio, then enter the customer's audio presets.
- Do the power window control unit reset procedure (see
RESETTING THE POWER WINDOW CONTROL UNIT
).
- Set the clock.