Steering Column Removal and Installation: Installation
- Install the steering column in the reverse order of removal, and note these items:
- Take care not to let the sliding capsules fall out of position during column installation.
- Make sure the wires are not caught or pinched by any parts.
- Insert the upper end of the steering joint onto the steering shaft (A) (line up the bolt hole (B) with the flat portion (C) on the shaft).
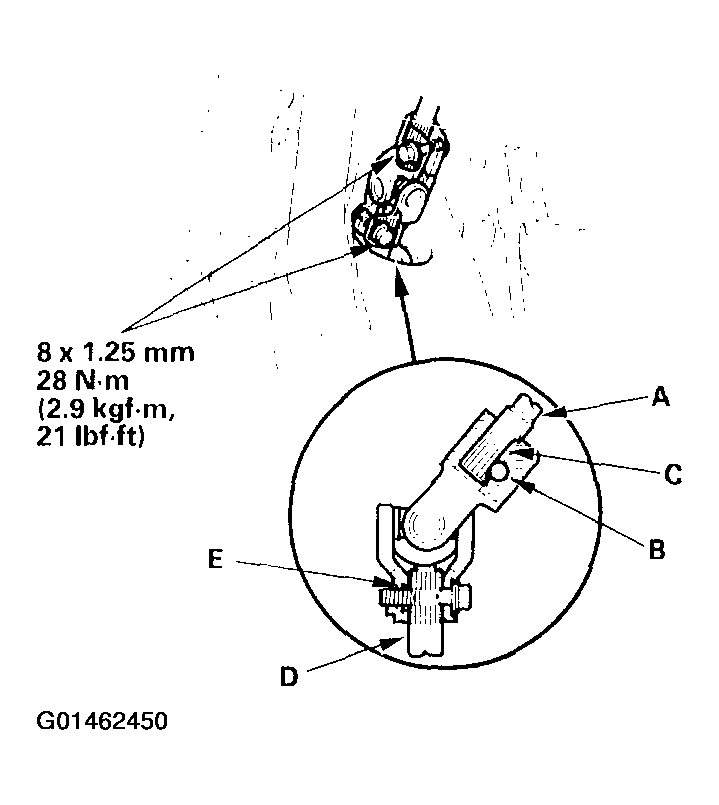 Courtesy of AMERICAN HONDA MOTOR CO., INC.
- Slip the lower end of the steering joint onto the pinion shaft (D) (line up the bolt hole with the groove (E) around the shaft), and loosely install the lower joint bolt. Be sure that the lower joint bolt is securely in the groove in the pinion shaft.
- Pull on the steering joint to make sure that the steering joint is fully seated. Then install the upper joint bolt and tighten it to the specified torque. Tighten the lower joint bolt to the specified torque.
- Install the driver's dashboard under cover (see DRIVER'S DASHBOARD LOWER COVER REMOVAL/INSTALLATION
).
- Finish the installation, and note these items:
- Make sure the wire harness is routed and fastened properly.
- Make sure the connectors are properly connected.
- Reinstall the steering wheel (see Steering Wheel Installation
).
- Reconnect the battery.
- Verify horn and turn signal switch operation.
- Check wheel alignment, and adjust it if necessary (see WHEEL ALIGNMENT PROCEDURES
).