Immobilizer Receiver/Transponder Test
- Turn ignition switch on. Ensure immobilizer indicator light begins to flash within 2 seconds. If indicator does not blink, perform CONTROL UNIT INPUT TEST
. If indicator blinks, go to next step.
- Attempt to start vehicle using another master (Black) or valet (Grey) key. If vehicle starts, replace ignition key (transponder) and program all keys. If vehicle will not start, go to next step.
- If engine does not crank, go to next step. If engine cranks, check for an open in White wire between immobilizer control unit and ECM. If White wire is okay, ECM program must be rewritten using Honda PGM Tester. See PROGRAMMING.
- Immobilizer program and ECM program must be rewritten using Honda PGM Tester. See PROGRAMMING. After reprogramming, if vehicle will start, immobilizer system is okay. If vehicle will not start, go to next step.
- Turn ignition off. Disconnect 3-pin connector from immobilizer control unit. See Fig 1
. Using a DVOM, check continuity between terminals B1 and B2, and terminals B2 and B3. See Fig 2
. If continuity does not exist, go to next step. If continuity exists, repair or replace short in shielded wires of harness between immobilizer receiver and immobilizer control unit.
- Check resistance between 3-pin connector terminals B1 and B3. See Fig 2
. If resistance is about 15 ohms, replace immobilizer control unit. If resistance is not about 15 ohms, check 3-pin harness between immobilizer receiver and immobilizer control unit. If harness is okay, replace immobilizer receiver. See IMMOBILIZER RECEIVER
in REMOVAL & INSTALLATION.
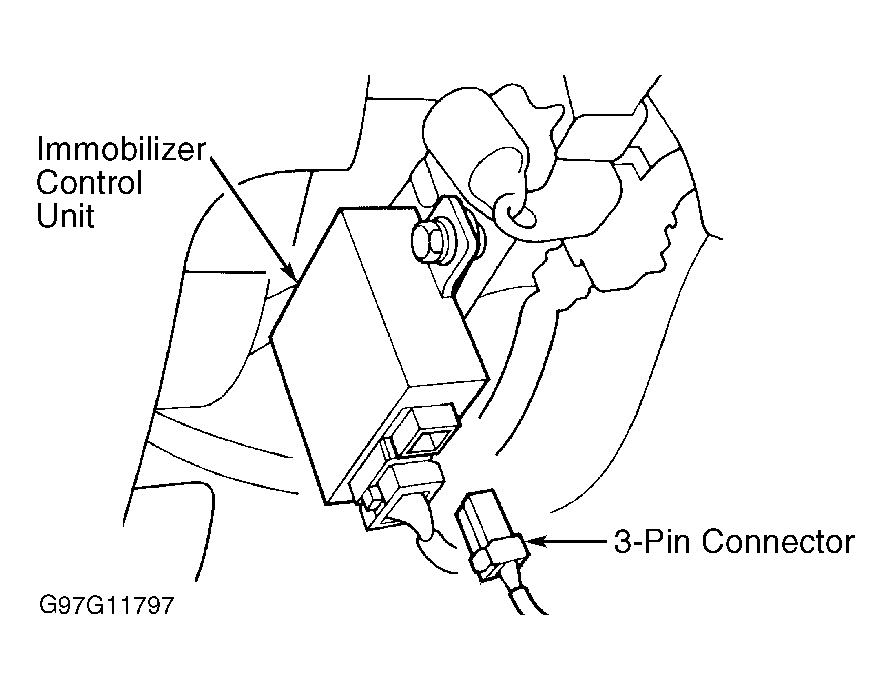 Courtesy of AMERICAN HONDA MOTOR CO., INC.
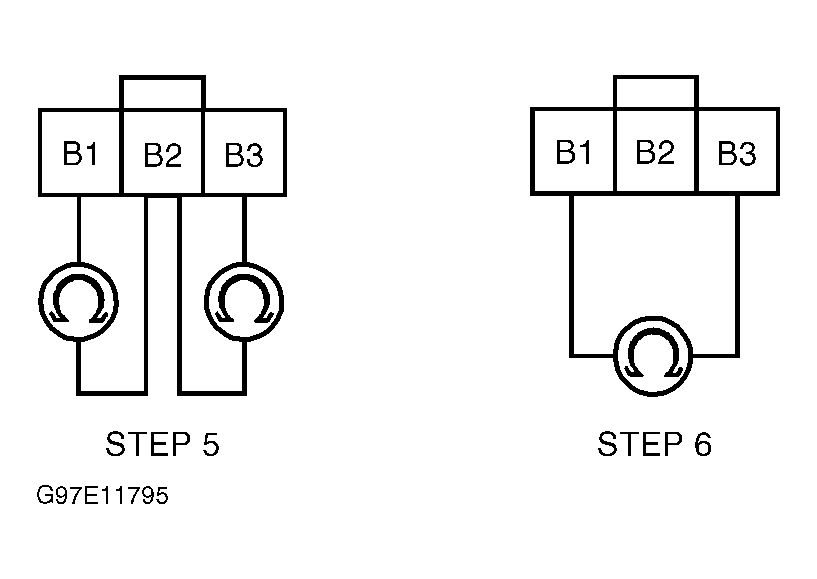 Courtesy of AMERICAN HONDA MOTOR CO., INC.