Removal Procedure
 Courtesy of GENERAL MOTORS COMPANY
- Relieve the fuel system pressure. Refer to Fuel Pressure Relief .
- Raise the vehicle. Refer to Lifting and Jacking the Vehicle
in General Information.
- Drain the fuel tank. Refer to Fuel Tank Draining (Front Tank) , Fuel Tank Draining (Rear Tank) , Fuel Tank Draining (Cab/Chassis) .
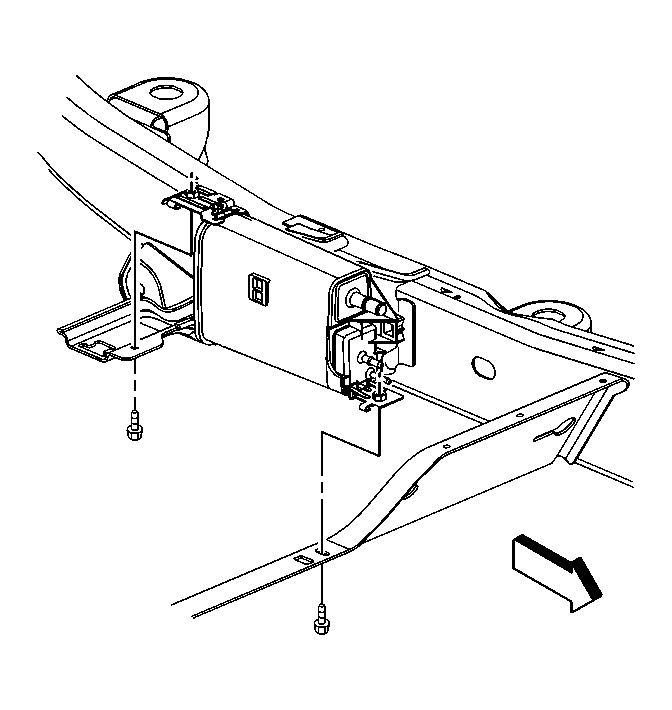
- Remove the evaporative emission (EVAP) canister. Refer to Evaporative Emission Canister Replacement (Utility) , Evaporative Emission Canister Replacement (Cab/Chassis) , Evaporative Emission Canister Replacement (Pickup) .
 Courtesy of GENERAL MOTORS COMPANY
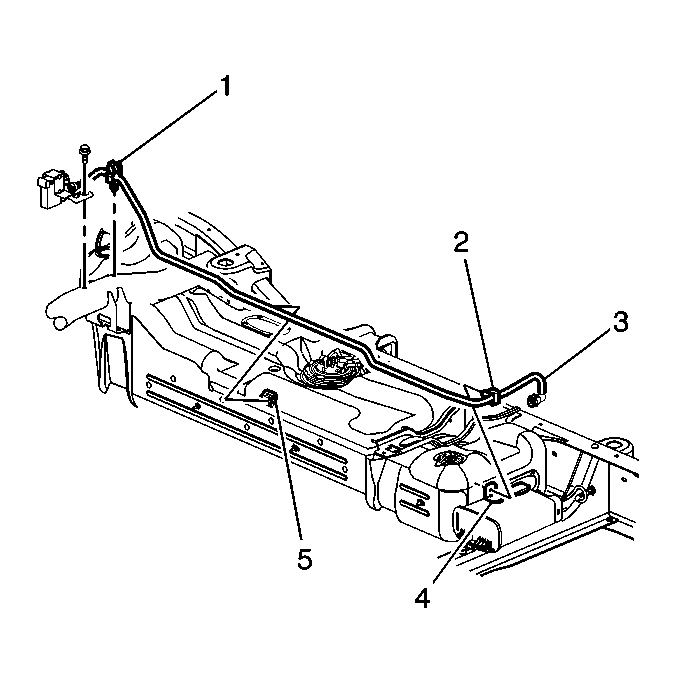
- Disconnect the EVAP vent pipe (3) at the fuel tank clip (5).
 Courtesy of GENERAL MOTORS COMPANY
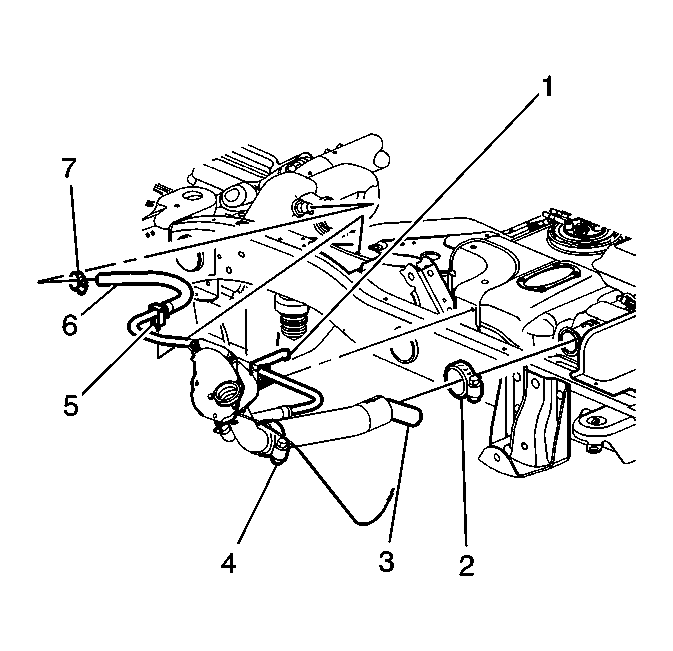
- Loosen the vent hose clamp (7).
- Disconnect the vent hose (6) from the fuel tank.
 Courtesy of GENERAL MOTORS COMPANY
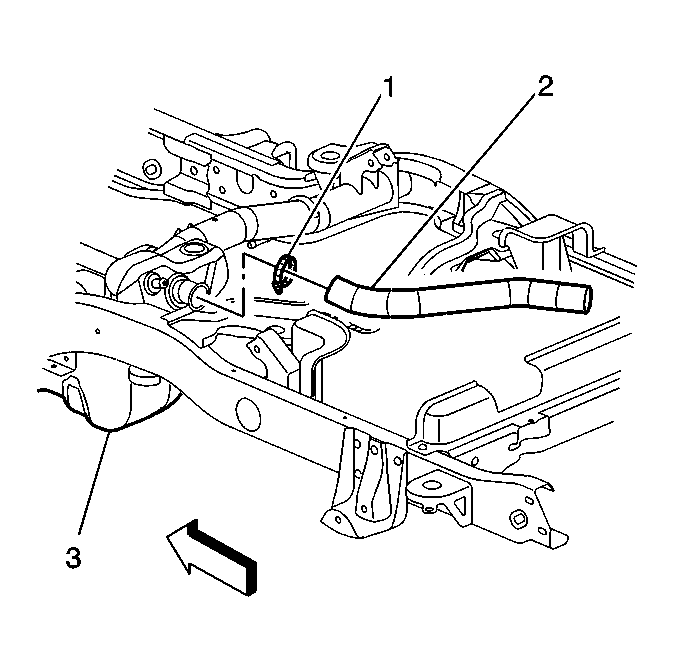
- Disconnect the fuel fill hose (2) from the fuel tank.
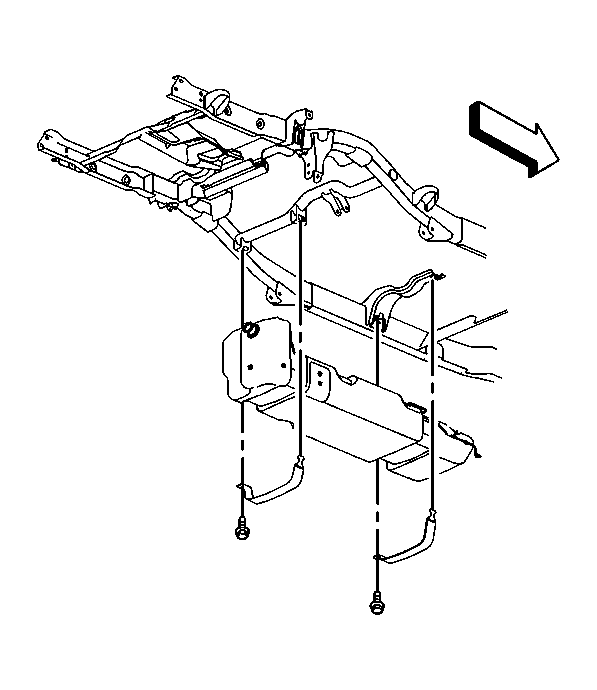 Courtesy of GENERAL MOTORS COMPANY
- With the aid of an assistant, support the fuel tank.
- Remove the fuel tank strap attaching bolts.
- Remove the fuel tank straps.
- Carefully lower the rear of the fuel tank slightly.
- Remove the fuel sender cover, on the suburban only.
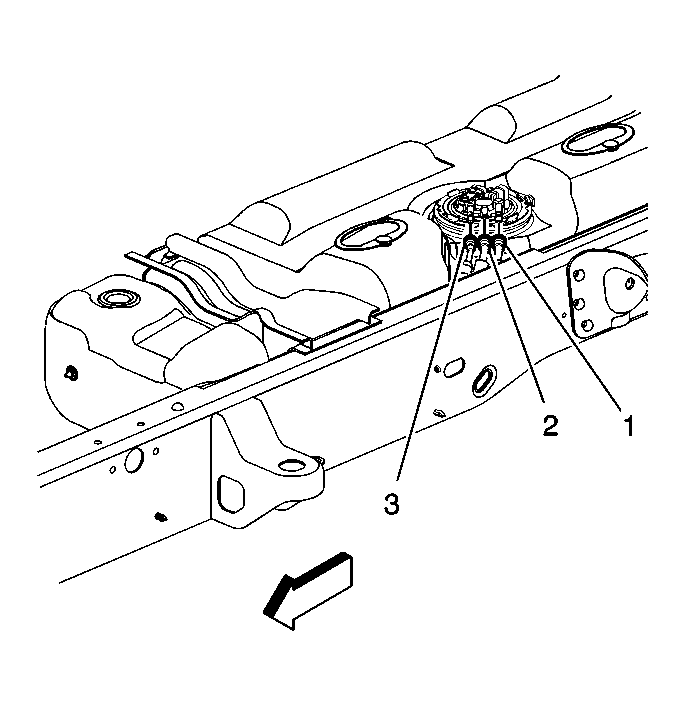 Courtesy of GENERAL MOTORS COMPANY
- Disconnect the fuel feed, return, and evaporative emission (EVAP) pipes (1, 2, 3) at the fuel sender.
- Disconnect the fuel sender and the fuel pressure sensor electrical connectors.
- Remove the fuel tank.
- Place the fuel tank in a suitable work area.
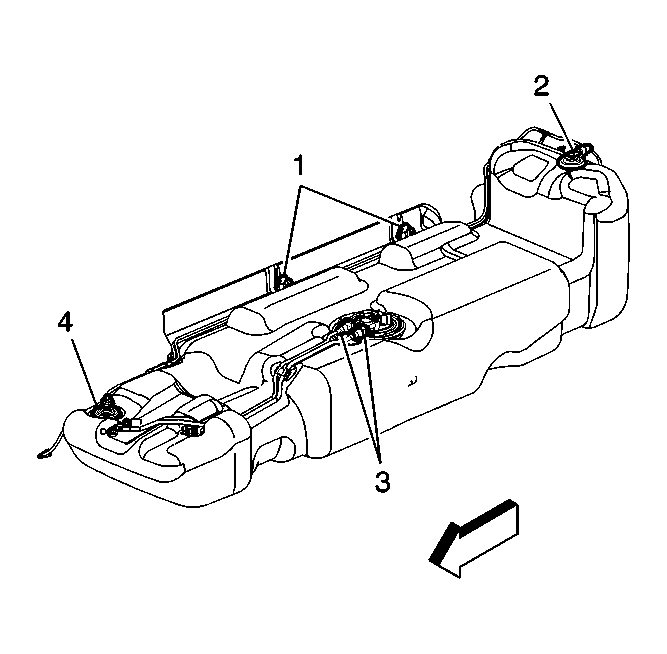 Courtesy of GENERAL MOTORS COMPANY
- Disconnect the EVAP pipe from the fuel tank roll over valves (2, 4) and the retaining clips (1).
- Remove the fuel sender assembly from the fuel tank. Refer to Fuel Sender Assembly Replacement .
- Cap the fuel and EVAP pipes in order to prevent possible fuel system contamination.