Tie Rod Removal
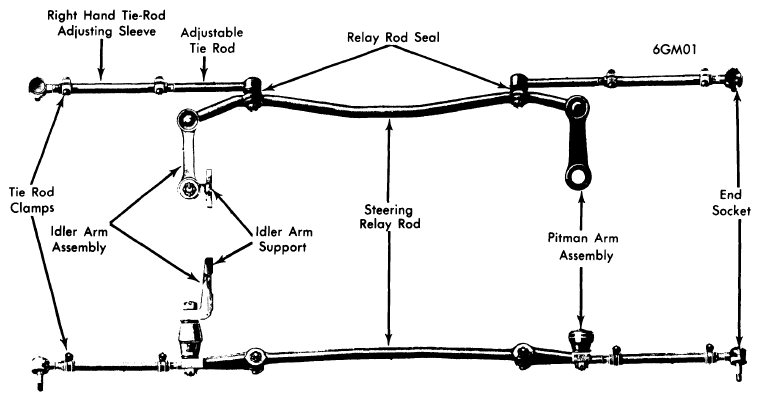
- Raise vehicle and remove cotter pins from ball studs, and remove castellated nuts. To remove outer ball stud, tap on steering arm at tie rod end with a hammer while using another hammer as a backing. Remove inner ball stud from relay rod using same procedure. To remove tie rod ends, loosen clamp bolts and unscrew end assemblies.
- To install, lubricate tie rod end threads with EP chassis lube and install ends on tie rod so both are threaded an equal amount on tie rod. Check condition of ball stud seals and replace if necessary. Install ball studs in steering arms and relay rod. Install ball stud nuts and torque to specifications. Install new cotter pins. Adjust toe-in. See Wheel Alignment Specifications & Procedures in WHEEL ALIGNMENT Section.
 Courtesy of GENERAL MOTORS COMPANY
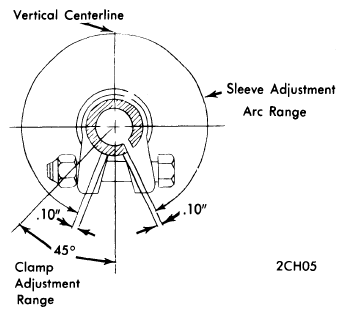
- Before tightening tie rod adjusting sleeve clamp bolts, note following: With 1972 models, clamps must be positioned between locating dimples on each tie rod end. Slot of adjuster sleeve may be in any position on arc (see Fig 2), but not closer than 0.10" to edge of clamp jaw or between clamp jaws. Rotate sleeve to meet requirements for clamp position as shown. With 1965-71 models, align clamps between dimples (if marked), and slit in adjuster sleeve must center with slot in clamp; and on "C", "P" 10-30 models, clamp slot facing forward.
 Courtesy of GENERAL MOTORS COMPANY