Engine - 3.5L Ti-VCT: Removal: Engine
SPECIAL TOOL(S)
 Courtesy of FORD MOTOR COMPANY
|
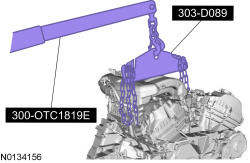
2, 200# Floor Crane, Fold Away 300-OTC1819E or equivalent |
 Courtesy of FORD MOTOR COMPANY
|
Adjustable Grip Arm, 1735A 014-00001 or equivalent |
 Courtesy of FORD MOTOR COMPANY
|
Disconnect Tool, Transmission Cooler Line 307-569 |
 Courtesy of FORD MOTOR COMPANY
|
Eye, Engine Lift 303-1245 |
 Courtesy of FORD MOTOR COMPANY
|
Powertrain Lift 300-OTC1585AE or equivalent |
 Courtesy of FORD MOTOR COMPANY
|
Spreader Bar 303-D089 (D93P-6001-A3) or equivalent |
WARNING:
Do not smoke, carry lighted tobacco or have an open flame of any type when working on or near any fuel-related component. Highly flammable mixtures are always present and may be ignited. Failure to follow these instructions may result in serious personal injury.
All vehicles
- 1.
With the vehicle in NEUTRAL, position it on a hoist. For additional information, refer to
Jacking and Lifting
.
- 2.
Release the fuel system pressure. For additional information, refer to
Fuel System - General Information
.
- 3.
Recover the A/C system. For additional information, refer to
Climate Control System - General Information and Diagnostics
.
- 4.
Remove the cowl panel grille. For additional information, refer to
Front End Body Panels
.
- 5.
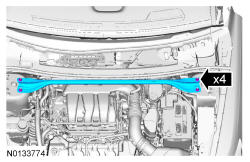
Remove the 4 nuts and the strut tower brace.
 Courtesy of FORD MOTOR COMPANY
|
- 6.
Remove the engine Air Cleaner (ACL) and ACL outlet pipe. For additional information, refer to
Intake Air Distribution and Filtering
.
- 7.
Remove the battery tray. For additional information, refer to
Battery, Mounting and Cables
.
- 8.
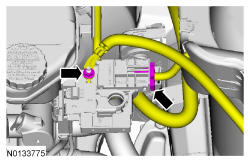
Remove the nut and disconnect the 2 battery feed cables from the positive battery terminal.
 Courtesy of FORD MOTOR COMPANY
|
- 9.
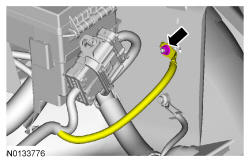
Remove the retainer and the ground wire cable.
 Courtesy of FORD MOTOR COMPANY
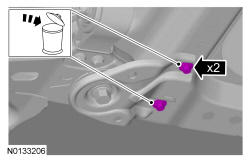
|
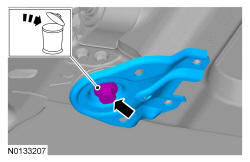
- 10.
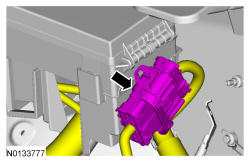
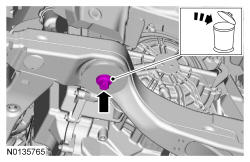
Disconnect the engine wiring harness electrical connector.
 Courtesy of FORD MOTOR COMPANY
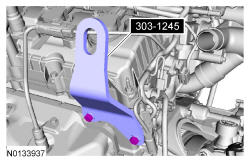
|
- 11.
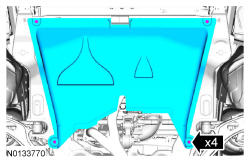
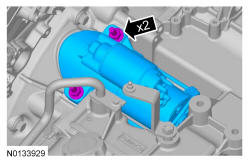
If equipped, release the 4 retainers and remove the underbody shield.
 Courtesy of FORD MOTOR COMPANY
|
- 12.
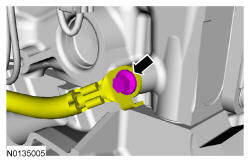
Drain the cooling system. For additional information, refer to
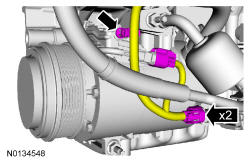
Engine Cooling
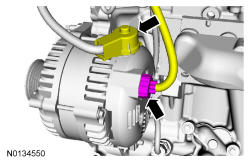
.
- 13.
Remove the front wheels and tires. For additional information, refer to
Wheels and Tires
.
- 14.
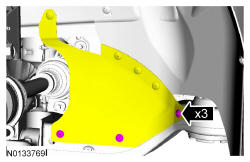
Remove the 3 pin-type retainers and position aside.
 Courtesy of FORD MOTOR COMPANY
|
- 15.
Remove the accessory drive belt. For additional information, refer to
Accessory Drive
.
- 16.
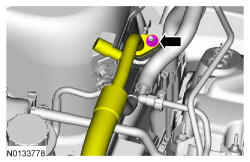
Remove the nut and disconnect the A/C tube.
- Discard the O-ring seal and gasket seal.
 Courtesy of FORD MOTOR COMPANY
|
- 17.
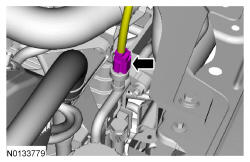
Disconnect the A/C pressure switch electrical connector.
 Courtesy of FORD MOTOR COMPANY
|
- 18.
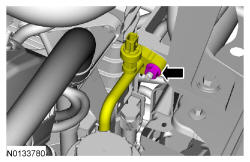
Remove the nut and the A/C tube from the condenser.
- Discard the O-ring seal and gasket seal.
 Courtesy of FORD MOTOR COMPANY
|
- 19.
Remove the degas bottle. For additional information, refer to
Engine Cooling
.
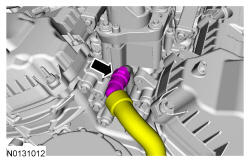
- 20.
Disconnect the degas bottle coolant hose from the engine coolant tube.
 Courtesy of FORD MOTOR COMPANY
|
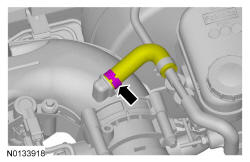
- 21.
Disconnect the brake booster vacuum hose from the upper intake manifold.
 Courtesy of FORD MOTOR COMPANY
|
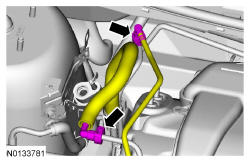
- 22.
Disconnect the Evaporative Emission (EVAP) tube and the fuel supply tube quick connect coupling. For additional information, refer to
Fuel System - General Information
.
 Courtesy of FORD MOTOR COMPANY
|
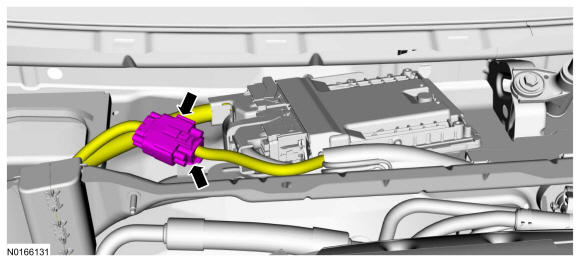
- 23.
Disconnect the engine harness electrical connector.
- Detach the wiring harness retainer.
 Courtesy of FORD MOTOR COMPANY
|
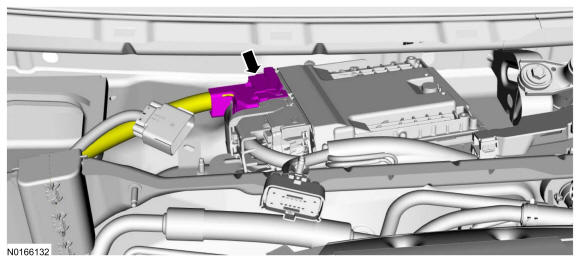
- 24.
Disconnect the PCM electrical connector.
 Courtesy of FORD MOTOR COMPANY
|
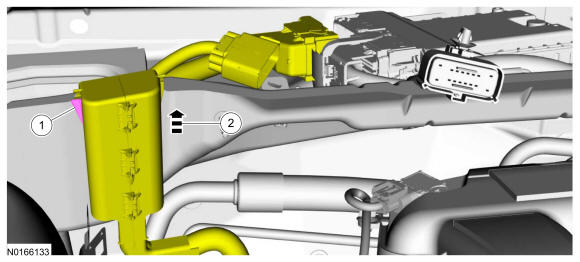
- 25.
Remove the engine wiring harness retainer from the bulkhead.
- 1.
Push the wiring harness retainer tab in.
- 2.
Slide the wiring harness up and out of the bulkhead.
 Courtesy of FORD MOTOR COMPANY
|
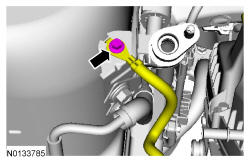
- 26.
Remove the bolt and ground wire from the RH shock tower.
 Courtesy of FORD MOTOR COMPANY
|
- 27.
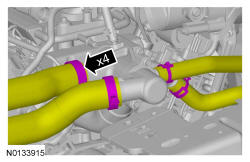
Disconnect the upper radiator hose, lower radiator hose and 2 heater hoses from the thermostat housing.
 Courtesy of FORD MOTOR COMPANY
|
- 28.
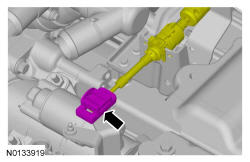
Disconnect the transaxle control cable from the control lever.
 Courtesy of FORD MOTOR COMPANY
|
- 29.
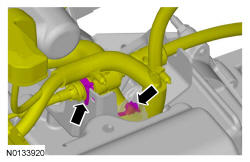
Disconnect the transaxle control cable from the shift cable bracket and position aside.
- Detach the wiring harness pin-type retainer from the shift cable bracket.
 Courtesy of FORD MOTOR COMPANY
|
- 30.
If equipped, detach the engine block heater harness from the radiator support.
- 31.
NOTE:
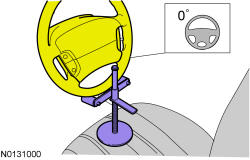
Use a steering wheel holding device (such as Hunter® 28-75-1 or equivalent).
Using a suitable holding device, hold the steering wheel in the straight-ahead position.
 Courtesy of FORD MOTOR COMPANY
|
- 32.
NOTE:
Do not allow the intermediate shaft to rotate while it is disconnected from the gear or damage to the clockspring may occur. If there is evidence that the intermediate shaft has rotated, the clockspring must be removed and recentered. For additional information, refer to
Supplemental Restraint System
.
NOTE:
Index-mark the steering column shaft position to the steering gear for reference during installation.
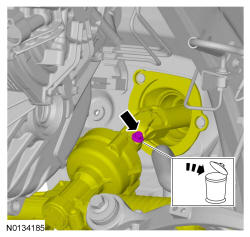
Remove the bolt and disconnect the steering column shaft from the steering gear.
 Courtesy of FORD MOTOR COMPANY
|
- 33.
Remove the exhaust Y-pipe. For additional information, refer to
Exhaust System
.
All-Wheel Drive (AWD) vehicles
- 34.
NOTE:
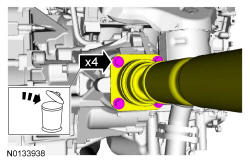
Index-mark the driveshaft for installation.
Remove and discard the 4 bolts and support the driveshaft with a length of mechanic's wire.
 Courtesy of FORD MOTOR COMPANY
|
All vehicles
- 35.
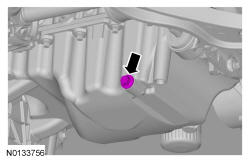
Remove the drain plug and drain the engine oil.
- Install the drain plug and tighten to 27 Nm (20 lb-ft).
 Courtesy of FORD MOTOR COMPANY
|
- 36.
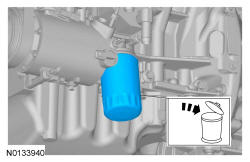
Remove and discard the engine oil filter.
 Courtesy of FORD MOTOR COMPANY
|
- 37.
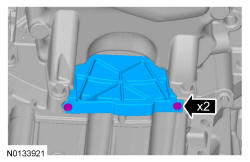
Remove the 2 fasteners and the inspection cover.
 Courtesy of FORD MOTOR COMPANY
|
- 38.
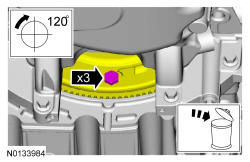
Remove and discard the 3 torque converter bolts.
 Courtesy of FORD MOTOR COMPANY
|
- 39.
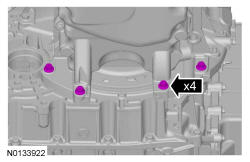
Remove the 4 oil pan-to-transaxle bolts.
 Courtesy of FORD MOTOR COMPANY
|
- 40.
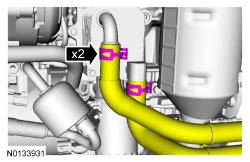
If equipped, disconnect the 2 oil cooler coolant hoses.
 Courtesy of FORD MOTOR COMPANY
|
- 41.
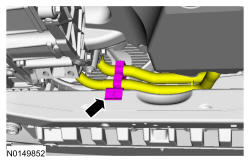
If equipped, unlatch the cooler hose retainer latch and pry up on the oil cooler hose retainer to release the retainer and remove it from the subframe.
 Courtesy of FORD MOTOR COMPANY
|
- 42.
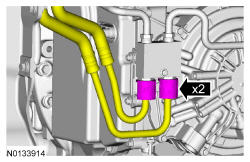
Remove the 2 secondary latches from the transmission fluid cooler tubes at the transmission fluid cooler thermal bypass valve.
 Courtesy of FORD MOTOR COMPANY
|
- 43.
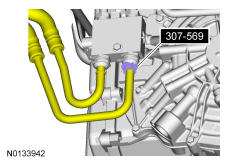
Using the Transmission Cooler Line Disconnect Tool, disconnect the transmission fluid cooler tubes from the transmission fluid cooler thermal bypass valve.
 Courtesy of FORD MOTOR COMPANY
|
- 44.
NOTE:
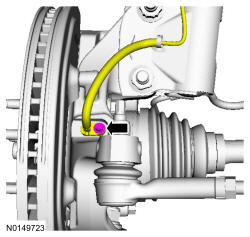
LH shown in illustration, RH similar.
Remove the bolt and the wheel speed sensor.
 Courtesy of FORD MOTOR COMPANY
|
- 45.
NOTE:
LH shown in illustration, RH similar.
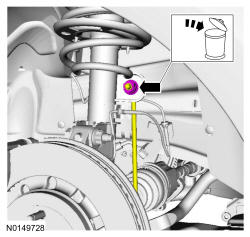
Remove and discard the upper stabilizer link nut.
 Courtesy of FORD MOTOR COMPANY
|
- 46.
NOTE:
Do not allow the brake caliper to hang from the brake flexible hose or damage to the hose may occur.
NOTE:
LH shown in illustration, RH similar.
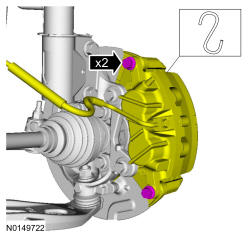
Remove the brake caliper guide pin bolts and calipers.
 Courtesy of FORD MOTOR COMPANY
|
- 47.
NOTE:
RH shown in illustration, LH similar.
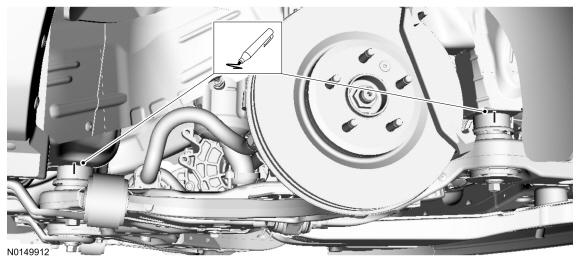
Using a wax pencil, mark the relationship of the front and rear subframe to the underbody at the mounting locations on both side.
 Courtesy of FORD MOTOR COMPANY
|
- 48.
NOTE:
LH shown in illustration, RH similar.
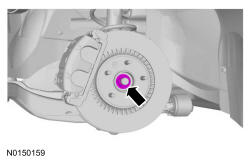
Remove the LH and RH halfshaft nuts.
- Do not discard at this time.
 Courtesy of FORD MOTOR COMPANY
|
- 49.
NOTE:
LH shown in illustration, RH similar.
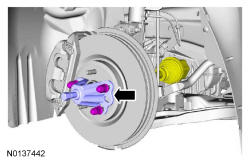
Separate the LH and RH halfshaft from the wheel hubs.
 Courtesy of FORD MOTOR COMPANY
|
- 50.
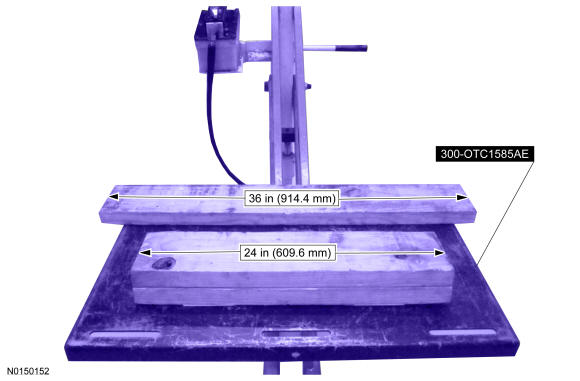
Position a 2 x 6 board, 36 in (914.4 mm) in length and two 2 x 6 boards 24 in (609.6 mm) in length onto the powertrain lift.
- Position the powertrain lift table with:
- the long board towards the rear of the subframe.
- the short boards under the engine and transmission.
 Courtesy of FORD MOTOR COMPANY
|
- 51.
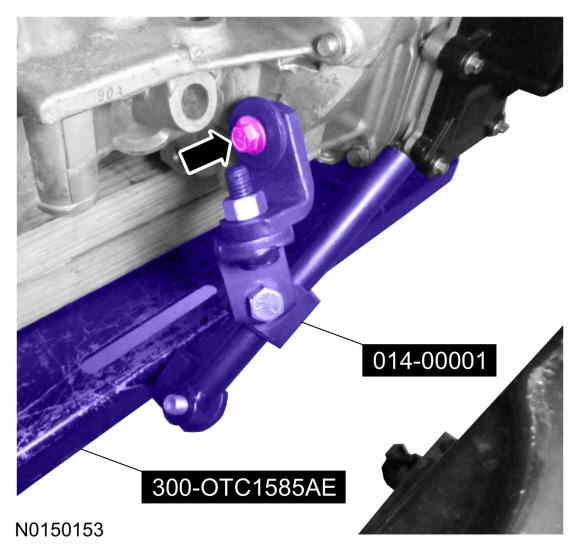
Install the Adjustable Grip Arm from the powertrain lift table to the LH engine-to-transmission bolt hole.
 Courtesy of FORD MOTOR COMPANY
|
- 52.
Install a ratchet strap from the front of the subframe under the powertrain lift table to the rear of the subframe, to secure the subframe to the powertrain lift table.
- 53.
NOTE:
LH shown in illustration, RH similar.
NOTE:
The halfshafts are not being remove from the transmission.
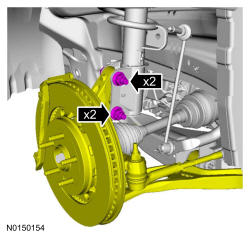
Remove the strut-to-wheel knuckle nuts and bolts.
- Remove the strut from the wheel knuckle and the halfshafts from the wheel knuckle.
 Courtesy of FORD MOTOR COMPANY
|
- 54.
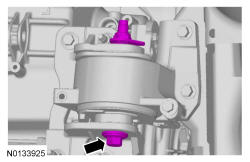
Remove the transaxle support insulator through bolt and nut.
 Courtesy of FORD MOTOR COMPANY
|
- 55.
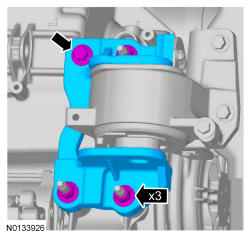
Remove the bolt, 3 nuts and the transaxle support insulator bracket.
 Courtesy of FORD MOTOR COMPANY
|
- 56.
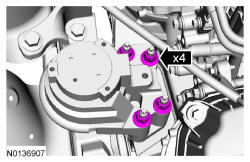
Remove the 4 engine mount nuts.
 Courtesy of FORD MOTOR COMPANY
|
- 57.
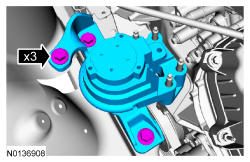
Remove the 3 bolts and the engine mount.
 Courtesy of FORD MOTOR COMPANY
|
- 58.
NOTE:
RH shown in illustration, LH similar.
Remove the subframe bracket-to-body bolts.
 Courtesy of FORD MOTOR COMPANY
|
- 59.
NOTE:
RH shown in illustration, LH similar.
Remove the rear subframe bolts and the subframe brackets.
 Courtesy of FORD MOTOR COMPANY
|
- 60.
NOTE:
RH shown in illustration, LH similar.
Remove the front subframe bolts.
 Courtesy of FORD MOTOR COMPANY
|
- 61.
Lower the subframe and powertrain assembly from the vehicle.
- 62.
Install 303-1245 on the LH cylinder head.
 Courtesy of FORD MOTOR COMPANY
|
- 63.
Install the Heavy Duty Floor Crane and Spreader Bar.
 Courtesy of FORD MOTOR COMPANY
|
- 64.
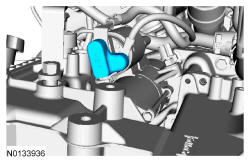
Remove the starter motor solenoid cover.
 Courtesy of FORD MOTOR COMPANY
|
- 65.
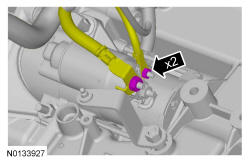
Remove the 2 nuts and the starter motor wiring terminals.
 Courtesy of FORD MOTOR COMPANY
|
- 66.
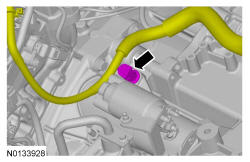
Disconnect the wiring harness retainer from the starter motor stud bolt.
 Courtesy of FORD MOTOR COMPANY
|
- 67.
Remove the bolt, stud bolt and the starter.
 Courtesy of FORD MOTOR COMPANY
|
- 68.
Remove the bolt and the ground wire from the RH cylinder head.
 Courtesy of FORD MOTOR COMPANY
|
- 69.
Disconnect the 2 A/C compressor electrical connectors.
- Detach the A/C wiring harness retainer.
 Courtesy of FORD MOTOR COMPANY
|
- 70.
Disconnect the generator electrical connector and position the generator B+ cable cover aside.
 Courtesy of FORD MOTOR COMPANY
|
- 71.
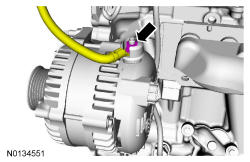
Remove the nut and disconnect the generator B+ cable.
 Courtesy of FORD MOTOR COMPANY
|
- 72.
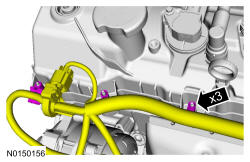
Detach the 3 wiring harness retainer from the valve cover stud bolt and position the harness on transmission.
 Courtesy of FORD MOTOR COMPANY
|
- 73.
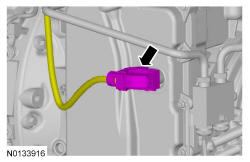
Disconnect the transaxle control electrical connector.
 Courtesy of FORD MOTOR COMPANY
|
- 74.
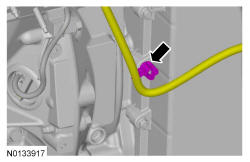
Detach the transaxle control wire harness retainer from the transaxle stud bolt.
 Courtesy of FORD MOTOR COMPANY
|
- 75.
Disconnect the RH catalyst monitor electrical connector.
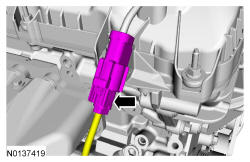 Courtesy of FORD MOTOR COMPANY
|
- 76.
Disconnect the RH Heated Oxygen Sensor (HO2S) electrical connector.
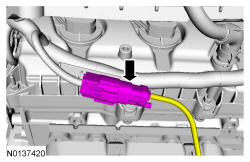 Courtesy of FORD MOTOR COMPANY
|
- 77.
Remove the 4 nuts and the RH catalytic converter heat shield.
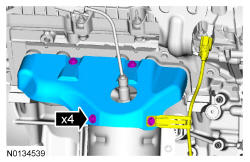 Courtesy of FORD MOTOR COMPANY
|
- 78.
Remove the 6 nuts and the RH catalytic converter manifold.
- Discard the nuts and RH catalytic converter manifold gasket.
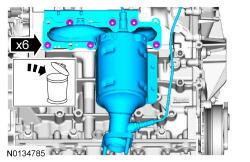 Courtesy of FORD MOTOR COMPANY
|
- 79.
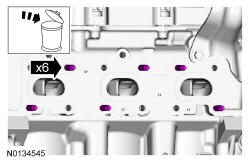
Remove and discard the 6 RH catalytic converter manifold studs.
 Courtesy of FORD MOTOR COMPANY
|
AWD vehicles
- 80.
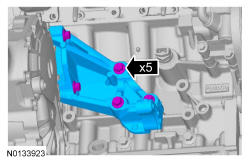
Remove the 5 bolts and the Power Transfer Unit (PTU) support bracket.
 Courtesy of FORD MOTOR COMPANY
|
All vehicles
- 81.
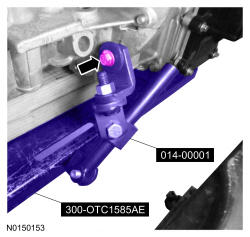
Remove the Adjustable Grip Arm.
 Courtesy of FORD MOTOR COMPANY
|
- 82.
Remove the ratchet strap from the front of the subframe under the powertrain lift table to the rear of the subframe.
- 83.
NOTE:
LH shown in illustration, RH similar.
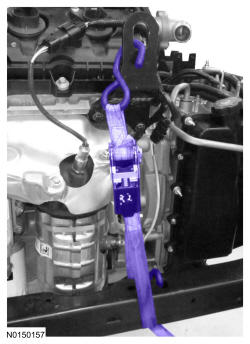
Install the ratchet strap from the front subframe to the LH engine lift eye and from the rear of the subframe to the RH engine lift eye.
 Courtesy of FORD MOTOR COMPANY
|
- 84.
Using the Floor Crane and Spreader Bar, remove the powertrain and subframe as an assembly from the powertrain lift table and set on the ground.
- Position wood blocks under the engine and transmission.
Courtesy of FORD MOTOR COMPANY
|
- 85.
NOTE:
LH shown in illustration, RH similar.
Remove the ratchet strap from the front subframe to the LH engine lift eye and from the rear of the subframe to the RH engine lift eye.
Courtesy of FORD MOTOR COMPANY
|
- 86.
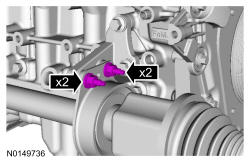
Remove the 2 intermediate shaft bracket nuts and the 2 studs.
 Courtesy of FORD MOTOR COMPANY
|
- 87.
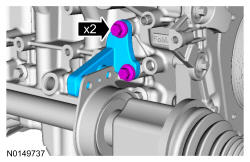
Remove the 2 bolts and the RH halfshaft support bracket.
 Courtesy of FORD MOTOR COMPANY
|
- 88.
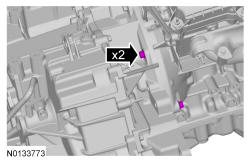
Remove the 2 engine-to-transaxle bolts.
 Courtesy of FORD MOTOR COMPANY
|
- 89.
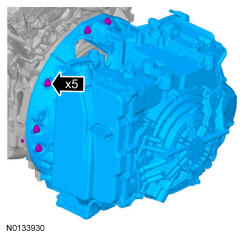
Remove the 5 transaxle-to-engine bolts.
- Separate the transaxle from the engine.
 Courtesy of FORD MOTOR COMPANY
|
- 90.
Using the Floor Crane and Spreader Bar, remove the engine from the transaxle.
Courtesy of FORD MOTOR COMPANY
|