Instrument Panel: Installation
WARNING: This page is about a different car, the 2015 Lincoln MKS. However, it is still accessible from the selected car via links, so may be relevant.
- 1.
NOTE:
To avoid damage to the instrument panel, an assistant is required when carrying out this step.
NOTE:
Make sure not to damage the RH front door trim panel or the instrument panel when installing the instrument panel into the vehicle.
NOTE:
Make sure that all electrical connectors and wiring are correctly routed when installing the instrument panel or damage to the components may occur.
Install the instrument panel into the vehicle through the RH front door opening.
- 2.
Install, but do not tighten, the 6 instrument panel side bolts.
- 3.
Install, but do not tighten, the 4 instrument panel center support bolts.
- 4.
Install, but do not tighten, the 3 instrument panel upper cowl bolts.
- 5.
Tighten the 6 instrument panel side bolts.
- Tighten to 40 Nm (30 lb-ft).
- 6.
Tighten the 4 instrument panel center support bracket bolts.
- Tighten to 25 Nm (18 lb-ft).
- 7.
Tighten the 3 instrument panel upper cowl bolts.
- Tighten to 25 Nm (18 lb-ft).
- 8.
Attach the 2 wire harness pin-type retainers onto the RH instrument panel center support bracket.
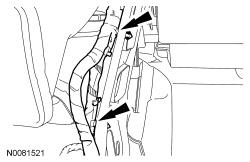 Courtesy of FORD MOTOR COMPANY
|
- 9.
Connect the small RCM electrical connector and attach the wire harness pin-type retainers.
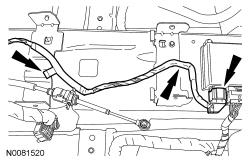 Courtesy of FORD MOTOR COMPANY
|
- 10.
Install the ground wires and the 2 bolts to the floor pan tunnel.
- Tighten to 10 Nm (89 lb-in).
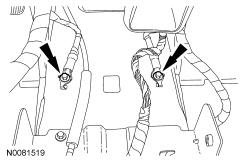 Courtesy of FORD MOTOR COMPANY
|
- 11.
Connect the RH bulkhead electrical connector.
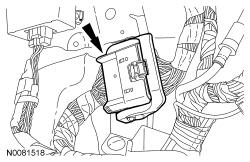 Courtesy of FORD MOTOR COMPANY
|
- 12.
Connect the antenna cable and, if equipped, the satellite radio connector.
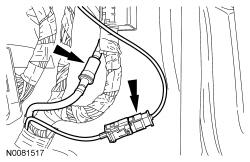 Courtesy of FORD MOTOR COMPANY
|
- 13.
Install the rear footwell duct and the 2 pin-type retainers.
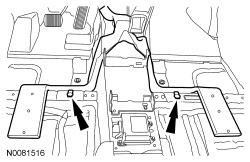 Courtesy of FORD MOTOR COMPANY
|
- 14.
Install the LH and RH front carpet sections.
- Install the 2 pin-type retainers.
- 15.
Install the driver footrest pad.
- Install the 2 pin-type retainers.
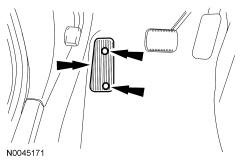 Courtesy of FORD MOTOR COMPANY
|
- 16.
Connect the 2 SJB electrical connectors and the lower bulkhead electrical connector.
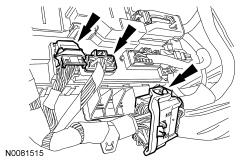 Courtesy of FORD MOTOR COMPANY
|
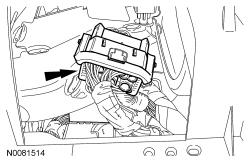
- 17.
Connect the LH bulkhead electrical connector.
 Courtesy of FORD MOTOR COMPANY
|
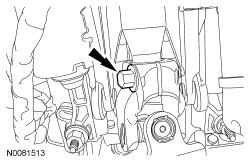
- 18.
Install the steering column shaft to the steering column.
- 19.
Install a new steering column shaft-to-steering column bolt.
- Tighten to 25 Nm (18 lb-ft).
 Courtesy of FORD MOTOR COMPANY
|
- 20.
Install the hood release handle.
- Install and tighten the hood release handle bolt.
- 21.
Install the RH and LH lower cowl trim panels.
- Make sure to align the lower cowl trim panel retaining clips to the retaining clip holes in the body.
- 22.
Install the RH and LH instrument panel side trim panels.
- Make sure to align the instrument panel side trim panel retaining clips to the retaining clip holes in the instrument panel.
- 23.
Install the RH and LH scuff plate trim panels.
- Make sure to align the scuff plate trim panel retaining clips to the retaining clip holes in the body.
- 25.
Install the RH and LH front door opening weatherstrips.
- 26.
Install the floor console. For additional information, refer to Console - Floor .
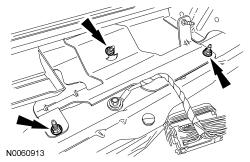
- 27.
Install the PCM bracket.
- Install and tighten the 3 PCM bracket nuts.
 Courtesy of FORD MOTOR COMPANY
|
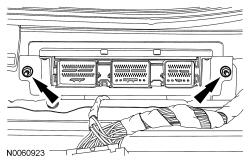
- 28.
Install the PCM.
- Install and tighten the 2 PCM nuts.
- Tighten to 5 Nm (44 lb-in).
 Courtesy of FORD MOTOR COMPANY
|
- 29.
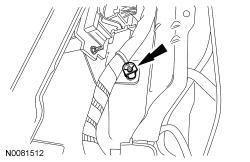
Install the wire harness retainer onto the PCM bracket stud.
 Courtesy of FORD MOTOR COMPANY
|
- 30.
Connect the 3 PCM electrical connectors.
- 31.
Install the front seats. For additional information, refer to
Seating
.
- 32.
Install the steering wheel. For additional information, refer to
Steering Column
.
- 33.
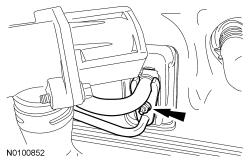
Install the TXV manifold.
- 1.
Install new O-ring seals.
- 2.
Install and tighten the TXV manifold nut.
- Tighten to 8 Nm (71 lb-in).
 Courtesy of FORD MOTOR COMPANY
|
- 34.
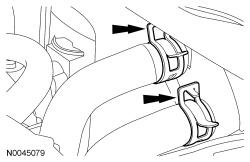
Connect the heater hoses to the heater core.
 Courtesy of FORD MOTOR COMPANY
|
- 35.
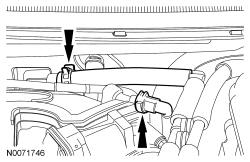
Connect the vacuum hose and the evaporator purge solenoid hose to the upper intake manifold.
 Courtesy of FORD MOTOR COMPANY
|
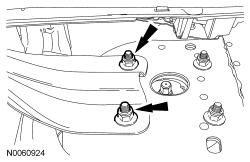
- 36.
Install the strut tower cross brace.
 Courtesy of FORD MOTOR COMPANY
|
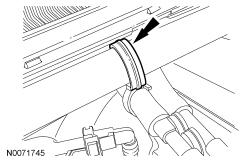
- 37.
Install the vacuum hose clip onto the strut tower cross brace.
 Courtesy of FORD MOTOR COMPANY
|
- 38.
Install the wiper mounting arm and pivot shaft assembly. For additional information, refer to
Wipers and Washers
.
- 40.
Fill the cooling system. For additional information, refer to
Engine Cooling
.