Transaxle Rear Support Insulator
- With the vehicle in NEUTRAL, position it on a hoist. For additional information, refer to
JACKING & LIFTING
.
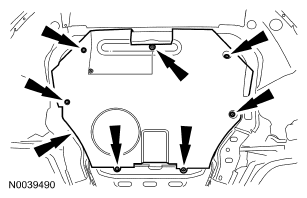
- Remove the 7 splash shield bolts and the splash shield.
- To install, tighten to 47 Nm (35 lb-ft).
 Courtesy of FORD MOTOR CO.
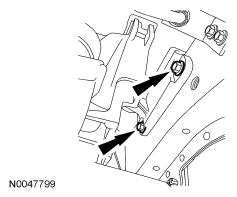
- Remove the 2 lower transaxle rear support insulator bolts.
- To install, tighten to 63 Nm (46 lb-ft).
 Courtesy of FORD MOTOR CO.
- Lower the vehicle.
- Remove the battery. For additional information, refer to
BATTERY, MOUNTING AND CABLES
.
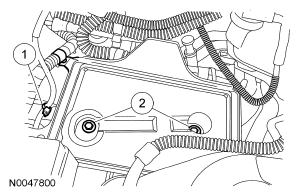
- Remove the battery tray.
- Disconnect the positive battery cable retainer.
- Remove the battery tray nut and bolt.
- Tighten to 9 Nm (80 lb-in).
 Courtesy of FORD MOTOR CO.
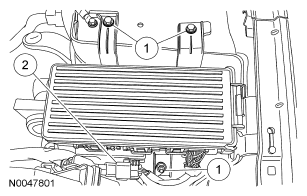
- Position the power distribution box aside.
- Remove the 2 power distribution box bolts and the nut. Pull the power distribution box upward to unclip the pushpin.
- Disconnect the 2 electrical connectors.
 Courtesy of FORD MOTOR CO.
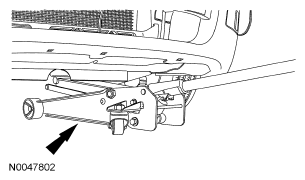
- Position a suitable floor jack under the transaxle.
 Courtesy of FORD MOTOR CO.
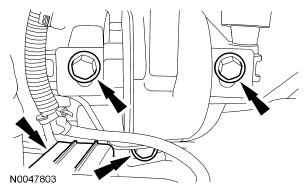
- Remove the remaining 4 transaxle rear support insulator bolts.
- If the mount studs are removed or come out, do not reinstall the old stud. Install a new stud. Make sure the stud is properly seated in the case.
- To install, tighten to 63 Nm (46 lb-ft).
 Courtesy of FORD MOTOR CO.
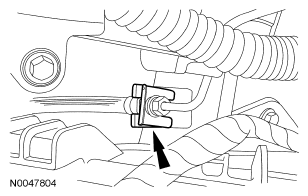
- Remove the clutch hydraulic line spring clip. Push downward on the clutch line to release it from the bracket.
 Courtesy of FORD MOTOR CO.
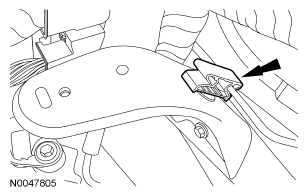
- Remove the clutch hydraulic line plastic retainer.
 Courtesy of FORD MOTOR CO.
- Remove the transaxle mount.
- To install, reverse the removal procedure.