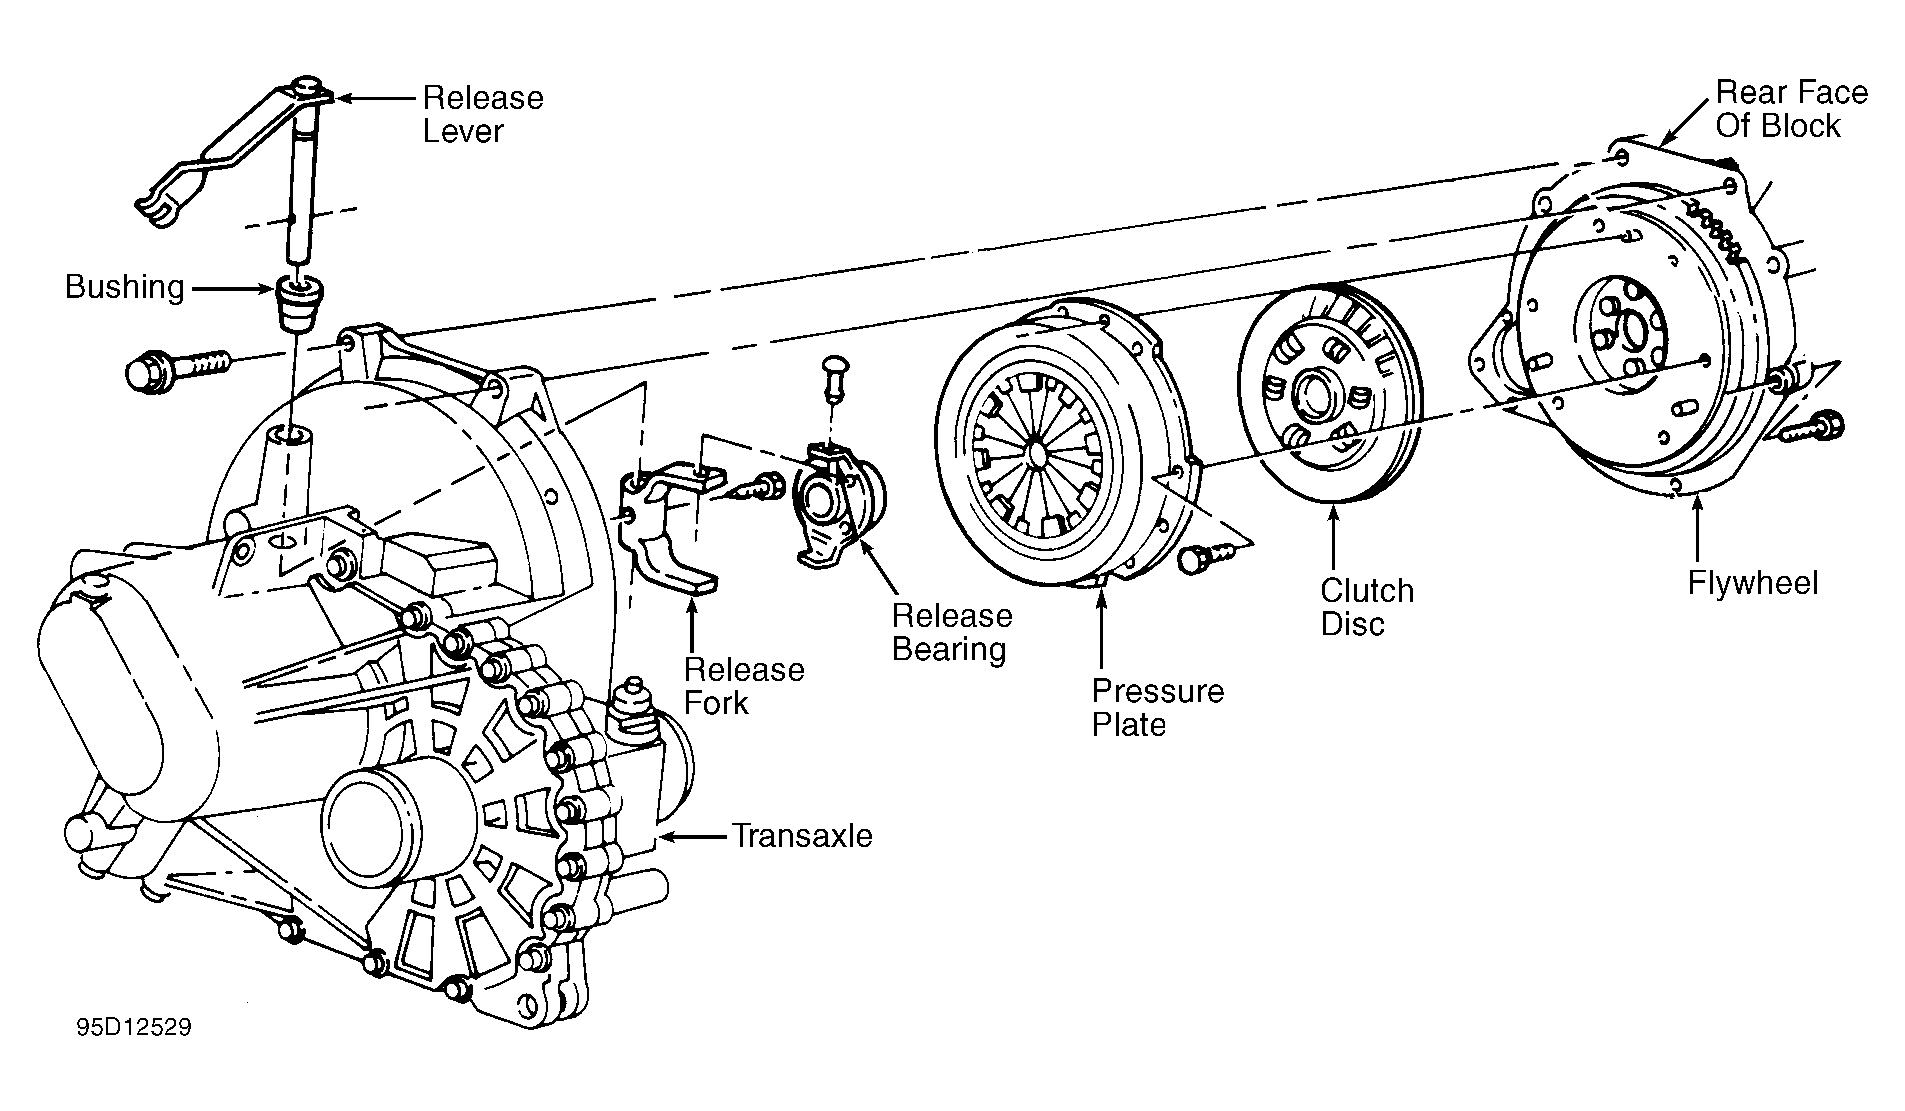
Clutch Assembly: Installation
- Install flywheel and Flywheel Holder (T74P-6375-A). Install clutch disc with flat side toward flywheel. Position clutch disc and align flywheel dowel pins into pressure plate guide holes. Start pressure plate bolts but, do not tighten to flywheel. Install Clutch Aligner (T74P-7137-K).
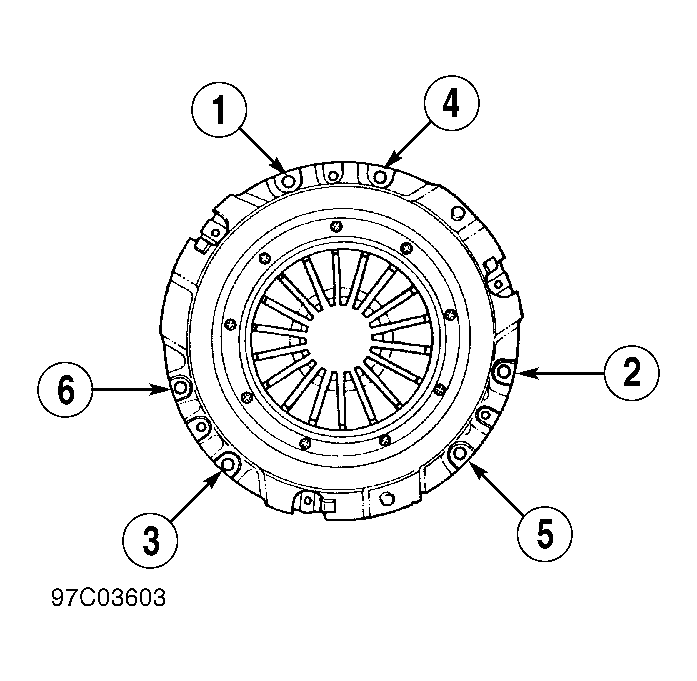
- With clutch aligned, tighten pressure plate bolts in a crisscross sequence until just seated. See Fig 2
. Tighten pressure plate bolts to specification. See TORQUE SPECIFICATIONS
. Remove clutch aligner.
- Clean and apply a thin coating of clutch grease to splines of input shaft. Clean pressure plate and flywheel surface with alcohol-based solvent. Using emery cloth, remove minor imperfections. Before installing transaxle, lubricate outside diameter of transaxle front bearing retainer, inside of release bearing and contact surface of release shaft.
- To complete installation, reverse removal procedure. Install NEW circlips on end of axle shafts and NEW nut and bolt when attaching lower control arm ball joint to steering knuckle. Bleed clutch hydraulic system. See HYDRAULIC SYSTEM BLEEDING
under BLEEDING HYDRAULIC SYSTEM.
 Courtesy of FORD MOTOR CO.
 Courtesy of FORD MOTOR CO.
 Courtesy of FORD MOTOR CO.