Rear Window Does Not Defog
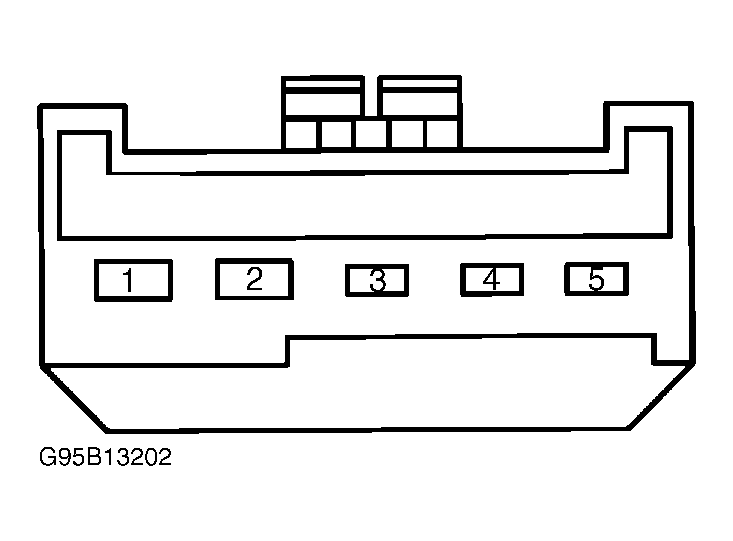
- Remove rear window defogger control switch from instrument panel. Turn ignition switch on. Using a grounded test light, backprobe pin No. 3 at control switch connector. See Fig 1. If test light glows, go to next step. if test light does not glow, check fuses. If fuses are okay, repair Purple/Orange wire between fuse panel and control switch connector.
- Using an ohmmeter, check continuity to ground at pin No. 4 of control switch connector. See Fig 1. If resistance is 5 ohms or less, go to next step. If resistance is greater than 5 ohms, repair Black wire between chassis ground and control switch connector.
- Using a grounded test light, backprobe pin No. 2 at rear defogger control switch connector. See Fig 1. If test light glows, go to next step. If test light does not glow, check Maxi-Fuses. If Maxi-Fuses are okay, repair Black/Yellow wire between power distribution box and control switch connector.
- Using a grounded test light, backprobe pin No. 1 at rear defogger control switch connector. See Fig 1. Turn ignition switch and rear defogger switch on. If test light glows, go to next step. If test light does not glow, replace rear defogger switch.
- Using a grounded test light, probe Brown/Light Blue wire at rear window grid connector. If test light glows, go to next step. If test light does not glow, repair Brown/Light Blue wire between rear defogger control switch and rear window grid connector.
- Using a DVOM, measure resistance between chassis ground and Black wire at rear window grid connector. If resistance is less than 5 ohms, grid is damaged, repair grid or replace window. If resistance is greater than 5 ohms repair Black wire between rear window grid connector and chassis ground.
 Courtesy of FORD MOTOR CO.