Standard Procedure - Engine Timing Verification
 Courtesy of CHRYSLER GROUP, LLC
- Disconnect and isolate the negative battery cable.
- Remove the engine cover (1).
 Courtesy of CHRYSLER GROUP, LLC
- Remove the air cleaner body (6). Refer to BODY, AIR CLEANER, REMOVAL .
 Courtesy of CHRYSLER GROUP, LLC
- Disconnect the PCV hose (1) from the intake manifold.
- Disconnect the vent hose (3) from the oil filler neck.
- Remove three bolts (2) and remove the oil separator housing (4) from the cylinder head cover.
 Courtesy of CHRYSLER GROUP, LLC
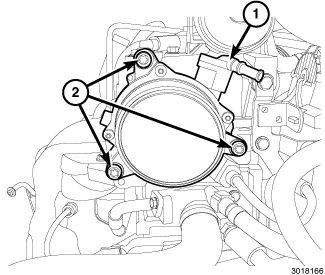
- Remove the vacuum pump (1). Refer to PUMP, VACUUM, REMOVAL .
 Courtesy of CHRYSLER GROUP, LLC
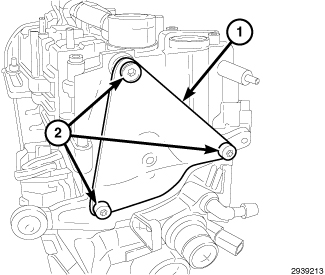
- Install the Camshaft Timing Locking Tool (special tool #10277, Tool, Camshaft Timing Locking) (1) to the rear of the camshaft. Rotate the crankshaft vibration damper clockwise to align the tool with the vacuum pump mounting. Install three bolts (2) and tighten to 20 N.m (15 ft. lbs.).
 Courtesy of CHRYSLER GROUP, LLC
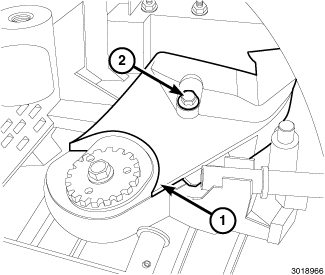
- Remove the lower timing belt cover (1). Refer to COVER(S), ENGINE TIMING, REMOVAL .
 Courtesy of CHRYSLER GROUP, LLC
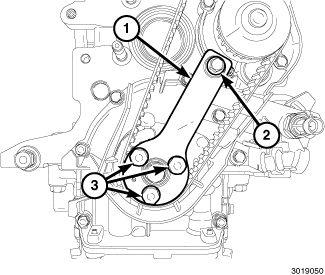
- Install the Crankshaft Timing Locking Tool (special tool #10276, Tool, Crankshaft Timing Locking) (1) with three bolts (3) tightened to 25 N.m (18 ft. lbs.) and one bolt (2) tightened to 9 N.m (80 in. lbs.).
- If the bolt (2) does not align with the lower timing belt cover mounting boss, the camshaft timing is not correct. Proceed to the timing belt service procedures. Refer to BELT, TIMING, REMOVAL .