- Disconnect negative battery cable. Remove steering wheel. See STEERING WHEEL & HORN PAD removal & installation. Remove steering column. See FIXED & TILT STEERING COLUMNS removal & installation.
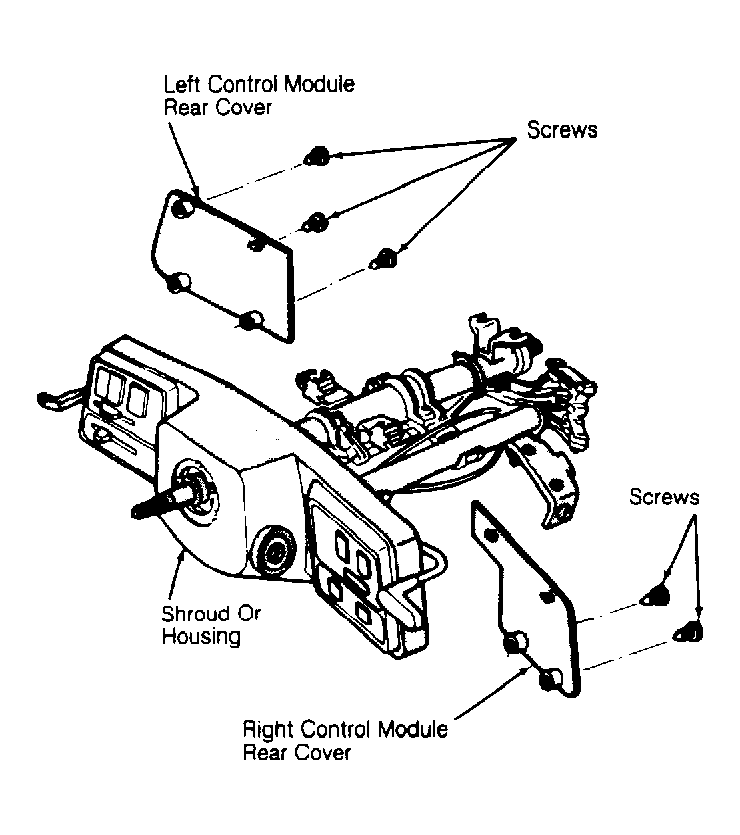
- Remove rear covers from control modules. See Fig 1. Remove lower cover-to-shroud bracket screw. Carefully separate lower and upper covers by removing upper cover tab fasteners from lower cover notches. Remove 2 shroud bracket-to-upper cover screws. Remove upper shroud cover.
 Courtesy of CHRYSLER MOTORS
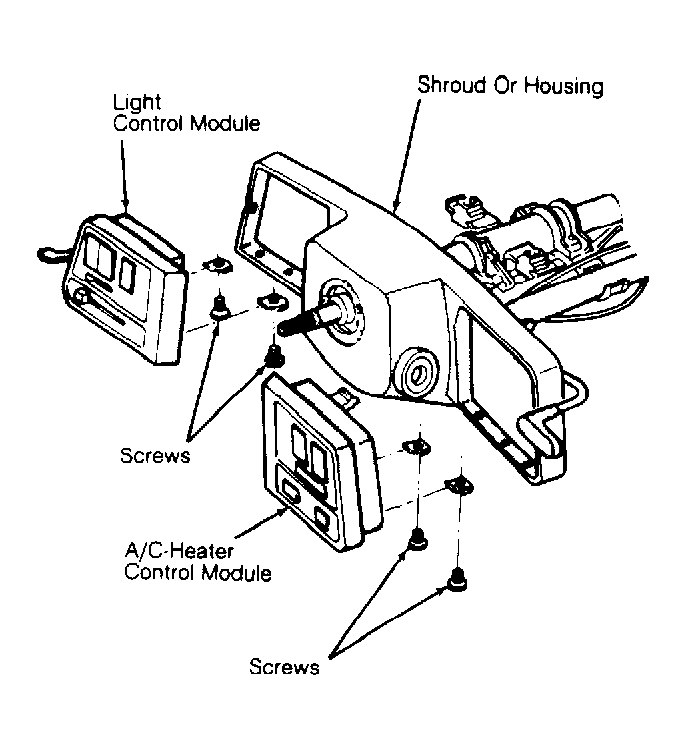
- On fixed column, slide upper shroud cover over gearshift lever. On all columns, remove control modules from shroud for access to shroud-to-bracket internal screws. See Fig 2. Detach lock cylinder bezel from shroud.
 Courtesy of CHRYSLER MOTORS
- On tilt column, cover tilt lever with shop towel and remove lever with pliers. On all columns, remove shroud from bracket. Remove canceling cam and wave washer from turn signal switch. Remove turn signal switch from switch adapter.
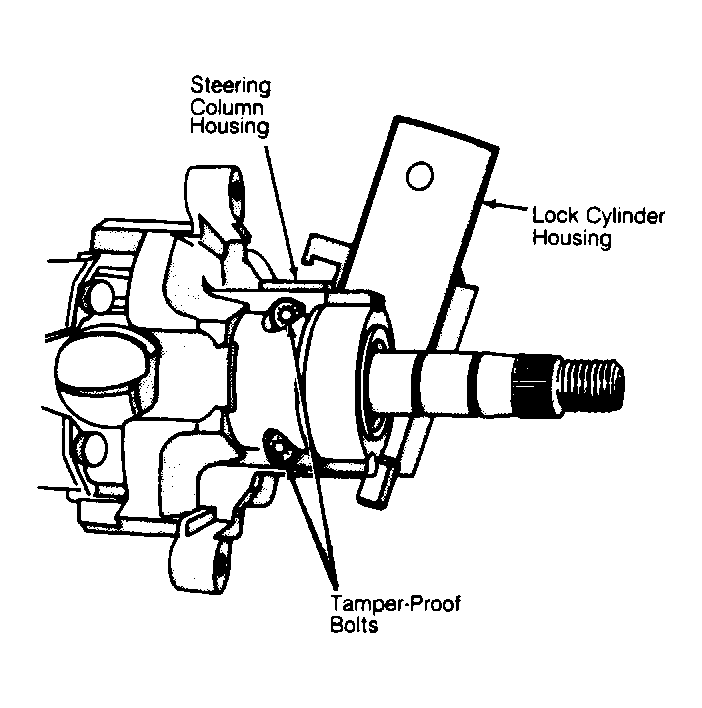
- Remove shroud bracket from column housing. Remove ignition switch from lock cylinder housing. Turn ignition key to unmarked position. Depress lock tab and remove lock cylinder. Remove turn signal switch adapter from steering column housing.
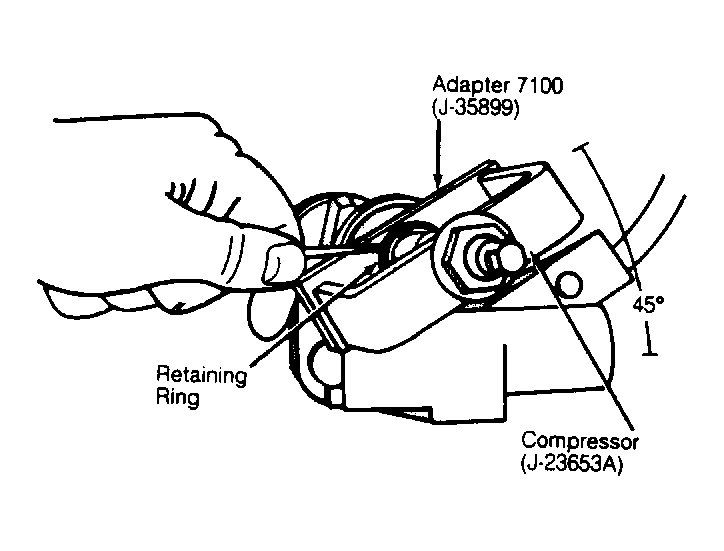
CAUTION:
Steering shaft retaining ring and upper bearing spring retainer compress strong spring tension from upper bearing spring. DO NOT
remove retaining ring without relieving spring tension. Adapter 7100 (J-35899) must be positioned at a 45-degree angle from lock cylinder housing to avoid damaging steering column housing.
- Remove upper steering shaft retaining ring, upper bearing spring retainer and upper bearing spring. Use Adapter 7100 (J-35899) and Spring Compressor (J-23653A) to remove these components. See Fig 3.
 Courtesy of CHRYSLER MOTORS
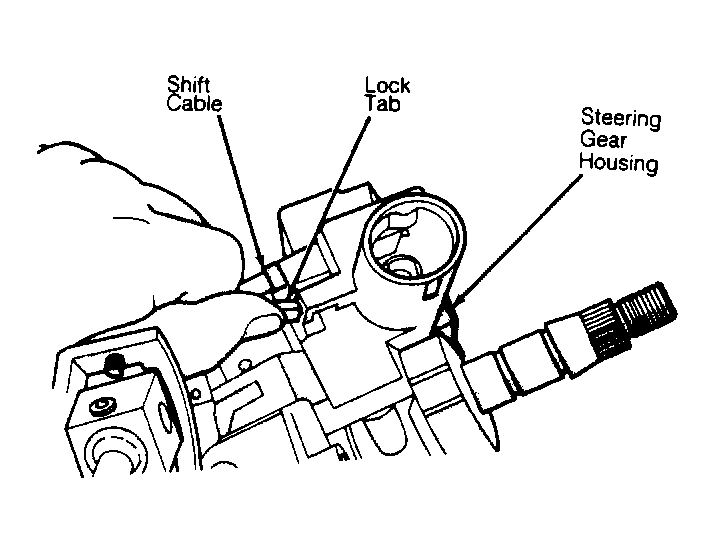
- On tilt column, temporarily remove tilt lever from steering column housing. On all columns, remove gearshift cable from steering column housing by depressing lock tab. See Fig 4.
 Courtesy of CHRYSLER MOTORS
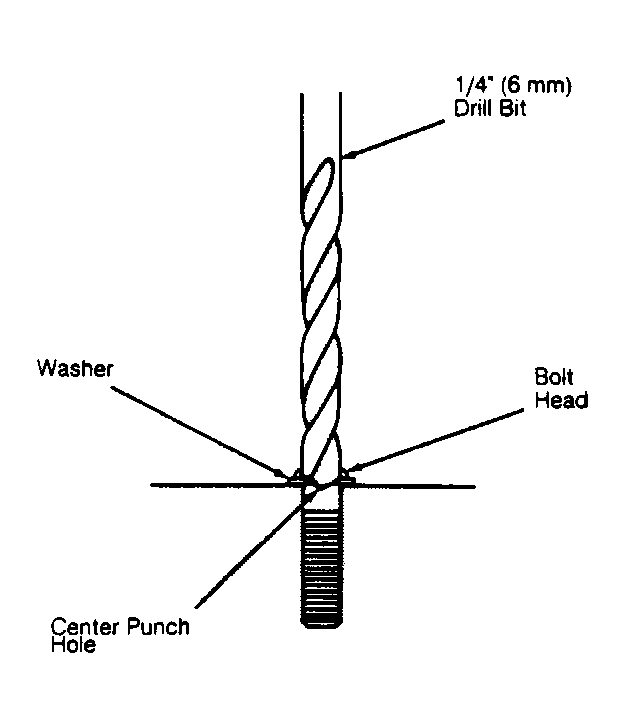
- Center punch a hole in the top of tamper-proof bolts. Drill out bolt heads using a 1/4" (6 mm) drill bit. See Fig 5. Drill until drill bit contacts hardened washer. See Fig 6. Remove lock cylinder housing from steering column housing.
 Courtesy of CHRYSLER MOTORS
 Courtesy of CHRYSLER MOTORS
- Remove the drilled-out bolts from lock cylinder housing with a pair of pliers. On tilt column, install tilt lever and place steering column housing in highest upward position.
CAUTION:
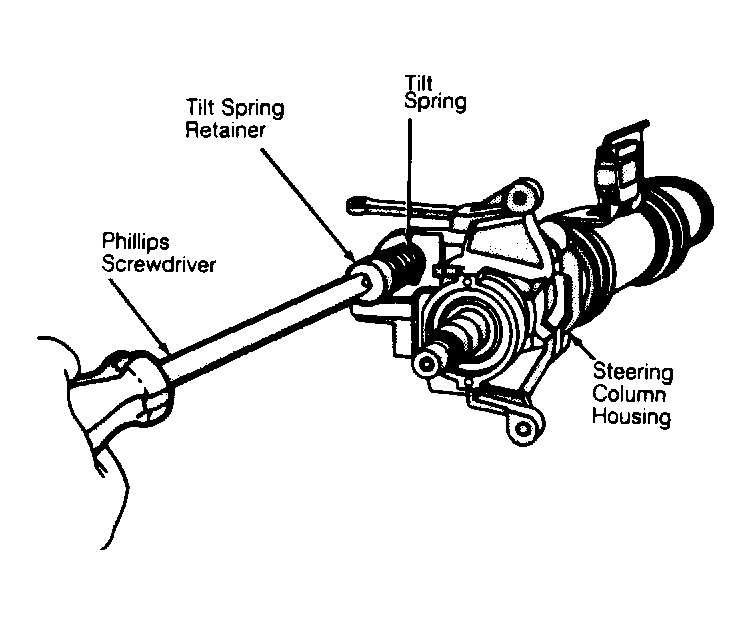
The following step involves removal of tilt spring, which exerts strong tension against tilt spring retainer. Use extreme care when removing tilt spring retainer. The Phillips screwdriver tip should be just large enough to snugly fit into retainer recess.
- Remove tilt spring retainer with a large Phillips screwdriver. Press retainer inward and turn clockwise to unlock and remove retainer and spring. See Fig 7. Place steering column in center (non-tilted) position.
 Courtesy of CHRYSLER MOTORS
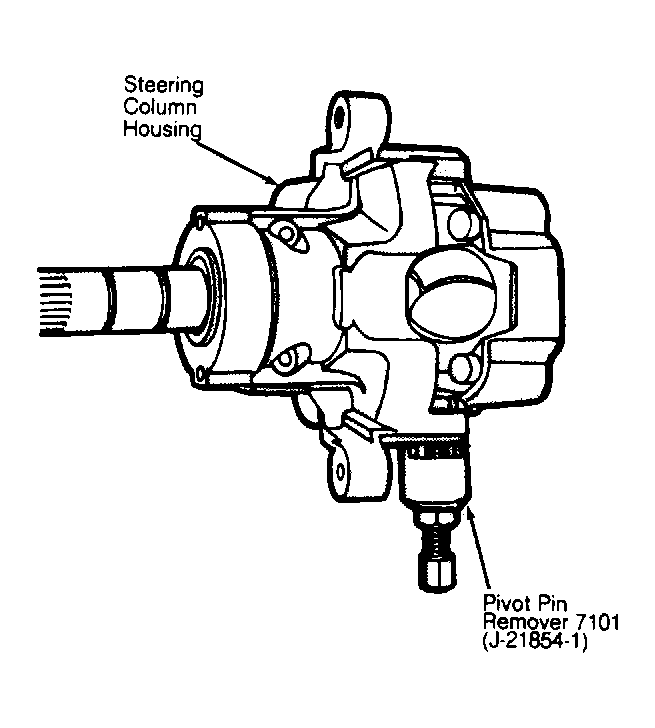
- Remove steering column tilt pivot pins with Pivot Pin Remover 7101 (J-21854-1). See Fig 8. Move tilt lever forward to disengage steering column lock shoes from steering column support. Move housing away from steering column support and off upper steering shaft.
 Courtesy of CHRYSLER MOTORS
CAUTION:
DO NOT
strike steering shafts to remove them. Steering column shear pins could be damaged.
- Remove Torx steering column support screws. Remove steering column support from steering column jacket. On fixed column, remove Torx steering column housing screws. Remove steering column housing from steering column jacket.
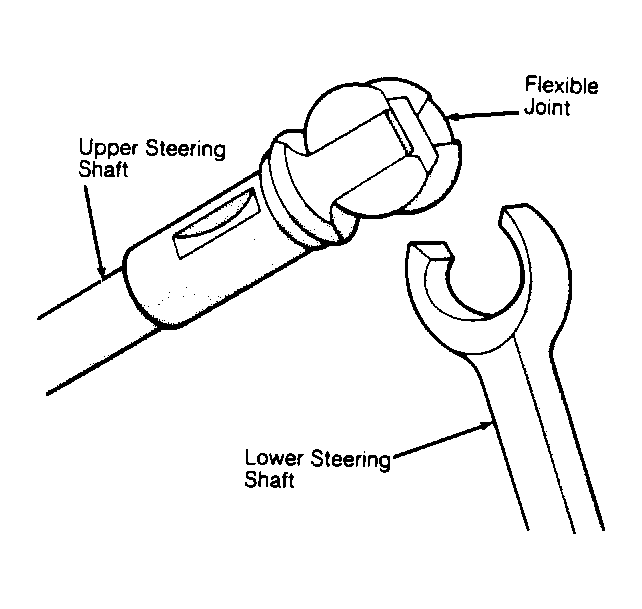
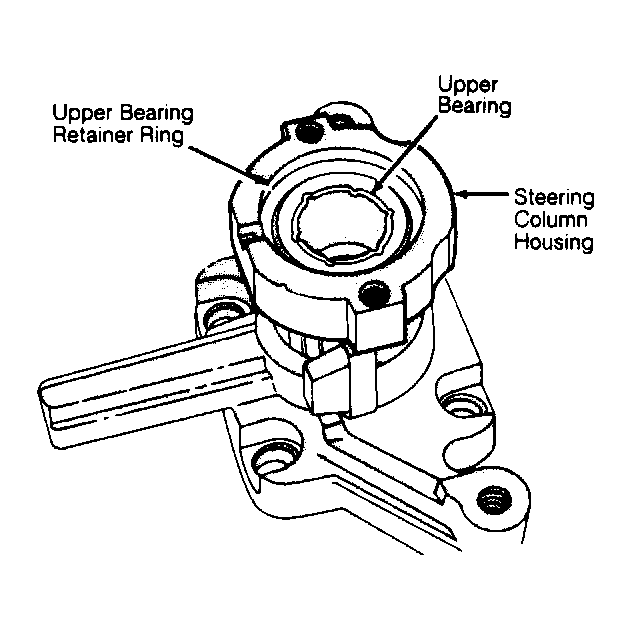
- On all columns, pull steering shafts out of steering column jacket. On tilt column, separate steering shafts. Pivot upper and lower shafts to 90-degree angle and separate at flexible joint. See Fig 9. On fixed column, remove upper bearing retaining ring from groove in steering column housing bore. See Fig 10.
 Courtesy of CHRYSLER MOTORS
 Courtesy of CHRYSLER MOTORS
- If bearing in steering column jacket is worn or damaged, replace jacket. A replacement bearing is included as part of a replacement jacket. Force upper bearing out of housing with 2 appropriately sized sockets used as bearing driver and support. See Fig 11.