3.2L - Service Information: Installation
 Courtesy of DAIMLERCHRYSLER CORP.
- Attach the lifting device to the engine lifting eyes.
- Remove the engine from the engine stand.
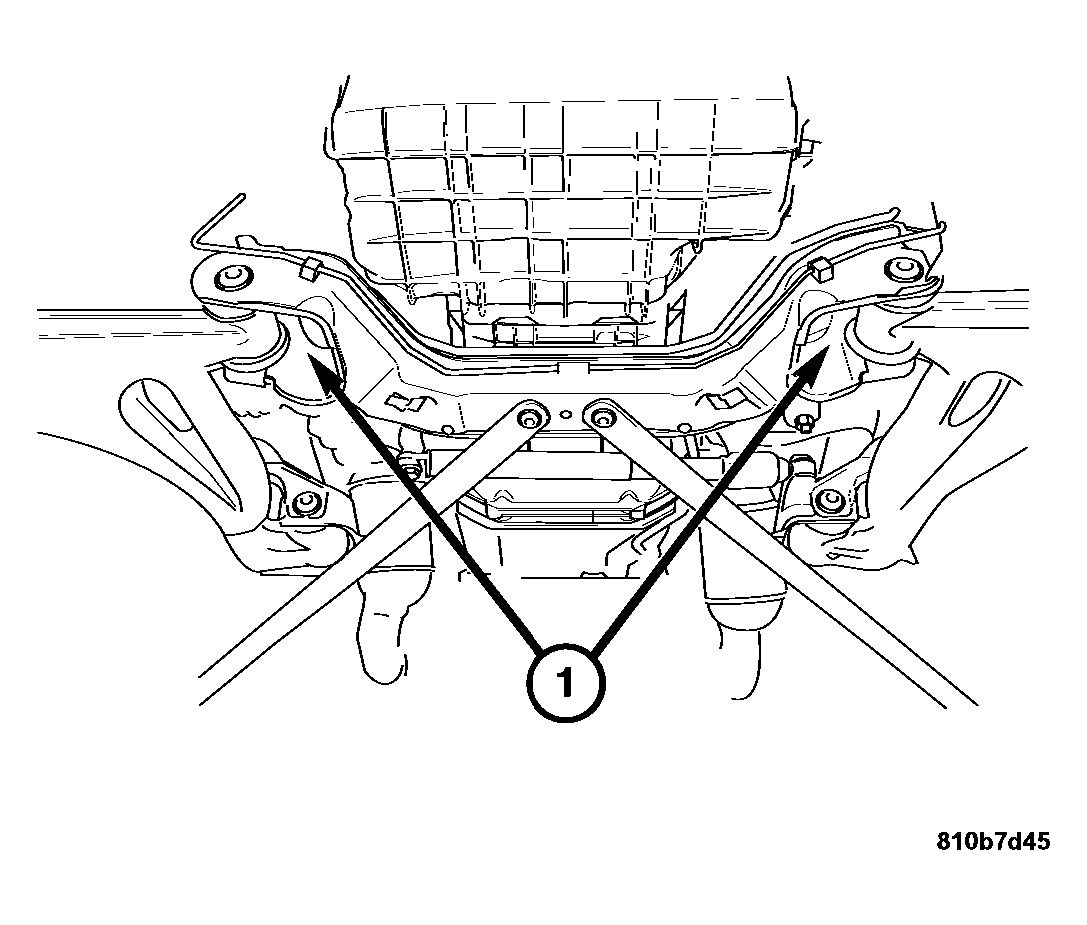
- Lower the engine into the engine compartment and install the lower engine mount bolts (1). Tighten bolts to 55 N.m (41 ft. lbs.).
- Install the transmission (Refer to TRANSMISSION/TRANSAXLE/AUTOMATIC - NAG1 - INSTALLATION)
or (Refer to TRANSMISSION/TRANSAXLE/MANUAL - INSTALLATION)
.
- Install the A/C compressor (Refer to HEATING & AIR CONDITIONING/PLUMBING/A/C COMPRESSOR - INSTALLATION)
.
 Courtesy of DAIMLERCHRYSLER CORP.
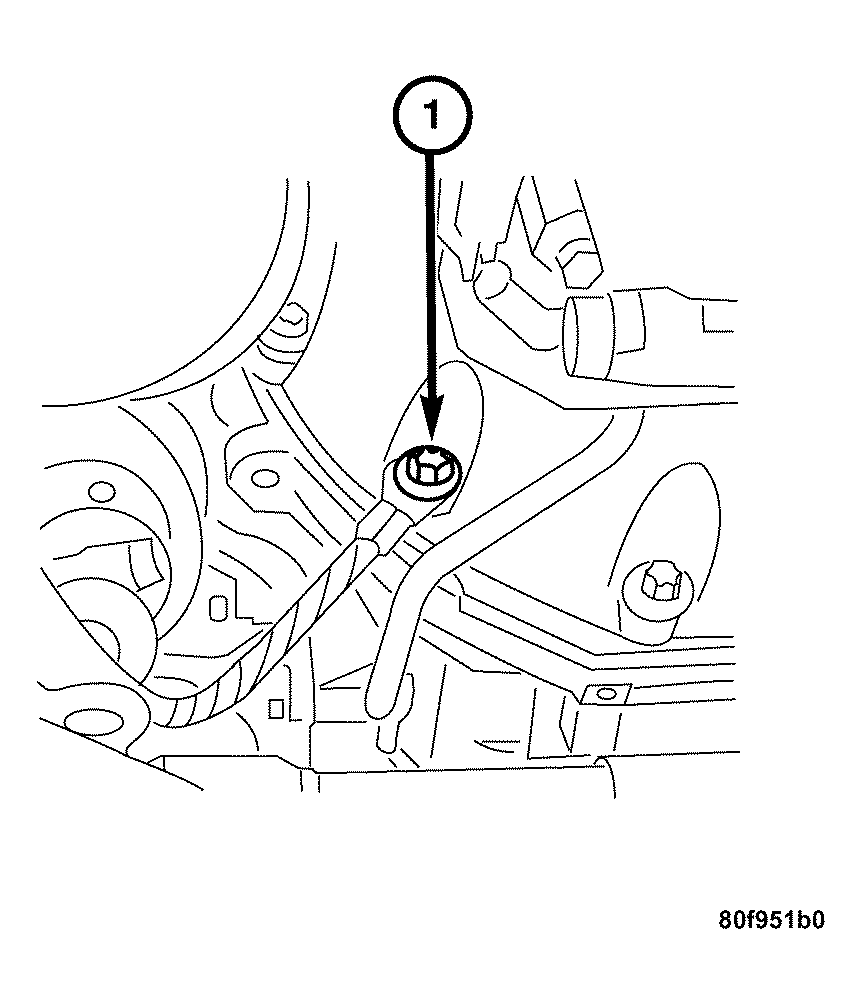
- Bolt on the ground cable at the transmission (1). Tighten to 40 N.m (30 ft. lbs.).
- Install the starter (Refer to ELECTRICAL/STARTING/STARTER MOTOR - INSTALLATION)
.
- Install the propeller shaft (Refer to DIFFERENTIAL & DRIVELINE/PROPELLER SHAFT - INSTALLATION)
.
- Install the front exhaust pipes (Refer to EXHAUST SYSTEM/CATALYTIC CONVERTER - INSTALLATION)
.
 Courtesy of DAIMLERCHRYSLER CORP.
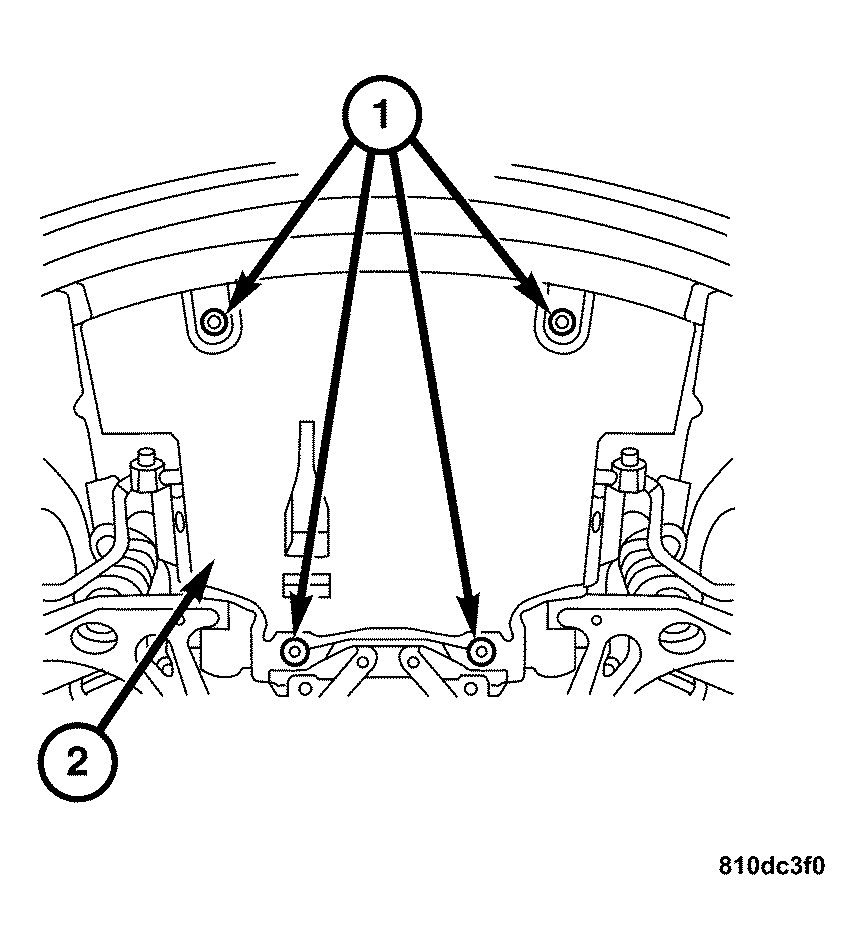
- Install the lower splash shield (2). Tighten the screws (1) to 5 N.m (44 in. lbs.).
- Lower the vehicle.
 Courtesy of DAIMLERCHRYSLER CORP.
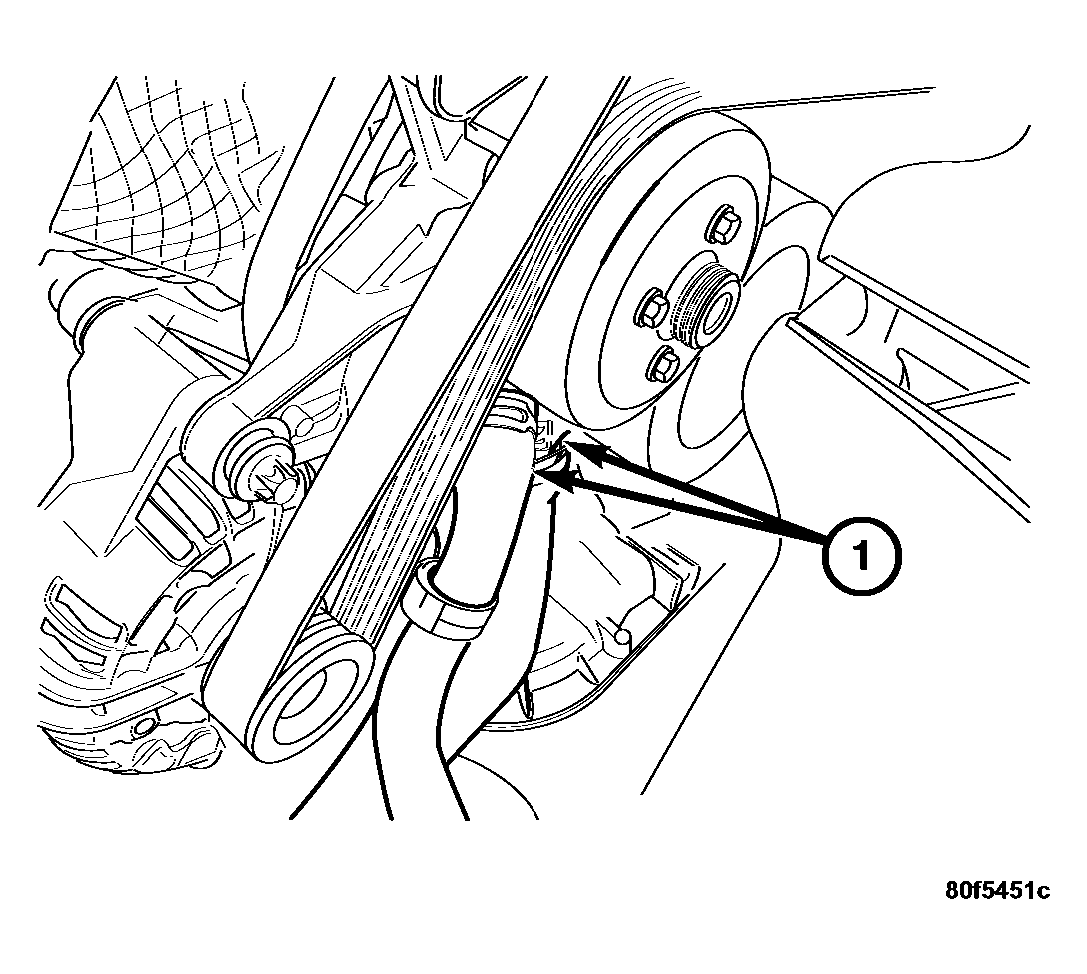
- Connect the lower radiator hose (1) and the coolant bypass hose (2) at the water pump.
- Connect the heater hoses at the engine block and the intake manifold.
 Courtesy of DAIMLERCHRYSLER CORP.
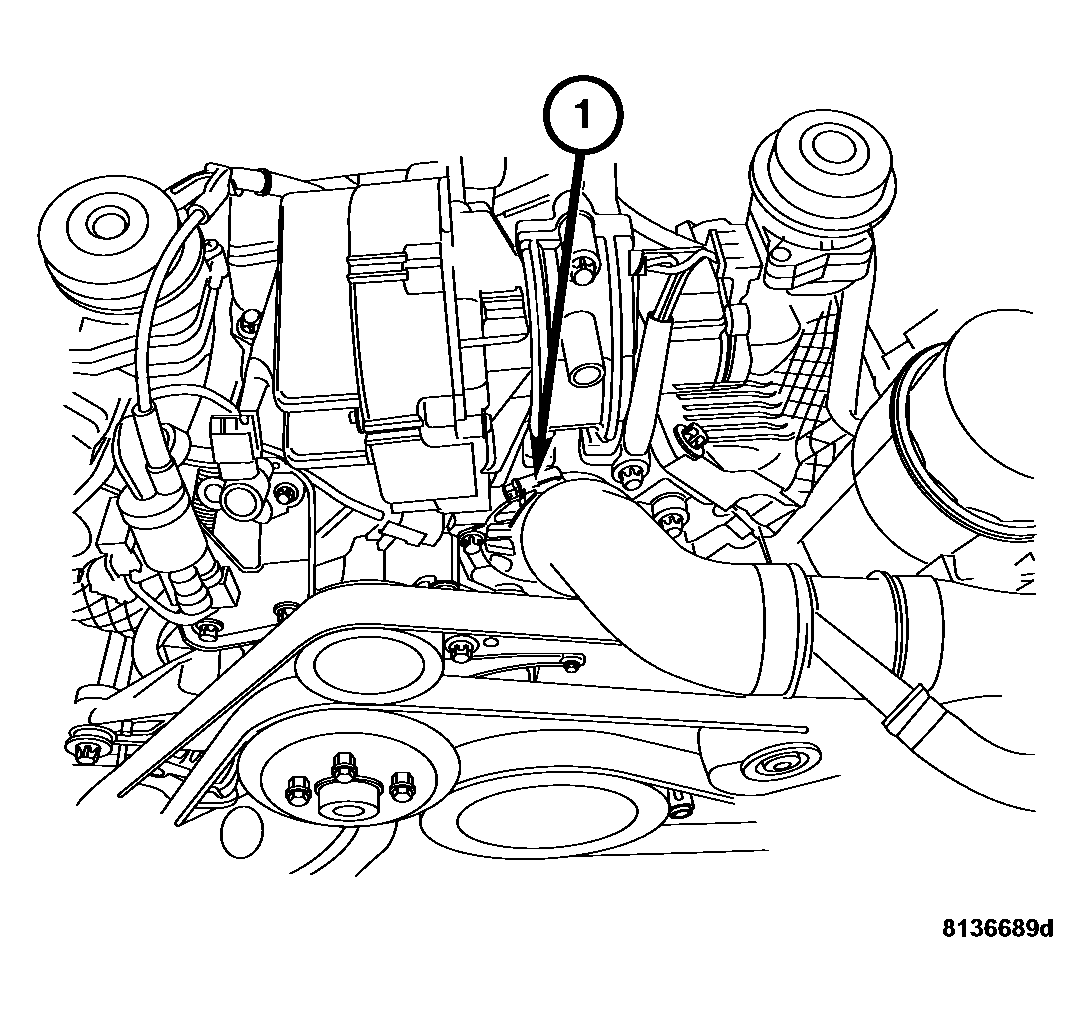
- Connect the upper radiator hose (1) at the thermostat housing.
- Connect the engine wire harness.
 Courtesy of DAIMLERCHRYSLER CORP.
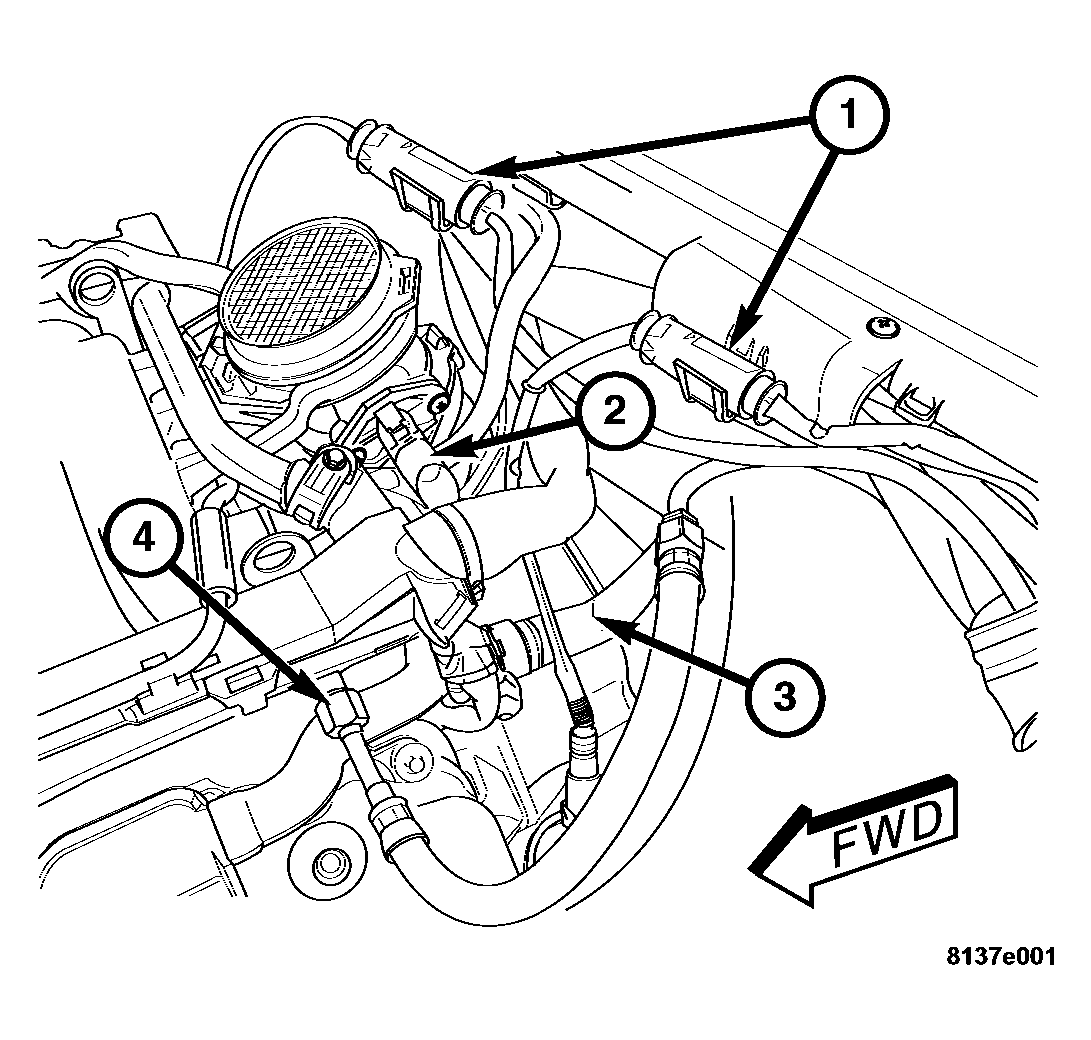
- Connect the fuel supply line (4) at the fuel rail. Tighten the fitting to 38 N.m (28 ft. lbs.).
- Connect the oxygen sensor harness connector (1), MAF sensor harness connector (2), and the heater hose (3) at rear of engine.
- Connect the ignition coil(s), fuel injector(s), camshaft position sensor, crankshaft position sensor, throttle position sensor, map sensor, engine coolant temperature sensor, EGR solenoid, air pump, air pump switchover solenoid, A/C compressor, and generator harness connectors.
 Courtesy of DAIMLERCHRYSLER CORP.
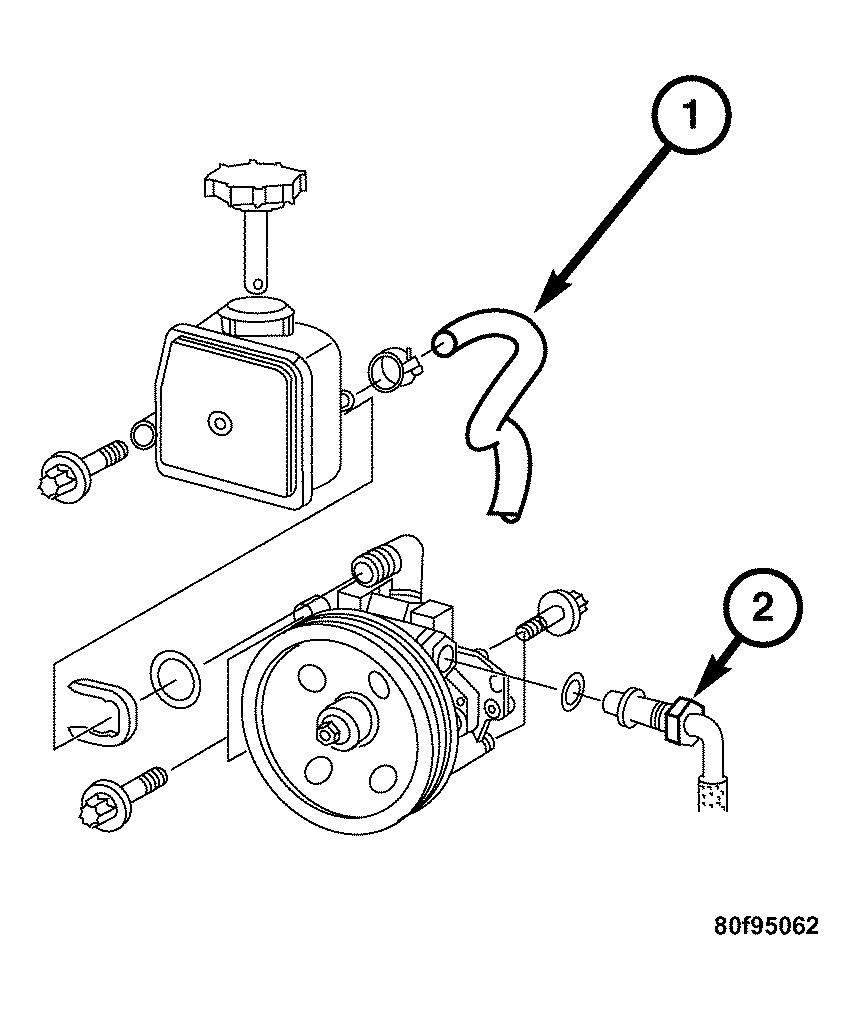
- Connect the power steering pressure (2) and return line (1) to the power steering pump. Tighten the high pressure fitting to 45 N.m (33 ft. lbs.).
- Connect the ground lead at the power steering pump. Tighten the bolt to 25 N.m (18 ft. lbs.).
- Refill the power steering pump fluid reservoir.
- Connect the vacuum hoses at the brake booster, intake manifold, and the purge valve.
- Install the accessory drive belt (Refer to COOLING/ACCESSORY DRIVE/DRIVE BELTS - INSTALLATION)
.
- Install and connect the radiator with the radiator fan (Refer to COOLING/ENGINE/RADIATOR - INSTALLATION)
.
- Install the air cleaner assembly (Refer to ENGINE/AIR INTAKE SYSTEM/AIR CLEANER HOUSING - INSTALLATION) .
- Connect the negative battery cable.
- Fill the cooling system (Refer to COOLING/ENGINE/COOLANT - STANDARD PROCEDURE)
.
- Fill the engine with engine oil (Refer to ENGINE/LUBRICATION/OIL - STANDARD PROCEDURE) .
- Start the engine and check for leaks.
- Recheck all fluid levels.